Thursday, October 26, 2017

Spooky Chocolate Bark Cake

I couldn't resist. We had a bunch of spooky candy left over from our Gluten Free Chocolate Pumpkin Jack-o-lantern Cookies that I had to put to good use.

a layer cake on a cake stand decorated with spooky eyeball chocolate bark shards
Have some spooky fun with this Spooky Chocolate Bark Cake.


So, we spooky-fied a cake - just for fun!

Broken up spooky eyeball chocolate bark on a tray


Kids working on putting spooky eyeball candy onto chocolate bark


First, the boys and I made some Spooky Chocolate Bark to decorate our cake. I used my Movie Candy Chocolate Bark recipe replacing the movie candy with spooky candy.

2 cake pans on top of parchment paper that has been traced with the pans, a pair of scissors, and a pencil


cake pans buttered and lined with parchment paper


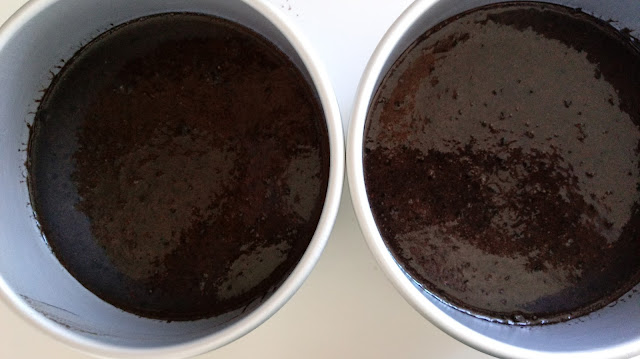
dark chocolate cake batter in two prepared cake pans


Next, I baked up a deep dark chocolate cake. I baked my batter in a couple of 6 inch pans and a few cupcakes liners. I thought a small cake would be cute, but you can also use two 8 inch pans. Make sure to butter your pans, line the bottom of each with parchment paper, and butter the parchment paper. This ensures easy removal from the cake tins.
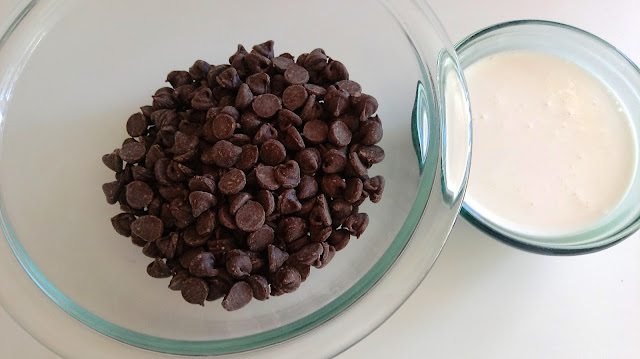
a bowl of chocolate chips next to a small bowl of cream


a bowl of chocolate chips covered in warm cream


a bowl of chocolate ganache ready to use


Then, I whipped up an easy ganache by warming some cream in the microwave, pouring it over some chocolate chips, stirring it all up until smooth, and letting it cool and set for a bit.

a bowl of cream cheese frosting


While my ganache was cooling, I whipped up my favorite cream cheese frosting. I chose cream cheese because it is unbelievable with rich dark chocolate cake. Fab - u - lous!!

a layer of chocolate cake topped with a layer of cream cheese frosting


a layer of chocolate cake topped with cream cheese frosting and chocolate ganache


two layers of chocolate cake sandwiching a layer of cream cheese frosting


frosted cake with chocolate ganache drizzle and Halloween sprinkles


To put my cake together, I piped some cream cheese frosting onto the bottom cake layer leaving a rim to hold the ganache. I poured in some ganache and put it in the fridge to set up a little. Then, I put on the top layer and frosted the whole thing with a thin layer of frosting. After another brief spell in the fridge, I put on another layer of frosting and piped some puffs around the top of the cake. I filled a Ziplock freezer bag with the rest of the ganache, drizzled it all around the piped puffs on top, and sprinkled on some Halloween sprinkles.

a decorated layer cake with spooky eyeball chocolate bark shards along the top


a decorated layer cake with spooky eyeball chocolate bark shards along the bottom


Then, to finish off the cake, I pushed a shard of spooky chocolate bark into each puff and lined the bottom of the cake with them as well.

a layer cake decorated with spooky eyeball Halloween chocolate bark
Homemade chocolate bark adds loads of fun to this Spooky Chocolate Bark Cake.


The cake turned out adorably spooky! The boys were in heaven. I just love making their day.

cupcakes decorated with spooky eyeball Halloween chocolate bark


I also decorated the extra cupcakes. You can bake the whole batter into cupcakes if you want. They're much easier to decorate than a layer cake.
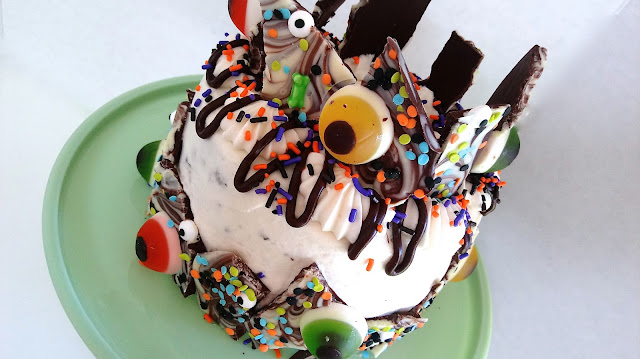
a layer cake decorated with spooky eyeball Halloween chocolate bark

Spooky Chocolate Bark Cake

INGREDIENTS

For the deep, dark, chocolate cake:
(Recipe adapted from My Baking Addiction)
1 3/4 cups flour
3/4 cup dark cocoa powder
2 cups sugar
2 tsp baking soda
1 tsp baking powder
1 tsp Kosher salt
2 Tbsp instant coffee granules
about 1 cup warm water
1 Tbsp apple cider vinegar
about 1 cup whole milk
2 large eggs
1/2 cup vegetable oil
2 tsp vanilla extract

For the chocolate ganache:
1/2 cup whipping cream
1 cup semisweet chocolate chips

For the cream cheese frosting:
8 oz cream cheese, softened
1/2 cup unsalted butter, softened
5 to 6 cups powdered sugar
2 tsp vanilla extract

A batch of spooky chocolate bark for decorating (I used my Movie Candy Bark recipe replacing the movie candy with spooky candy)

Halloween sprinkles for decorating

DIRECTIONS
1. Make your spooky chocolate bark using my recipe. Set in the fridge and break into shards.
2. Preheat oven to 350 degrees, butter your cake tins, line the bottoms with parchment paper, and butter the parchment.
3. For the cake batter, pour enough warm water over your coffee granules to make 1 cup and set aside. Also, pour enough milk over the apple cider vinegar to make 1 cup of sour milk and set aside for 15 minutes.
4. In a large bowl, whisk together all of the dry ingredients for the cake batter.
5. Pour all wet ingredients into the dry ingredients and whisk together until batter is smooth.
6. Pour into prepared cake tins and bake for 30 to 40 minutes or until a toothpick inserted in the center comes out clean.
7. Cool cakes for 20 minutes, loosen edges with a butter knife, remove cakes, and cool completely.
8. To make the ganache, pour chocolate chips into a heat proof bowl. In another microwave safe dish, heat 1/2 cup whipping cream for about a minute (watch it carefully) until just simmering. Pour over the chocolate chips and set a timer for 5 minutes. Then, stir ganache until smooth and set another timer for 15 minutes so ganache can set a bit.
9. For the frosting, beat cream cheese and butter for 30 seconds. Beat in 3 cups powdered sugar. Beat in vanilla and then beat in 2 to 3 more cups powdered sugar until you get the consistency you like. Then, scrape down the bowl and beat on high for 3 minutes.
10. Put half the frosting into a Ziplock freezer bag prepared with a piping tip.
11. Pipe a layer of frosting onto the bottom layer of the cake making a little rim to hold the ganache.
12. Pour in some of the ganache and set the cake in the fridge to set for about 15 minutes.
13. Top with the other cake layer and frost the whole cake with a thin layer of frosting. Then, set in the fridge for 15 minutes.
14. Put another layer of frosting onto your cake making it as smooth as you wish.
15. Pipe puffs of frosting all along the top of the cake.
16. Fill another Ziplock freezer bag with ganache. Snip a teeny tiny piece off of one corner and drizzle onto the top of the cake. Sprinkle with Halloween sprinkles.
17. Push a shard of spooky chocolate bark into each frosting puff and line the bottom of the cake with more.

Spooky Chocolate Bark Cake from At Home with the Loverbees Pin

Monday, October 23, 2017

Keep'n it Simple: Let's Talk Wardrobe

Some of you may remember the Twenty Pieces Project that I tried out a few years ago. You can read more about it here.

Here's the gist. I picked out 25 pieces of clothing to wear for a year, got rid of everything else, and committed to not buying any other clothes unless I had to replace one of my 25 items. Pajamas and workout clothes didn't count in the 25 pieces. Neither did jewelry, shoes, or other accessories, but I decided to pare those down as well. Okay, let me tell you, folks. It was awesome! Getting dressed was so easy. Laundry was better too.

I've known for a while now that getting back to something like the Twenty Pieces Project was something I needed and wanted in my life. Life is hectic. Laundry is insane. I loathe digging through piles of laundry never put away (more on that at a later date) and finding nothing but ill-fitting, hole-baring clothes that make me seriously consider becoming a nudist. No, not really. But can you feel my pain?

I'm not gonna commit to not buying clothing for a year. Although, as little chance as I get to go out and buy clothes, I might as well. What I have done is make some space in my closet - and my life. I've gotten rid of over half of my wardrobe in hopes of a simpler life, less laundry (let's cross our fingers on that one), and an easier time putting something on in the morning.

I'm no fashionista, but I wanted the clothes that I kept to look good on me, not be out-of-date, and were items I didn't have to adjust all day. Comfort is also important to me and played a big part in my decision making process.

a stack of denim bottoms next to a stack of solid and printed colored tops


I narrowed down my pieces to 31.

Here are my basics (I just love lists like this!):
12 tops
5 jeans
2 shorts
2 cardigans
2 sweaters
2 jackets
3 dresses
2 maxi skirts
1 snow jacket

I made sure the pieces I kept were items I like, fit well, and don't have holes. Well, one of my sweaters has a hole in it, but I'm planning on replacing it soon... er than later. My shorts also have holes, but those are mostly on purpose.

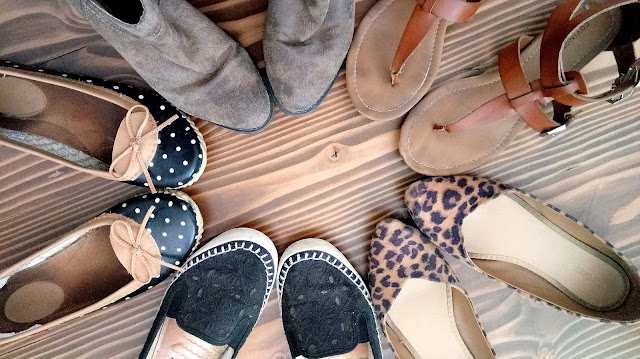
a pair of boots, leopard flats, polka dot flats, black embroidered slip ons, and brown sandals in a circle
These are the shoes I regularly wear out of the house.


I've also pared down my footwear based on what I wear most often (house shoes not included). In addition to what's pictured, I have a pair of rain boots, a pair of sneakers, a pair of hiking shoes, and two pairs of dress heels that don't get used very often but are needed when they're needed. I hate items like that. What can ya do?

a plate of 7 pairs of earrings
I pared down my earrings based on what I wear the most often.


After that, I tackled my jewelry drawer and only kept what I regularly wear (apart from some sentimental pieces I don't wear but keep in a jewelry box because of where or who they came from).

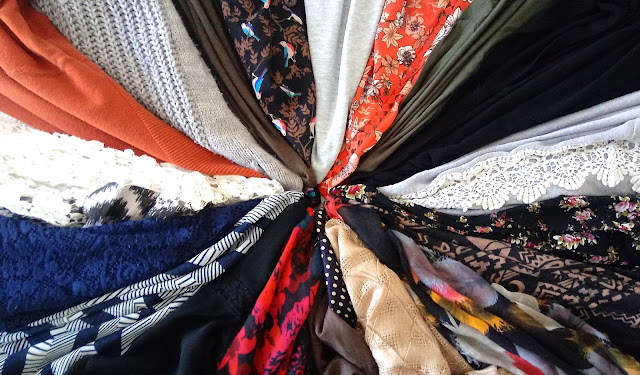
different colors, patterns, and textures of clothing organized in a sort of color wheel


I'm a big fan of basic colors with pops of pattern and texture. Most of my pieces are denim, gray, navy, black, or tan and brown. Many of my scarfs and blouses boast bright colors and patterns. It makes for great mixing and matching.

Here are what I call my "throw ons" that go over whatever I have on when I need an extra layer:

a brown cloth jacket, a grey cable knit sweater, a tan wrap sweater, and a brown leatherette bomber jacket hanging


Here are some of my "go to" outfits:

a black bird printed blouse, orange cardigan, light colored jeans, and a dainty white gold and opal necklace


sheer black lacy blouse with jeans and a long floral gold necklace


gray and cream lace top with dark jeans and a gold and pearl layered necklace


striped navy blouse with orange cardigan, dark jeans and rose gold long heart necklace


olive colored shirt with a black printed maxi and long gold floral necklace


a floral maxi dress on a hanger with a long heart necklace


Wow, this feels so good!

I'll let ya know how it goes throughout the next several months.

Here's to simpler living and happier dressing.

Friday, October 20, 2017

Easy Gourmet Cupcakes: Maple Bacon Brown Butter

Get ready to love me forever. Brown butter. Maple cream. Bacon. If you're trying to win someone over, use this cupcake.

Easy Gourmet Maple Bacon Brown Butter Cupcakes
These Easy Maple Bacon Brown Butter Cupcakes will be your new favorite breakfast.


The maple cream buttercream is to die for. (Feel free to die, but only if you must.) The cake mix is doctored the way we usually do it, except that this time we're browning the butter first. You can totally do this. Here's a video if you need encouragement. And, to top it all off - BACON!!! Come on now!

Ingredients for Easy Gourmet Maple Bacon Brown Butter Cupcakes


Here's our line up - yellow cake mix, brown butter, crumbled bacon, and maple extract. There's just a couple of extra steps in this recipe, but they are so worth it. And I know you can handle it. You're a cupcake making pro now, after all.

brown butter for Easy Gourmet Maple Bacon Brown Butter Cupcakes


First, let's make us some brown butter. Put two sticks of butter in a heavy bottomed saucepan and melt over medium high heat. As soon as the butter is melted, swirl the pan, or stir with a wooden spoon, continuously until butter browns. If you stop swirling or stirring the butter will splatter, so keep it moving. It should take 3 to 5 minutes. Immediately pour into a heat proof bowl and let cool for a bit. You can cook up your bacon while you're waiting for the butter to cool.

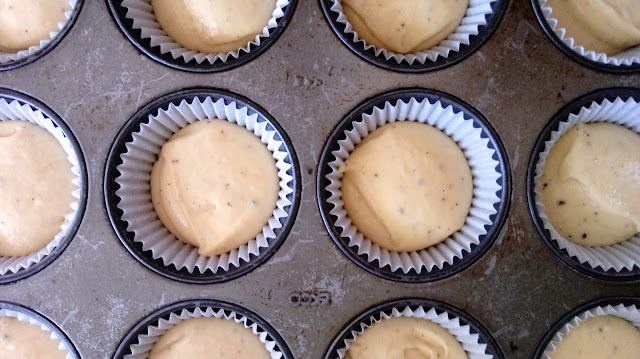
unbaked cupcakes for Easy Gourmet Maple Bacon Brown Butter Cupcakes


baked cupcakes for Easy Gourmet Maple Bacon Brown Butter Cupcakes


When your butter has cooled down from boiling hot to warm you can mix up your cupcake batter. Bake your cakes and then cool.

After your cupcakes are completely cool, crumble your bacon so it's ready to top your cupcakes and work on whipping up the best frosting ever. I say that about every frosting, don't I?

butter for maple cream buttercream


Beat three sticks of softened butter for 30 seconds.

whipped butter for maple cream buttercream


maple cream buttercream in process


Beat in 3 cups powdered sugar. Scrape down the bowl and beat in a pinch of salt and 1 3/4 tsp maple extract. Beat in another 3 cups powdered sugar. Then, beat in some milk a tablespoon at a time until your buttercream is piping consistency - not too stiff, not too soft.

whipped maple cream buttercream in mixing bowl
The fluffiest maple cream buttercream tops my Easy Maple Bacon Brown Butter Cupcakes.


Then, scrape down the bowl again and beat on high for 3 minutes until light and fluffy. So light. So fluffy. So maple-y (happy sigh).

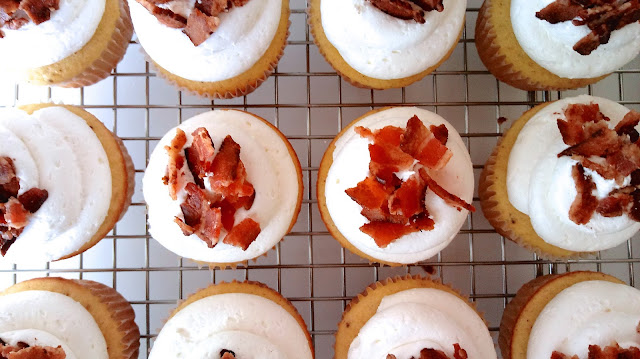
finished Easy Gourmet Maple Bacon Brown Butter Cupcakes
My Easy Maple Bacon Brown Butter Cupcakes will make a morning person out of you.


Pipe the buttercream onto your cupcakes and top with crumbled bacon. I find it's best to kinda push the bacon into the buttercream a bit.

Easy Gourmet Maple Bacon Brown Butter Cupcakes with a cup of coffee
These Easy Maple Bacon Brown Butter Cupcakes make the best breakfast ever.


Welcome to your new favorite breakfast!

Easy Gourmet Maple Bacon Brown Butter Cupcakes
(makes 24 cupcakes)

INGREDIENTS

For the brown butter cupcakes:
1 15.25 oz box yellow cake mix
1 cup unsalted butter (2 sticks)
1 cup whole milk
4 large eggs
* These ingredients are based on a cake mix that calls for 3 eggs, 1 cup of water, and 1/2 cup of oil. I added an extra egg, subbed whole milk for the water, and subbed butter for the oil, and then doubled the amount of butter.

For the maple cream buttercream:
1 1/2 cups unsalted butter, softened
6 cups powdered sugar
1 3/4 tsp maple extract
a pinch of salt
1 to 4 Tbsp milk

1 cup crumbled bacon to top cupcakes (about 8 slices)

DIRECTIONS
1. Preheat oven to 350 degrees and line 2 cupcake pans with 24 cupcake liners.
2. Brown the butter for the cupcakes. Heat 2 sticks of butter over medium high heat until melted. Then, swirl or stir continuously for 3 to 5 minutes until butter is a deep auburn color. Immediately pour into a heat proof bowl and allow to cool to warm.
3. Cook and crumble bacon while butter cools.
4. In a large bowl, add all of the ingredients for the cupcakes, including the brown butter, and mix well using a hand mixer, whisk, or wooden spoon. The batter should be smooth.
5. Scoop a scant 1/4 cup of batter (or use a size 20 cupcake scoop) into each liner.
6. Bake cupcakes for the time recommended on your cake mix box for cupcakes. Check them at the earliest time by inserting a toothpick into the center of one of the cupcakes near the center of the oven until it comes out clean.
7. Let cupcakes cool in pans for 15 minutes and then remove from the pans to cool completely.
8. For the maple cream buttercream, beat 3 sticks of softened butter for 30 seconds.
9. Scrape down the bowl and beat in 3 cups powdered sugar.
10. Scrape down the bowl again and beat in the maple extract and salt.
11. Scrape down the bowl and beat in 3 more cups powdered sugar.
12. Scrape down the bowl again and beat in milk 1 tablespoon at a time until you get a good pipable consistency - not too stiff, not too soft.
13. Scrape down the bowl again and beat on high for 3 minutes until buttercream is light and fluffy.
14. Snip off one corner of a Ziplock freezer bag a little smaller than your piping tip. Slide in your piping tip and set bag in a tall cup to easily fill with buttercream.
15. Twist the top of your bag closed and pipe buttercream onto each cupcake.
16. Immediately top with bacon pushing it into the buttercream a bit.

Easy Gourmet Maple Bacon Brown Butter Cupcakes Pin

Monday, October 16, 2017

What's for Dinner? Our Favorite Chili

'Tis the season for chili, y'all.

There are so many great chili recipes out there. I like to experiment now and then. I even have a whole Pinterest board dedicated to different recipes I want to try. So many chilis, so little time.

Our Favorite Chili is the perfect fall dinner.


Our Favorite Chili recipe is the one I love best and cook most often. It's a pretty basic recipe, but tried and true. I developed this recipe based on what I like in my chili and have fine-tuned it over the years. I'm partial to ground beef, a variety of beans, and petite diced tomatoes.


I stick to my basic recipe every time I make this chili. The only thing I vary is the peppers. Sometimes I use a couple of deseeded jalapeños instead of the bell pepper. If I don't have fresh peppers on hand, I dump in a small can of green chilies.


I start off by browning my ground beef in a dutch oven. Then, I remove the beef with a slotted spoon and dump out any excess grease. Next, I cook up my onions and peppers.


The veggies get cooked until soft and beginning to turn brown. Then, I lower the heat, dump in the garlic, and cook for another minute.


After that, everything gets dumped in - including the cooked meat.


I bring the pot to a boil, lower the heat to a simmer, and cover. I like to occasionally stir my chili to make sure my heat is just right and the bottom isn't sticking.


After 30 minutes, I taste the chili and add in more salt or spices as needed.

I usually serve this chili with our favorite gluten free cornbread recipe from Make the Best of Everything. I love that there's no special flour in this cornbread - just pure corn meal.

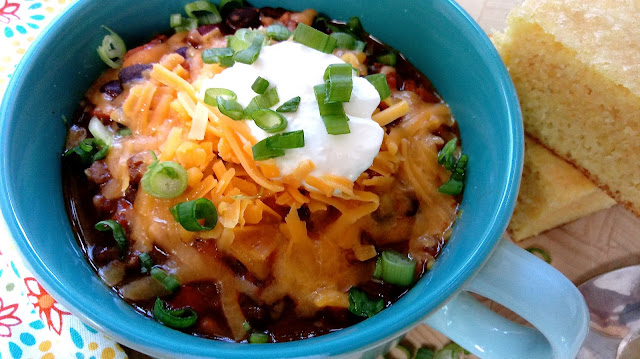
Cook up a pot of Our Favorite Chili!


My favorite way to eat this chili is to load up my bowl with shredded sharp cheddar, sour cream, and green onions, set my cornbread on the side, and walk around eating wherever I want. I usually end up on the couch or the porch if we're not sitting down to family dinner. No need for a drink or a salad or a napkin - just me and my bowl. I love eating that way.

I love cooking up Our Favorite Chili in a large cast iron dutch oven.


Our Favorite Chili

INGREDIENTS
1 Tbsp olive oil, divided
1 lb ground beef
1 large onion, diced
1 large bell pepper or 2 deseeded jalapeños, diced
3 cloves garlic, minced
2 14.5 oz cans petite diced tomatoes
2 8 oz cans tomato sauce
1 15 oz can kidney beans, drained
1 15 oz can black beans, drained
1 15 oz can pinto beans, drained
2 1/2 Tbsp chili powder
1/4 tsp cumin
a scant 1/4 tsp paprika
a scant tsp salt
shredded sharp cheddar, sour cream, and sliced green onions for serving

DIRECTIONS
1. In a dutch oven, heat 1/2 Tbsp olive oil over medium high heat.
2. Brown the meat. Remove meat with a slotted spoon and dump out any excess grease.
3. If necessary, add in another 1/2 Tbsp olive oil. Cook onions and peppers until soft and onions are starting to turn brown.
4. Lower the heat and add in garlic. Cook another minute.
5. Add in the meat, tomato products, beans, and seasonings. Stir together, raise heat to high, and bring to a boil.
6. Lower the heat to a simmer, cover, and cook for 30 minutes, stirring occasionally.
7. Taste chili and adjust salt and chili powder as needed.
8. Serve with shredded sharp cheddar, sour cream, and sliced green onions.

Our Favorite Chili Pin