Showing posts with label gluten free. Show all posts

Monday, August 13, 2018

Chocolaty Chocolate Dairy Free Ice Cream

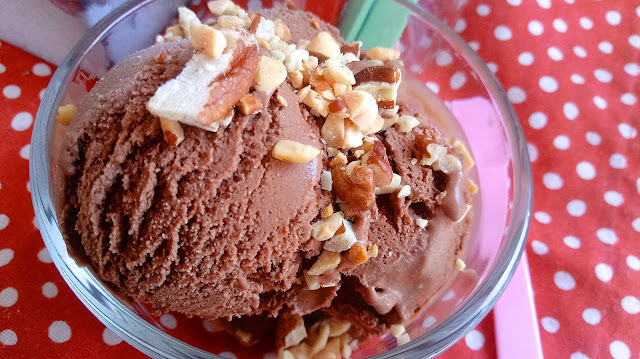
Well, it's been a while, hasn't it? Did you miss me? I sure missed you. Lots going on in the Loverbee household this summer - new job, big move, diet overhaul, homeschool overhaul. More on these fabulous resets at a later date. But before our busy summer ends, I want to share one more ice scream recipe with y'all. This creamy treat is dairy free, intensely chocolaty, and a big favorite in our house.

a close up of a scoop of Chocolaty Chocolate Dairy Free Ice Cream in a glass dish on a red and white polk a dot cloth
Our favorite Chocolaty Chocolate Dairy Free Ice Cream!


We make this Chocolaty Chocolate Dairy Free Ice Cream all summer long - all year long, really.

Monday, April 16, 2018

M & M Granola Bars

My 6 year old is a little mister picky pants (don't tell him I said that). I completely understand where he's coming from though, because I was the same way when I was little. I confess that I indulge his pickiness a little - okay, maybe a lot. But I get it. I used to gag on foods I totally love now. So there must be hope for him too.

m & m granola bars cut into squares
These M & M Granola Bars hit just the right note with my picky eater.

As I'm trying to keep things more natural around these here parts I've been experimenting with homemade granola bars. Finding one that Ezra will accept is the challenging part. I often make a peanut butter version that he will only sometimes eat claiming he only likes peanut butter in peanut butter and jelly sandwiches (sigh).

Thursday, March 22, 2018

Grain Free Granola

So I've been making a grain free version of my favorite granola recipe that I just had to share with y'all. We were playing around with the idea of going grain free for a while last year. While we didn't make the switch, we did fall in love with this mostly nut version of our favorite granola.

a bowl of grain free granola next to a jar full of granola on a pretty floral napkin
Try this grain free version of our favorite granola recipe!


This version is lower carb, higher protein, and we are in total nut heaven over here. The hubster eats this granola almost every day over plain whole milk yogurt. How he can eat the same thing every morning is beyond me, but at least it's a delicious and healthy meal.

Thursday, January 25, 2018

Chocolate Cupcake Bread Pudding

I hope all of you having a true winter are reveling in it. I'm so jealous. Over here in California life is pretty moderate. Even though it's gotten colder this last week, a light sweater will do during the day (sigh). Not my favorite, to say the least. But, carry on we must. I'm still cooking and baking up my favorite cold weather favorites in spite of the lack of a real winter. Maybe even in defiance to it.

a close up of a bowl full of Chocolate Cupcake Bread Pudding topped with a scoop of vanilla ice cream, chocolate sauce, and chocolate sprinkles
Get your chocolate fix in a comforting bowl of Chocolate Cupcake Bread Pudding. So yum!


This Chocolate Cupcake Bread Pudding is comforting and satisfying whether you're enjoying a true winter or just pretending to, like me.

Ingredients for Chocolate Cupcake Bread Pudding sitting on a marble cutting board
This Chocolate Cupcake Bread Pudding is the best way to use up leftover cupcakes.


I actually baked this pudding with grain free chocolate cupcakes that I made from a recipe over at Living Healthy with Chocolate, but any chocolate cupcakes will do. Just make sure they're unfrosted. If they are frosted, just push off the frosting (I'm wincing as I say that) and use the cake part only.

a casserole dish filled with crumbled chocolate cupcakes and chocolate chips sitting next to a bowl of custard mixture


Start by breaking up 10 to 12 chocolate cupcakes into a buttered dish. Sprinkle on a handful of chocolate chips and pour your custard mixture over the top.

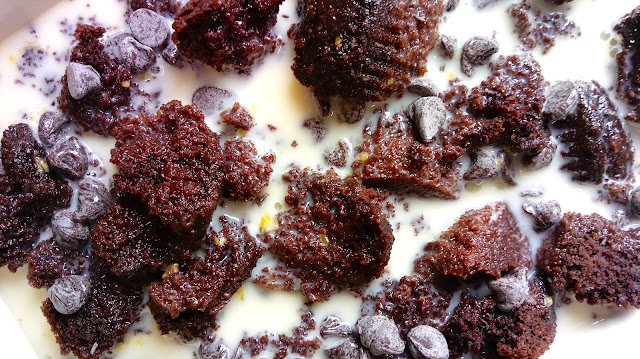
a close up of the unbaked bread pudding - crumbled chocolate cupcakes and chocolate chips sitting in custard mixture
Just look at that chocolaty goodness swimming in a sea of luscious custard. Oh baby!


Be sure to push the goodies down into the custard.

baked Chocolate Cupcake Bread Pudding in a casserole dish next to a pretty pot holder


Bake 45 to 55 minutes until center is set, but still jiggly. Allow to cool for 5 to 10 minutes before digging in.

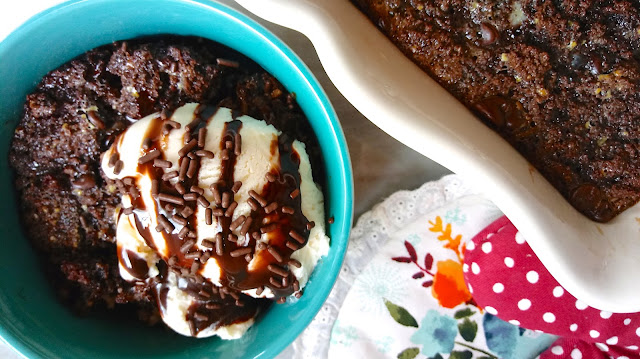
a serving of Chocolate Cupcake Bread Pudding topped with ice cream, chocolate sauce, and sprinkles next to the Chocolate Cupcake Bread Pudding casserole
I serve this Chocolate Cupcake Bread Pudding with vanilla ice cream, chocolate syrup, and chocolate sprinkles.


I serve this pudding with vanilla ice cream, chocolate sauce, and chocolate sprinkles. It is a cupcake pudding after all. Nuts would be totally awesome, too. 😉

Chocolate Cupcake Bread Pudding

INGREDIENTS
butter for greasing your dish
10 to 12 unfrosted or de-frosted cupcakes
1/2 cup chocolate chips
4 large eggs
2 cups whole milk
1 tsp vanilla extract
3/4 cup granulated sugar
vanilla ice cream, chocolate sauce, and chocolate sprinkles for serving

DIRECTIONS
1. Preheat oven to 350 degrees and grease a 3 quart casserole dish.
2. Break the cupcakes up into your dish.
3. Sprinkle on the chocolate chips.
4. In a large bowl, lightly beat the eggs.
5. Add the milk, vanilla, and sugar, and whisk to combine.
6. Pour over the cupcakes and push all of the goodies down into the custard mixture.
7. Bake for 45 to 55 minutes until the center is set, but still jiggly.
8. Allow to cool for 5 to 10 minutes before digging in.
9. Serve with vanilla ice cream, chocolate sauce, and chocolate sprinkles.

Chocolate Cupcake Bread Pudding Pin

Thursday, January 4, 2018

Easy Gourmet Cupcakes: Gluten Free Fudgy Mint

This one goes out to all of my gluten free cupcake-loving peeps out there, and to my baby girl. This cupcake has Nora's name written all over it. That little girly girl loves her some mint. So much so that we have to hide the toothpaste. No joke! If she happens to get her hands on a tube we have to chase her down while she gleefully sucks out as much as she possibly can. All those poor candy canes on our Christmas tree didn't stand a chance. Oh, that girl.

chocolate cupcakes frosted with light green mint frosting, drizzled with hot fudge, and sprinkled with chopped Andes chocolate mints
Eating gluten free doesn't get any better than these Easy Gluten Free Fudgy Mint Cupcakes.


I'll confess right off the bat that these Easy Gluten Free Fudgy Mint Cupcakes are just a little over the top - but just a little. 😉 A chocolate mint gluten free cake gets filled with hot fudge, frosted with creamy peppermint frosting, drizzled with more hot fudge, and topped with chopped chocolate mints. Welcome to gluten free indulgence, my friends.

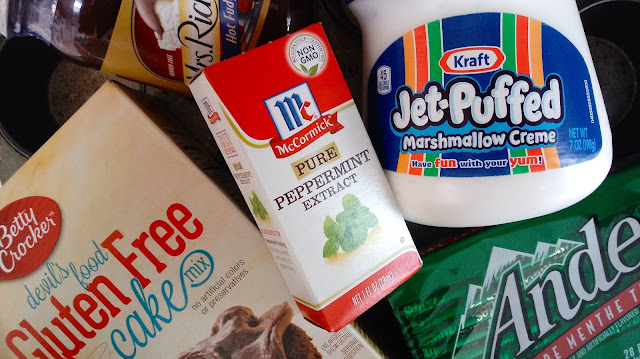
a box of cake mix, a jar of marshmallow cream, a jar of hot fudge, a box of peppermint extract, and a package of Andes chocolate mints


I used a gluten free cake mix for this recipe, but you can sub in a regular one if you don't need to eat gluten free. The Andes chocolate mints, Mrs. Richardson's hot fudge, and McCormick peppermint extract are all gluten free products you can find at your local supermarket. If you are an exclusive gluten free eater, make sure you buy the "Marshmallow Fluff" brand of marshmallow cream or that your jar reads "gluten free" on the label. While other Kraft marshmallow products read "gluten free" on the packaging, their Jet-Puffed Marshmallow Creme does not. Just a word to the wise.

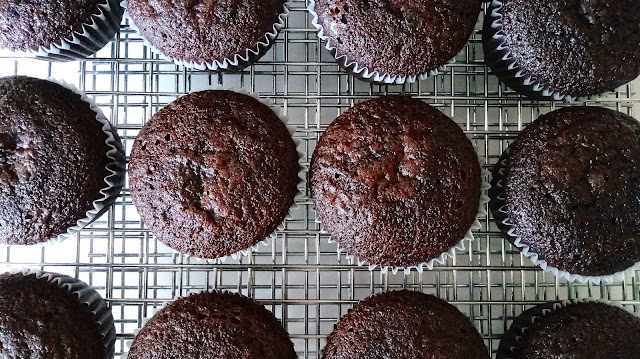
baked gluten free chocolate cupcakes cooling on a wire rack


Start by mixing up your gluten free cake mix according to the package directions and adding in 1/2 tsp of peppermint extract.

You can prep your toppings while your cupcakes are cooling. Chop up the chocolate mints so they're ready to sprinkle onto your cupcakes. Also, fill a Ziploc bag with some of the fudge and snip off less than 1/4 inch off of one corner to drizzle on the frosted cakes.

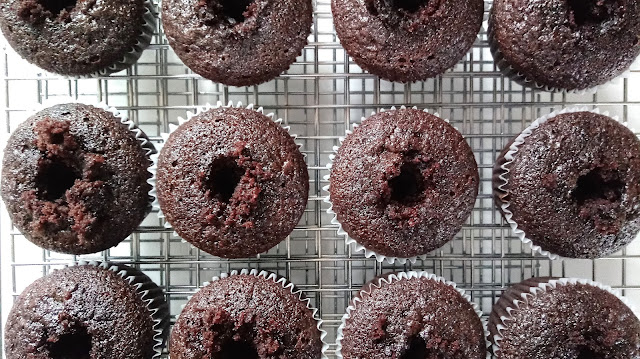
cored and baked gluten free chocolate cupcakes on a wire rack


Once your cupcakes have cooled, use the end of a wooden spoon to make a hole in the center of each cupcake being careful not to punch through the bottom.

cored and baked gluten free chocolate cupcakes on a wire rack ready to be filled


filled gluten free chocolate cupcakes on a wire rack


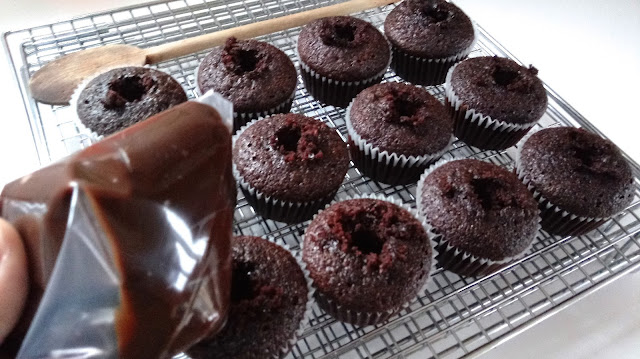
Fill another Ziploc freezer bag with more hot fudge, snip off 1/3 inch off of one corner, and squeeze some into the center of each cupcake until you can see it coming up out of the top.

a bowl with beaten butter and marshmallow cream


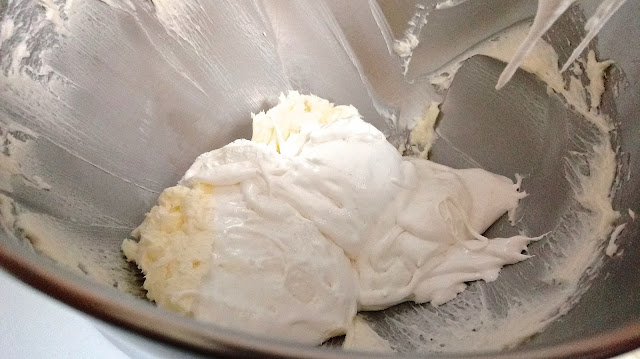
Now, make the peppermint frosting. Beat a stick of butter with the marshmallow cream.

a bowl of peppermint frosting in process


Beat in 2 cups powdered sugar. Beat in 1 tsp of peppermint extract and then another 2 cups of powdered sugar.

a bowl of light green peppermint frosting


Beat in 3 or 4 drops of green food coloring and one to two tablespoons of milk.

a bowl of light green peppermint frosting

Scrape down the bowl and beat for 3 minutes until light and creamy.

chocolate cupcakes frosted with light green mint frosting, drizzled with hot fudge, and sprinkled with chopped Andes chocolate mints
Say hello to gluten free indulgence with these Easy Gluten Free Fudgy Mint Cupcakes.


Frost your cupcakes, drizzle them with more hot fudge, and sprinkle the tops with chopped chocolate mints. You may need to push them into the frosting a little.

Is the fudgy minty awesomeness getting to you yet? It's okay to drool. I won't tell. 😉


Easy Gourmet Gluten Free Fudgy Mint Cupcakes
(makes 12 cupcakes)


INGREDIENTS
For the cupcakes:
1 15 oz gluten free chocolate cake mix (I used Betty Crocker's)
1/2 cup unsalted butter (1 stick), softened
3 large eggs
1 cup water
1/2 tsp peppermint extract

For the peppermint frosting:
1/2 cup unsalted butter, softened
1 7 oz jar marshmallow cream (gluten free eaters, make sure you buy "Marshmallow Fluff" brand or that the label on your jar reads "gluten free")
4 cups powdered sugar
1 tsp peppermint extract
2 Tbsp milk
3 or 4 drops green food coloring

1 16 oz jar Mrs. Richardson's hot fudge, room temperature
1 cup chopped Andes chocolate mints

DIRECTIONS
1. Preheat oven to 350 degrees and line a cupcake pan with 12 cupcake liners.
2. Make your batter according to the directions on your box of cake mix adding 1/2 tsp of peppermint extract.
3. Divide batter evenly among the 12 cupcake liners.
4. Bake cupcakes for the time recommended on your cake mix box for cupcakes. Check them at the earliest time by inserting a toothpick into the center of one of the cupcakes near the center of the oven. The cupcakes are done when it comes out clean.
5. Let cupcakes cool in pans for 15 minutes and then remove from the pans to cool completely.
6. When your cupcakes are completely cool, use the end of a wooden spoon to make a hole in the center of each cupcake being careful not to punch through the bottom.
7. Fill a Ziploc freezer bag with 1/2 cup of hot fudge, twist the top closed (you can use a twist tie if you like), snip off a 1/3 inch off of one corner, and squeeze filling into each cupcake until you see the filling coming up out of the top of the cupcake.
8. Chop the Andes chocolate mints, if you haven't already, so they are ready to top your cupcakes.
9. Fill another Ziploc freezer bag with more hot fudge, twist the top closed, snip off less than 1/4 inch off of one corner, and set aside.
10. For the peppermint frosting, beat the butter in a stand mixer for 30 seconds.
11. Beat in the whole 7 oz jar of marshmallow cream.
12. Scrape down the bowl and beat in 2 cups powdered sugar. Then, beat in 1 tsp peppermint extract.
13. Beat in 2 more cups of powdered sugar.
14. Beat in 3 or 4 drops of green food coloring and 1 to 2 Tbsp milk.
15. Scrape down the bowl and beat on high for 3 minutes.
16. Snip off one corner of another Ziploc freezer bag a little smaller than your piping tip. Slide in your piping tip and set bag in a tall cup to easily fill with frosting.
17. Twist the top of your bag closed and pipe frosting onto each cupcake.
18. Immediately drizzle with more hot fudge and sprinkle with chopped chocolate mints.

* If you don't need to eat gluten free use a regular chocolate cake mix. Doctor it up by adding an extra egg, subbing whole milk for the water, subbing melted butter for the oil, doubling the amount of butter, and stirring in a tsp of peppermint extract. You'll need to double the frosting recipe and use more fudge and chopped chocolate mints than the recipe above calls for since it makes 12 cupcakes and your regular cake mix box will make 24.


Monday, October 16, 2017

What's for Dinner? Our Favorite Chili

'Tis the season for chili, y'all.

There are so many great chili recipes out there. I like to experiment now and then. I even have a whole Pinterest board dedicated to different recipes I want to try. So many chilis, so little time.

Our Favorite Chili is the perfect fall dinner.


Our Favorite Chili recipe is the one I love best and cook most often. It's a pretty basic recipe, but tried and true. I developed this recipe based on what I like in my chili and have fine-tuned it over the years. I'm partial to ground beef, a variety of beans, and petite diced tomatoes.


I stick to my basic recipe every time I make this chili. The only thing I vary is the peppers. Sometimes I use a couple of deseeded jalapeños instead of the bell pepper. If I don't have fresh peppers on hand, I dump in a small can of green chilies.


I start off by browning my ground beef in a dutch oven. Then, I remove the beef with a slotted spoon and dump out any excess grease. Next, I cook up my onions and peppers.


The veggies get cooked until soft and beginning to turn brown. Then, I lower the heat, dump in the garlic, and cook for another minute.


After that, everything gets dumped in - including the cooked meat.


I bring the pot to a boil, lower the heat to a simmer, and cover. I like to occasionally stir my chili to make sure my heat is just right and the bottom isn't sticking.


After 30 minutes, I taste the chili and add in more salt or spices as needed.

I usually serve this chili with our favorite gluten free cornbread recipe from Make the Best of Everything. I love that there's no special flour in this cornbread - just pure corn meal.

Cook up a pot of Our Favorite Chili!


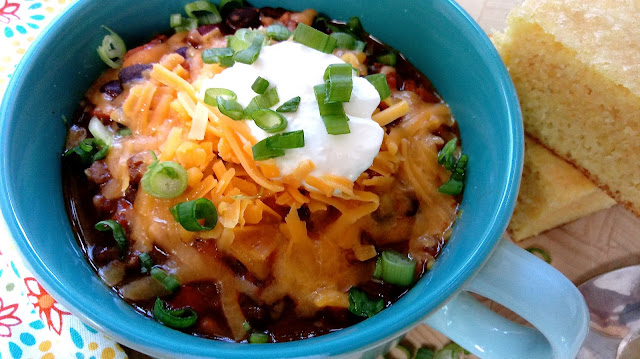
My favorite way to eat this chili is to load up my bowl with shredded sharp cheddar, sour cream, and green onions, set my cornbread on the side, and walk around eating wherever I want. I usually end up on the couch or the porch if we're not sitting down to family dinner. No need for a drink or a salad or a napkin - just me and my bowl. I love eating that way.

I love cooking up Our Favorite Chili in a large cast iron dutch oven.


Our Favorite Chili

INGREDIENTS
1 Tbsp olive oil, divided
1 lb ground beef
1 large onion, diced
1 large bell pepper or 2 deseeded jalapeños, diced
3 cloves garlic, minced
2 14.5 oz cans petite diced tomatoes
2 8 oz cans tomato sauce
1 15 oz can kidney beans, drained
1 15 oz can black beans, drained
1 15 oz can pinto beans, drained
2 1/2 Tbsp chili powder
1/4 tsp cumin
a scant 1/4 tsp paprika
a scant tsp salt
shredded sharp cheddar, sour cream, and sliced green onions for serving

DIRECTIONS
1. In a dutch oven, heat 1/2 Tbsp olive oil over medium high heat.
2. Brown the meat. Remove meat with a slotted spoon and dump out any excess grease.
3. If necessary, add in another 1/2 Tbsp olive oil. Cook onions and peppers until soft and onions are starting to turn brown.
4. Lower the heat and add in garlic. Cook another minute.
5. Add in the meat, tomato products, beans, and seasonings. Stir together, raise heat to high, and bring to a boil.
6. Lower the heat to a simmer, cover, and cook for 30 minutes, stirring occasionally.
7. Taste chili and adjust salt and chili powder as needed.
8. Serve with shredded sharp cheddar, sour cream, and sliced green onions.

Our Favorite Chili Pin

Friday, October 13, 2017

Gluten Free Chocolate Pumpkin Jack-o-lantern Cookies

We're still keep'n it easy over here in Loverbee Land. Also, I've got doctored cake mix on the brain as I've been baking through my Easy Gourmet Cupcake series. All that to say, cake mix cookies are how we're doin' this thang.

This recipe goes out to all my gluten free peeps. Hope you guys haven't been feeling left out. I'll be making you guys an easy gourmet gluten free cupcake soon, so stay tuned for that.

Gluten Free Chocolate Pumpkin Jack-o-lantern Cookies
These Gluten Free Chocolate Pumpkin Jack-o-lantern Cookies are rich with chocolate and autumn spice.


These ghoulish cookies are super chocolatey and full of fall spice. They're also crispy on the outside and chewy on the inside - just like a cookie should be. They're the perfect vehicle for Halloween decorating fun.

Ingredients for Gluten Free Chocolate Pumpkin Jack-o-lantern Cookies


I doctored a gluten free chocolate cake mix with pumpkin and cinnamon to make these adorable jack-o-lantern cookies for the boys to decorate. Even in the midst of busyness I have to get my bake on, and the boys need stuff to decorate. That's how we roll up in this place.

I used cinnamon for a more Mexican hot chocolate kinda flavor. I'm not a huge fan of pumpkin pie spice with chocolate. But that's just me. If you love pumpkin pie spice, then go for it.

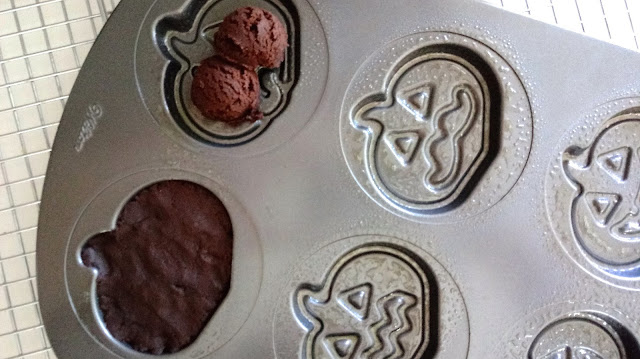
Jack-o-lantern pan for Gluten Free Chocolate Pumpkin Jack-o-lantern Cookies


You'll need a jack-o-lantern pan to make these molded cookies. Wilton makes one you can order online. I suggest buying two pans. That way you can bake all your cookies at once.

Making cookie dough for Gluten Free Chocolate Pumpkin Jack-o-lantern Cookies


First, beat butter, pumpkin, and the spice of your choice until well combined.

Making cookie dough for Gluten Free Chocolate Pumpkin Jack-o-lantern Cookies


Beat in the chocolate cake mix until mixture resembles cookie dough.

cookie dough for Gluten Free Chocolate Pumpkin Jack-o-lantern Cookies


Spray each mold with oil spray and scoop 1/4 cup of dough into each. Press the dough down into each face spreading evenly as you go.

Gluten Free Chocolate Pumpkin Jack-o-lantern Cookies


Bake for 10 minutes and cool cookies completely in the pans. Then, remove them very carefully. I used a butter knife to help dislodge the edges.

candy for decorating Gluten Free Chocolate Pumpkin Jack-o-lantern Cookies


Prep your decorating station by filling a couple of freezer bags with chocolate hazelnut spread and snipping off the corners for piping. Also, open up the candies for easy grabbing.

decorating Gluten Free Chocolate Pumpkin Jack-o-lantern Cookies


My guys had a blast decorating their jack-o-lanterns. I, of course, peeled off the candy to enjoy my cookie. 😉

Gluten Free Chocolate Pumpkin Jack-o-lantern Cookies
Kids will love decorating these Gluten Free Chocolate Pumpkin Jack-o-lantern Cookies.


Gluten Free Chocolate Pumpkin Jack-o-lantern Cookies
(makes 12 jack-o-lantern cookies)

INGREDIENTS
1/2 cup unsalted butter, softened
1/4 cup pumpkin puree
1/2 tsp cinnamon or pumpkin pie spice
15 oz box gluten free chocolate cake mix (I used Betty Crocker's)
oil spray to grease cookie pan

To Decorate:
1/2 cup chocolate hazelnut spread
assorted Halloween candies
* For gluten free eaters, make sure your store-bought spread and candies read "gluten free" on the labels, or check the ingredients very carefully.

DIRECTIONS
1. Preheat oven to 350 degrees.
2. Using a stand or hand mixer, beat butter, pumpkin puree, and spice until creamy and well combined.
3. Beat in all of the chocolate cake mix until mixture comes together. It should look like cookie dough.
4. Spray your jack-o-lantern pan (just in the molds) generously with oil spray.
5. Scoop 4 Tbsp of dough into each jack-o-lantern face pushing down and spreading to fill the mold.
6. Bake for 10 minutes. They will look sunken in a little. That's okay.
7. Let cookies cool in pan completely and then remove them very carefully.
8. If you only have one pan, wipe it out and then spray again with oil spray before re-scooping.
9. When you're ready to decorate, spoon the chocolate hazelnut spread evenly into 2 Ziplock freezer bags, twist tops closed, and secure with twist ties. Snip 1/4 inch off of one corner for kids to use as glue to stick on their candies.

Gluten Free Chocolate Pumpkin Jack-o-lantern Cookies Pin

Monday, September 18, 2017

What's for Dinner? Italian Lentil Stew

It's soup season. Hip, hip, hurray. I'm so happy. I love soups and stews and make them throughout the year, but especially in fall and winter. I make so much soup that my family begs me to make something different. Hee, hee!

Soup Season: Italian Lentil Stew
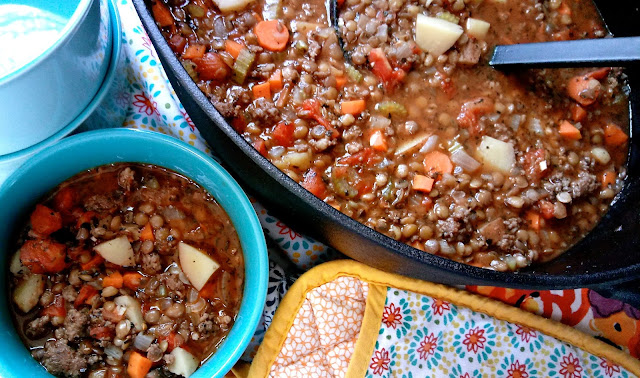
Jump into soup season with this Italian Lentil Stew!

This Italian Lentil Stew is my mom's recipe. It's one of my favorite soups - hearty, flavorful, and pretty in the bowl. Thanks, Mom!

Ingredients for Italian Lentil Stew

Loaded with Italian spices, flavorful sausage, hearty veggies, and yummy lentils, this Italian Lentil Stew is a must-make. Protein packed soup anyone? It also goes great with crusty bread and it freezes well too. That's a fantastic soup in my book. Oh, and did I mention that it's totally easy to make.

Browned Italian Sausage for Italian Lentil Stew

First, brown your sausage.

Italian Lentil Stew

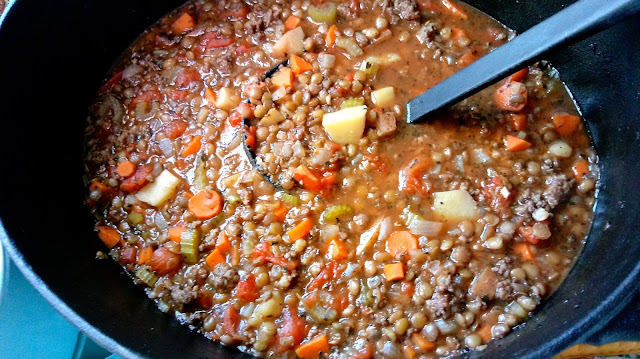
Next, add in all the rest of the ingredients and bring to a boil. The stew cooks for 45 to 50 minutes or until the veggies are tender and the lentils are soft. So easy!

Italian Lentil Stew

This recipe makes a nice big batch of stew. I like to freeze half of it so as not to soup out the fam. Everything in moderation - except for cupcakes. 😉

Italian Lentil Stew
Hearty and flavorful Italian Lentil Stew is the perfect way to kick off soup season!


Italian Lentil Stew

INGREDIENTS
1/2 Tbsp olive oil
1 lb Italian sausage
2 cups lentils
2 14 oz cans diced tomatoes
3 cups diced mirepoix (celery, carrot, onions)
2 cups diced red potatoes
3 cloves garlic, minced
4 Tbsp dried basil
1 tsp dried oregano
1/2 tsp dried thyme
1/4 tsp fresh ground pepper
2 tsp salt
8 cups chicken broth

DIRECTIONS
1. In a large dutch oven or stock pot, heat oil over medium high heat.
2. Brown sausage and drain off any excess fat.
3. Add in all of the rest of the ingredients and bring to a boil.
4. Reduce heat to a simmer, cover, and cook for 45 to 50 minutes, stirring occasionally.
5. Taste stew to make sure lentils are cooked and veggies are tender. If stew is too thick, add a little more broth or water to get the consistency you like.

Italian Lentil Stew Pin