Showing posts with label doctored cake mix. Show all posts

Friday, March 9, 2018

Mexican Hot Chocolate Cupcakes

I'm desperately trying to enjoy what's left of California's chilly weather. I love being cold and all the fun things that come with it - sitting by a fire, snuggly blankets, a mug of hot tea in the middle of the day, and warming up with a batch of these Mexican Hot Chocolate Cupcakes. Of course, I'll settle for the cupcakes any day.

a close up pic of the Mexican Hot Chocolate Cupcakes sitting on a colorful latin style place mat
Warm up with these delicious Mexican Hot Chocolate Cupcakes!


I made these cupcakes with a doctored chocolate cake mix, filled them with a creamy dreamy marshmallow filling, and topped them off with sweet and spicy milk chocolate buttercream and a grating of Mexican chocolate. The perfect treat to enjoy in front of a cozy fire with a steaming mug of whatever you like.

Monday, February 5, 2018

White Chocolate Cherry Cake Mix Cookies

I can't stop with all the cake mix creations. It's so nice not to have to measure out flour and baking soda and all that kinda stuff. And I love having a quick and easy recipe to pull out for last minute holiday baking.

a close up of White Chocolate Cherry Cake Mix Cookies


a close up of White Chocolate Cherry Cake Mix Cookies with milk


These White Chocolate Cherry Cake Mix Cookies are such a lovely Valentine's Day treat. They're soft and pretty and full of maraschino flavor. First, almond flavored cookie batter is loaded with chopped maraschino cherries and toasted almonds. Then, I finish the baked and cooled cookies with a drizzle of white chocolate. What a sweet treat of a cookie!

Thursday, January 4, 2018

Easy Gourmet Cupcakes: Gluten Free Fudgy Mint

This one goes out to all of my gluten free cupcake-loving peeps out there, and to my baby girl. This cupcake has Nora's name written all over it. That little girly girl loves her some mint. So much so that we have to hide the toothpaste. No joke! If she happens to get her hands on a tube we have to chase her down while she gleefully sucks out as much as she possibly can. All those poor candy canes on our Christmas tree didn't stand a chance. Oh, that girl.

chocolate cupcakes frosted with light green mint frosting, drizzled with hot fudge, and sprinkled with chopped Andes chocolate mints
Eating gluten free doesn't get any better than these Easy Gluten Free Fudgy Mint Cupcakes.


I'll confess right off the bat that these Easy Gluten Free Fudgy Mint Cupcakes are just a little over the top - but just a little. ๐Ÿ˜‰ A chocolate mint gluten free cake gets filled with hot fudge, frosted with creamy peppermint frosting, drizzled with more hot fudge, and topped with chopped chocolate mints. Welcome to gluten free indulgence, my friends.

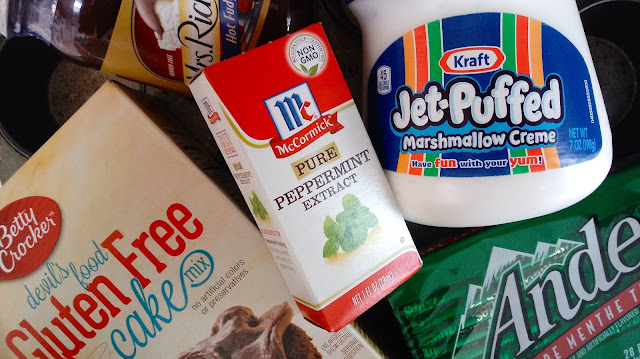
a box of cake mix, a jar of marshmallow cream, a jar of hot fudge, a box of peppermint extract, and a package of Andes chocolate mints


I used a gluten free cake mix for this recipe, but you can sub in a regular one if you don't need to eat gluten free. The Andes chocolate mints, Mrs. Richardson's hot fudge, and McCormick peppermint extract are all gluten free products you can find at your local supermarket. If you are an exclusive gluten free eater, make sure you buy the "Marshmallow Fluff" brand of marshmallow cream or that your jar reads "gluten free" on the label. While other Kraft marshmallow products read "gluten free" on the packaging, their Jet-Puffed Marshmallow Creme does not. Just a word to the wise.

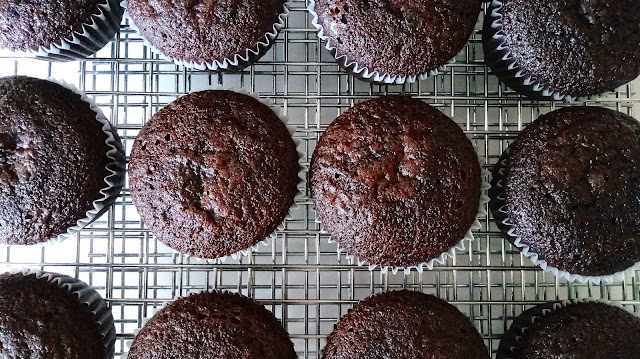
baked gluten free chocolate cupcakes cooling on a wire rack


Start by mixing up your gluten free cake mix according to the package directions and adding in 1/2 tsp of peppermint extract.

You can prep your toppings while your cupcakes are cooling. Chop up the chocolate mints so they're ready to sprinkle onto your cupcakes. Also, fill a Ziploc bag with some of the fudge and snip off less than 1/4 inch off of one corner to drizzle on the frosted cakes.

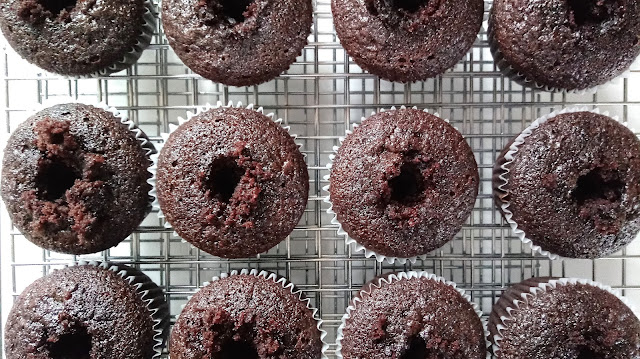
cored and baked gluten free chocolate cupcakes on a wire rack


Once your cupcakes have cooled, use the end of a wooden spoon to make a hole in the center of each cupcake being careful not to punch through the bottom.

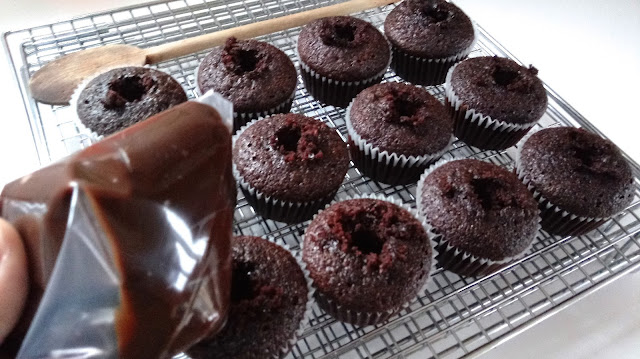
cored and baked gluten free chocolate cupcakes on a wire rack ready to be filled


filled gluten free chocolate cupcakes on a wire rack


Fill another Ziploc freezer bag with more hot fudge, snip off 1/3 inch off of one corner, and squeeze some into the center of each cupcake until you can see it coming up out of the top.

a bowl with beaten butter and marshmallow cream


Now, make the peppermint frosting. Beat a stick of butter with the marshmallow cream.

a bowl of peppermint frosting in process


Beat in 2 cups powdered sugar. Beat in 1 tsp of peppermint extract and then another 2 cups of powdered sugar.

a bowl of light green peppermint frosting


Beat in 3 or 4 drops of green food coloring and one to two tablespoons of milk.

a bowl of light green peppermint frosting

Scrape down the bowl and beat for 3 minutes until light and creamy.

chocolate cupcakes frosted with light green mint frosting, drizzled with hot fudge, and sprinkled with chopped Andes chocolate mints
Say hello to gluten free indulgence with these Easy Gluten Free Fudgy Mint Cupcakes.


Frost your cupcakes, drizzle them with more hot fudge, and sprinkle the tops with chopped chocolate mints. You may need to push them into the frosting a little.

Is the fudgy minty awesomeness getting to you yet? It's okay to drool. I won't tell. ๐Ÿ˜‰


Easy Gourmet Gluten Free Fudgy Mint Cupcakes
(makes 12 cupcakes)


INGREDIENTS
For the cupcakes:
1 15 oz gluten free chocolate cake mix (I used Betty Crocker's)
1/2 cup unsalted butter (1 stick), softened
3 large eggs
1 cup water
1/2 tsp peppermint extract

For the peppermint frosting:
1/2 cup unsalted butter, softened
1 7 oz jar marshmallow cream (gluten free eaters, make sure you buy "Marshmallow Fluff" brand or that the label on your jar reads "gluten free")
4 cups powdered sugar
1 tsp peppermint extract
2 Tbsp milk
3 or 4 drops green food coloring

1 16 oz jar Mrs. Richardson's hot fudge, room temperature
1 cup chopped Andes chocolate mints

DIRECTIONS
1. Preheat oven to 350 degrees and line a cupcake pan with 12 cupcake liners.
2. Make your batter according to the directions on your box of cake mix adding 1/2 tsp of peppermint extract.
3. Divide batter evenly among the 12 cupcake liners.
4. Bake cupcakes for the time recommended on your cake mix box for cupcakes. Check them at the earliest time by inserting a toothpick into the center of one of the cupcakes near the center of the oven. The cupcakes are done when it comes out clean.
5. Let cupcakes cool in pans for 15 minutes and then remove from the pans to cool completely.
6. When your cupcakes are completely cool, use the end of a wooden spoon to make a hole in the center of each cupcake being careful not to punch through the bottom.
7. Fill a Ziploc freezer bag with 1/2 cup of hot fudge, twist the top closed (you can use a twist tie if you like), snip off a 1/3 inch off of one corner, and squeeze filling into each cupcake until you see the filling coming up out of the top of the cupcake.
8. Chop the Andes chocolate mints, if you haven't already, so they are ready to top your cupcakes.
9. Fill another Ziploc freezer bag with more hot fudge, twist the top closed, snip off less than 1/4 inch off of one corner, and set aside.
10. For the peppermint frosting, beat the butter in a stand mixer for 30 seconds.
11. Beat in the whole 7 oz jar of marshmallow cream.
12. Scrape down the bowl and beat in 2 cups powdered sugar. Then, beat in 1 tsp peppermint extract.
13. Beat in 2 more cups of powdered sugar.
14. Beat in 3 or 4 drops of green food coloring and 1 to 2 Tbsp milk.
15. Scrape down the bowl and beat on high for 3 minutes.
16. Snip off one corner of another Ziploc freezer bag a little smaller than your piping tip. Slide in your piping tip and set bag in a tall cup to easily fill with frosting.
17. Twist the top of your bag closed and pipe frosting onto each cupcake.
18. Immediately drizzle with more hot fudge and sprinkle with chopped chocolate mints.

* If you don't need to eat gluten free use a regular chocolate cake mix. Doctor it up by adding an extra egg, subbing whole milk for the water, subbing melted butter for the oil, doubling the amount of butter, and stirring in a tsp of peppermint extract. You'll need to double the frosting recipe and use more fudge and chopped chocolate mints than the recipe above calls for since it makes 12 cupcakes and your regular cake mix box will make 24.


Sunday, December 17, 2017

Easy Cranberry Spice Cake

This is a fabulous Christmas cake - and it is so fabulously easy, too.

a close up of the Easy Cranberry Spice Cake covered in buttercream and topped with sugared cranberries
These gorgeous sugared cranberries turn this Easy Cranberry Spice Cake into something special.
My Easy Cranberry Spice Cake starts out with a box of yellow cake mix. I know, I know. I'm all about the cake mix these days. We gotta keep things easy, right?

the Easy Cranberry Spice Cake covered in buttercream and topped with sugared cranberries in its baking dish
I baked this Easy Cranberry Spice Cake in a 9 x 13 inch baking dish.


I like to doctor my cake mix by adding an extra egg, subbing whole milk for the water, subbing melted butter for the oil, and then doubling the amount of butter. For this cake, I also added a bunch of fresh cranberries and some Chinese five spice (heck yeah!). I baked it up in a 9 x 13 inch baking pan to keep things easy.

I love 9 x 13 cakes. They are the easiest cakes ever. They aren't as glamorous as layer cakes or as cute as cupcakes, but they really are the easiest and they're just as yummy. You can totally bake this cake into a batch of pretty cupcakes if you are so inclined.

a close up of sugared cranberries sitting on a piece of parchment paper


The sugared cranberries are also a breeze. I dump my cup of berries into a mixture of meringue powder and water, and then toss them into a dish of sugar. Then, they dry out on a piece of parchment paper. Dump, dump, and dry. So easy.

a close up of cut pieces of Easy Cranberry Spice Cake on a serving tray
Aren't these luscious slices of Easy Cranberry Spice Cake tempting?


This lovely cake is very tender and moist. The flavor of the tart berries really pops in your mouth and pairs perfectly with that fabulous spice. And the sweet and fluffy Chinese five spice buttercream? Well, that stuff just sends the whole cake over to amazingly-delicious-ville!

I used Chinese five spice because that's what I had in my pantry. I've also made this cake with chai spice, which is also delicious. Look for these spice blends in the spice aisle.

a close up from above of cur pieces of Easy Cranberry Spice Cake
Easy Cranberry Spice Cake - a festive, delicious, and easy Christmas cake to whip up this season.

I sprinkled the sugared cranberries all over the top of my cake so that each piece of cake would have some. There are far prettier ways to use these gorgeous berries for decorating your cake, but I like an even distribution for eating. ๐Ÿ˜‹

Easy Cranberry Spice Cake

INGREDIENTS
For the sugared cranberries:
2 tsp meringue powder (I got mine at Michael's)
2 Tbsp water
1 cup fresh cranberries, rinsed and dried
1 cup granulated sugar

For the cake:
1 15.25 oz box yellow cake mix
4 large eggs
1 cup whole milk
1 cup unsalted butter, melted (2 sticks)
2 tsp Chinese five spice or chai spice
2 1/2 cups fresh cranberries, roughly chopped

* These ingredients are based on a cake mix that calls for 3 eggs, 1 cup of water, and 1/2 cup of oil. I added an extra egg, subbed whole milk for the water, and subbed melted butter for the oil, and then doubled the amount of butter.

For the buttercream:
1 1/2 cups unsalted butter, softened (3 sticks)
4 cups powdered sugar
1 tsp Chinese five spice or chai spice
a pinch of salt
1 tsp vanilla extract
1 to 3 Tbsp whipping cream

DIRECTIONS:
1. For the sugared cranberries, mix up the meringue powder and water and whisk until well combined.
2. Throw in your rinsed and dried cranberries and toss to coat.
3. Fill another dish with sugar and scoop the berries out of the meringue mixture. Drop them into the sugar, roll them all around, and set them on a piece of parchment paper to dry. They should be done in a couple of hours. They will feel crisp when you touch them.
4. Preheat oven to 350 degrees and butter a 9 x 13 inch baking dish or pan.
5. Mix up your cake batter, except for the cranberries, and let it sit a few minutes on the counter.
6. Fold in the cranberries and dump into prepared pan. Spread evenly.
7. Bake the cake for the time recommended on your box and then cool completely.
8. For the buttercream, beat butter for 30 seconds and then beat in the powdered sugar, spice, and vanilla.
9. Beat in cream one tablespoon at a time until you have a nice spreadable consistency. I used 2 Tbsp. Beat on high for 2 to 3 minutes until light and fluffy.
10. Frost your cake and decorate with the sugared cranberries.

Easy Cranberry Spice Cake Pin

Friday, October 20, 2017

Easy Gourmet Cupcakes: Maple Bacon Brown Butter

Get ready to love me forever. Brown butter. Maple cream. Bacon. If you're trying to win someone over, use this cupcake.

Easy Gourmet Maple Bacon Brown Butter Cupcakes
These Easy Maple Bacon Brown Butter Cupcakes will be your new favorite breakfast.


The maple cream buttercream is to die for. (Feel free to die, but only if you must.) The cake mix is doctored the way we usually do it, except that this time we're browning the butter first. You can totally do this. Here's a video if you need encouragement. And, to top it all off - BACON!!! Come on now!

Ingredients for Easy Gourmet Maple Bacon Brown Butter Cupcakes


Here's our line up - yellow cake mix, brown butter, crumbled bacon, and maple extract. There's just a couple of extra steps in this recipe, but they are so worth it. And I know you can handle it. You're a cupcake making pro now, after all.

brown butter for Easy Gourmet Maple Bacon Brown Butter Cupcakes


First, let's make us some brown butter. Put two sticks of butter in a heavy bottomed saucepan and melt over medium high heat. As soon as the butter is melted, swirl the pan, or stir with a wooden spoon, continuously until butter browns. If you stop swirling or stirring the butter will splatter, so keep it moving. It should take 3 to 5 minutes. Immediately pour into a heat proof bowl and let cool for a bit. You can cook up your bacon while you're waiting for the butter to cool.

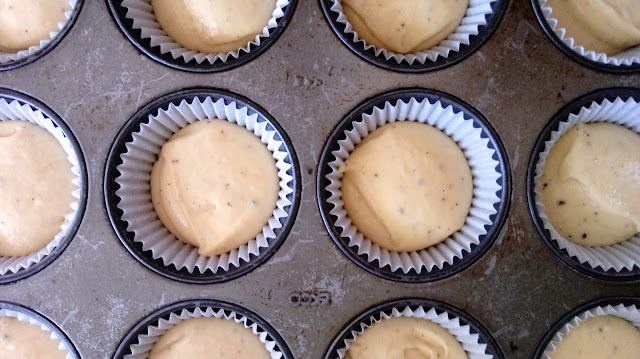
unbaked cupcakes for Easy Gourmet Maple Bacon Brown Butter Cupcakes


baked cupcakes for Easy Gourmet Maple Bacon Brown Butter Cupcakes


When your butter has cooled down from boiling hot to warm you can mix up your cupcake batter. Bake your cakes and then cool.

After your cupcakes are completely cool, crumble your bacon so it's ready to top your cupcakes and work on whipping up the best frosting ever. I say that about every frosting, don't I?

butter for maple cream buttercream


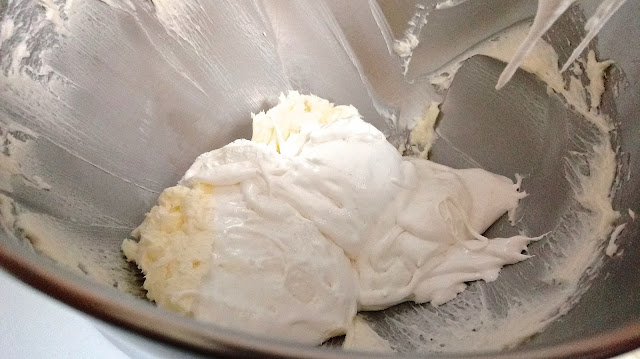
Beat three sticks of softened butter for 30 seconds.

whipped butter for maple cream buttercream


maple cream buttercream in process


Beat in 3 cups powdered sugar. Scrape down the bowl and beat in a pinch of salt and 1 3/4 tsp maple extract. Beat in another 3 cups powdered sugar. Then, beat in some milk a tablespoon at a time until your buttercream is piping consistency - not too stiff, not too soft.

whipped maple cream buttercream in mixing bowl
The fluffiest maple cream buttercream tops my Easy Maple Bacon Brown Butter Cupcakes.


Then, scrape down the bowl again and beat on high for 3 minutes until light and fluffy. So light. So fluffy. So maple-y (happy sigh).

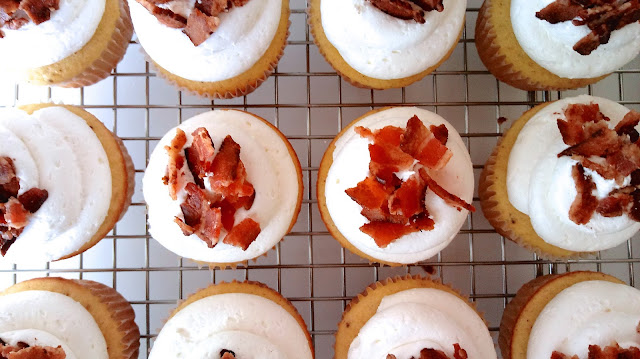
finished Easy Gourmet Maple Bacon Brown Butter Cupcakes
My Easy Maple Bacon Brown Butter Cupcakes will make a morning person out of you.


Pipe the buttercream onto your cupcakes and top with crumbled bacon. I find it's best to kinda push the bacon into the buttercream a bit.

Easy Gourmet Maple Bacon Brown Butter Cupcakes with a cup of coffee
These Easy Maple Bacon Brown Butter Cupcakes make the best breakfast ever.


Welcome to your new favorite breakfast!

Easy Gourmet Maple Bacon Brown Butter Cupcakes
(makes 24 cupcakes)

INGREDIENTS

For the brown butter cupcakes:
1 15.25 oz box yellow cake mix
1 cup unsalted butter (2 sticks)
1 cup whole milk
4 large eggs
* These ingredients are based on a cake mix that calls for 3 eggs, 1 cup of water, and 1/2 cup of oil. I added an extra egg, subbed whole milk for the water, and subbed butter for the oil, and then doubled the amount of butter.

For the maple cream buttercream:
1 1/2 cups unsalted butter, softened
6 cups powdered sugar
1 3/4 tsp maple extract
a pinch of salt
1 to 4 Tbsp milk

1 cup crumbled bacon to top cupcakes (about 8 slices)

DIRECTIONS
1. Preheat oven to 350 degrees and line 2 cupcake pans with 24 cupcake liners.
2. Brown the butter for the cupcakes. Heat 2 sticks of butter over medium high heat until melted. Then, swirl or stir continuously for 3 to 5 minutes until butter is a deep auburn color. Immediately pour into a heat proof bowl and allow to cool to warm.
3. Cook and crumble bacon while butter cools.
4. In a large bowl, add all of the ingredients for the cupcakes, including the brown butter, and mix well using a hand mixer, whisk, or wooden spoon. The batter should be smooth.
5. Scoop a scant 1/4 cup of batter (or use a size 20 cupcake scoop) into each liner.
6. Bake cupcakes for the time recommended on your cake mix box for cupcakes. Check them at the earliest time by inserting a toothpick into the center of one of the cupcakes near the center of the oven until it comes out clean.
7. Let cupcakes cool in pans for 15 minutes and then remove from the pans to cool completely.
8. For the maple cream buttercream, beat 3 sticks of softened butter for 30 seconds.
9. Scrape down the bowl and beat in 3 cups powdered sugar.
10. Scrape down the bowl again and beat in the maple extract and salt.
11. Scrape down the bowl and beat in 3 more cups powdered sugar.
12. Scrape down the bowl again and beat in milk 1 tablespoon at a time until you get a good pipable consistency - not too stiff, not too soft.
13. Scrape down the bowl again and beat on high for 3 minutes until buttercream is light and fluffy.
14. Snip off one corner of a Ziplock freezer bag a little smaller than your piping tip. Slide in your piping tip and set bag in a tall cup to easily fill with buttercream.
15. Twist the top of your bag closed and pipe buttercream onto each cupcake.
16. Immediately top with bacon pushing it into the buttercream a bit.

Easy Gourmet Maple Bacon Brown Butter Cupcakes Pin

Friday, October 13, 2017

Gluten Free Chocolate Pumpkin Jack-o-lantern Cookies

We're still keep'n it easy over here in Loverbee Land. Also, I've got doctored cake mix on the brain as I've been baking through my Easy Gourmet Cupcake series. All that to say, cake mix cookies are how we're doin' this thang.

This recipe goes out to all my gluten free peeps. Hope you guys haven't been feeling left out. I'll be making you guys an easy gourmet gluten free cupcake soon, so stay tuned for that.

Gluten Free Chocolate Pumpkin Jack-o-lantern Cookies
These Gluten Free Chocolate Pumpkin Jack-o-lantern Cookies are rich with chocolate and autumn spice.


These ghoulish cookies are super chocolatey and full of fall spice. They're also crispy on the outside and chewy on the inside - just like a cookie should be. They're the perfect vehicle for Halloween decorating fun.

Ingredients for Gluten Free Chocolate Pumpkin Jack-o-lantern Cookies


I doctored a gluten free chocolate cake mix with pumpkin and cinnamon to make these adorable jack-o-lantern cookies for the boys to decorate. Even in the midst of busyness I have to get my bake on, and the boys need stuff to decorate. That's how we roll up in this place.

I used cinnamon for a more Mexican hot chocolate kinda flavor. I'm not a huge fan of pumpkin pie spice with chocolate. But that's just me. If you love pumpkin pie spice, then go for it.

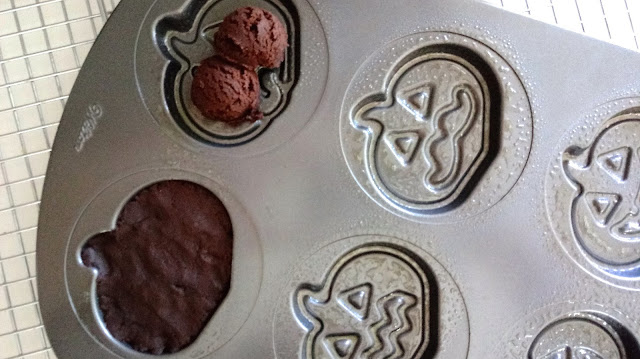
Jack-o-lantern pan for Gluten Free Chocolate Pumpkin Jack-o-lantern Cookies


You'll need a jack-o-lantern pan to make these molded cookies. Wilton makes one you can order online. I suggest buying two pans. That way you can bake all your cookies at once.

Making cookie dough for Gluten Free Chocolate Pumpkin Jack-o-lantern Cookies


First, beat butter, pumpkin, and the spice of your choice until well combined.

Making cookie dough for Gluten Free Chocolate Pumpkin Jack-o-lantern Cookies


Beat in the chocolate cake mix until mixture resembles cookie dough.

cookie dough for Gluten Free Chocolate Pumpkin Jack-o-lantern Cookies


Spray each mold with oil spray and scoop 1/4 cup of dough into each. Press the dough down into each face spreading evenly as you go.

Gluten Free Chocolate Pumpkin Jack-o-lantern Cookies


Bake for 10 minutes and cool cookies completely in the pans. Then, remove them very carefully. I used a butter knife to help dislodge the edges.

candy for decorating Gluten Free Chocolate Pumpkin Jack-o-lantern Cookies


Prep your decorating station by filling a couple of freezer bags with chocolate hazelnut spread and snipping off the corners for piping. Also, open up the candies for easy grabbing.

decorating Gluten Free Chocolate Pumpkin Jack-o-lantern Cookies


My guys had a blast decorating their jack-o-lanterns. I, of course, peeled off the candy to enjoy my cookie. ๐Ÿ˜‰

Gluten Free Chocolate Pumpkin Jack-o-lantern Cookies
Kids will love decorating these Gluten Free Chocolate Pumpkin Jack-o-lantern Cookies.


Gluten Free Chocolate Pumpkin Jack-o-lantern Cookies
(makes 12 jack-o-lantern cookies)

INGREDIENTS
1/2 cup unsalted butter, softened
1/4 cup pumpkin puree
1/2 tsp cinnamon or pumpkin pie spice
15 oz box gluten free chocolate cake mix (I used Betty Crocker's)
oil spray to grease cookie pan

To Decorate:
1/2 cup chocolate hazelnut spread
assorted Halloween candies
* For gluten free eaters, make sure your store-bought spread and candies read "gluten free" on the labels, or check the ingredients very carefully.

DIRECTIONS
1. Preheat oven to 350 degrees.
2. Using a stand or hand mixer, beat butter, pumpkin puree, and spice until creamy and well combined.
3. Beat in all of the chocolate cake mix until mixture comes together. It should look like cookie dough.
4. Spray your jack-o-lantern pan (just in the molds) generously with oil spray.
5. Scoop 4 Tbsp of dough into each jack-o-lantern face pushing down and spreading to fill the mold.
6. Bake for 10 minutes. They will look sunken in a little. That's okay.
7. Let cookies cool in pan completely and then remove them very carefully.
8. If you only have one pan, wipe it out and then spray again with oil spray before re-scooping.
9. When you're ready to decorate, spoon the chocolate hazelnut spread evenly into 2 Ziplock freezer bags, twist tops closed, and secure with twist ties. Snip 1/4 inch off of one corner for kids to use as glue to stick on their candies.

Gluten Free Chocolate Pumpkin Jack-o-lantern Cookies Pin