Showing posts with label holiday baking. Show all posts

Thursday, December 20, 2018

Toasted Almond Bark

I have to admit, I am way behind on all things holiday. Until this week, putting up our Christmas tree was as far as I had gotten. Now that we're on break from our regular homeschooling routine, I'm huff'n to catch up. Enter, our favorite Christmas candy - Toasted Almond Bark.

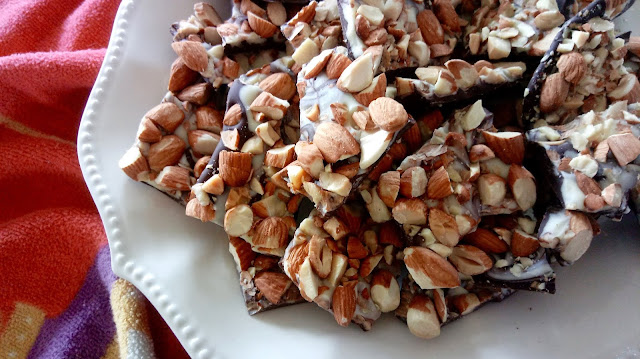
a platter of Toasted Almond Bark next to a red dish cloth


a close up of Toasted Almond Bark on a platter


This Christmas treat is a clear sign for our household that the holidays have arrived, and it's super easy to put together. Tons (and I mean tons) of toasted almonds get gently pressed into swirled dark and white chocolate. It still amazes me how something so simple and easy to make can be so gosh darn delicious!

Wednesday, December 27, 2017

Gorgonzola & Toasted Pecan Sourdough Wreath

2018 is just around the corner, folks! This last recipe of the year goes out to all my peeps with a sourdough starter. I just love fancy-ing up my sourdough for celebrations, and this braided wreath has New Year's Eve cocktail party written all over it. If you don't have a sourdough starter, fear not. You can still make this lovely bread. Just see the directions at the bottom of the recipe.

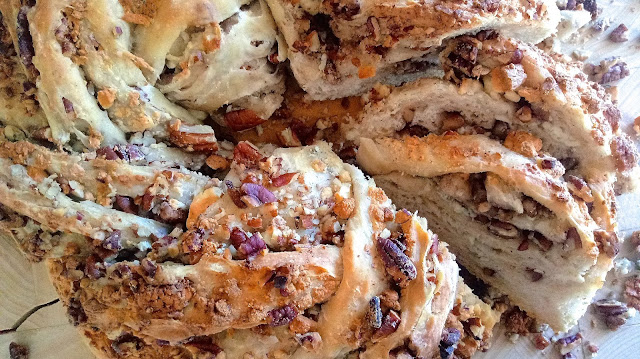
Gorgonzola & Toasted Pecan Sourdough Wreath on a cutting board with a few slices exposed
Elevate your holiday cheese tray with this gorgeous Gorgonzola & Toasted Pecan Sourdough Wreath!


This Gorgonzola and Toasted Pecan Sourdough Wreath is so festive. It's packed with chunks of Gorgonzola and loads of toasted pecans. It's also gorgeous and delicious and perfect for that New year's Eve cheese board.

sourdough mixture in a large stainless steel bowl


I started with the basic sourdough bread recipe I use to make bread. I mixed up the dough the night before and left it to ferment on the counter overnight.

sourdough rolled out into a large rectangle on a floured marble board


The next day I punched down the dough, rolled it out into a large rectangle, and covered it evenly with half a stick of very soft butter.

sourdough rolled out into a large rectangle on a floured marble board and sprinkled with chunks of Gorgonzola and toasted pecans


Then, I sprinkled on the cheese and pecans and pushed them down into the butter and dough.

sourdough filled with gorgonzola and pecans rolled up into a log on a floured marble board


Now comes the fun part. Roll into a long log and pinch the seam closed.

sourdough filled with gorgonzola and pecans rolled up into a log on a floured marble board


sourdough filled with gorgonzola and pecans rolled up into a log and cut in half on a floured marble board


Use a sharp knife to cut the roll in half lengthwise, exposing the goodies.

unbaked Gorgonzola & Toasted Pecan Sourdough Wreath on a floured marble board


Gently braid the two halves trying to keep the filling in the roll as best you can and then twist into a wreath tucking the ends underneath. It's okay if stuff falls out. I just pushed stray pieces of filling back into the dough.

a large clean white garbage bag containing the proofing Gorgonzola & Toasted Pecan Sourdough Wreath


Set on your baking sheet and put it in a proofing bag or large clean garbage bag to prevent a draft from drying out the surface.

proofed Gorgonzola & Toasted Pecan Sourdough Wreath sitting on a large baking sheet


After the wreath has almost doubled in size (about 2 to 4 hours at room temperature) bake at 400 degrees for 35 to 40 minutes.

a top shot of the Gorgonzola & Toasted Pecan Sourdough Wreath on a cutting board with a few slices cut


Wait about 15 minutes before you slice into your bread as the bread will continue to bake out of the oven.

a slice of Gorgonzola & Toasted Pecan Sourdough Wreath sitting upright on a cutting board exposing layers of nuts and cheese
Each slice of this Gorgonzola & Toasted Pecan Sourdough Wreath is studded with chunks of cheese and toasted nuts.


Packed with chunks of cheese and pecans in every slice, this show-stopping bread is bound to impress your new year's guests.

Gorgonzola & Toasted Pecan Sourdough Wreath

Ingredients
3 1/4 cups flour + about 1/2 cup more
1 tsp salt
1 cup sourdough starter
1 cup water
4 Tbsp unsalted butter, room temperature
6 oz crumbled Gorgonzola
2 cups toasted pecans, chopped

Directions
1. Mix 3 1/4 cups flour with the salt, sourdough starter, and water. Cover with plastic wrap and a clean towel and leave on the counter overnight.
2. The next morning, punch down the dough adding in more flour if your dough is too sticky. Roll out into a large rectangle and spread with butter leaving 1 inch of the length bare for the seam.
3. Sprinkle on the cheese and pecans and gently push them down into the butter and dough.
4. Roll into a long log ending at the bare edge and pinch the seam closed.
5. Roll log so that the seam is on the bottom and cut in half lengthwise using a sharp knife.
6. Gently braid the two halves trying to keep the filling in the dough. Then, twist into a wreath tucking the edges underneath.
7. Gently set on a baking sheet and place in a proofing bag or clean garbage bag to prevent a draft from forming a crust.
8. Proof 2 to 4 hours at room temperature or until almost doubled in size.
9. Preheat oven to 400 degrees. Bake for 35 to 40 minutes.
10. Allow bread to cool for 15 minutes before slicing.

If you don't have a sourdough starter you can find ready-to-use bread dough in your grocery store's freezer section. Thaw according to the package directions and skip to step 2.

Gorgonzola and Toasted Pecan Sourdough Wreath Pin 2

Thursday, December 21, 2017

Boston Baked Bean Brittle

Every holiday season I make a batch of nut brittle. Okay, okay, more like two or three. Hee, hee. It's one of our favorite sweet treats. I often opt for a mixed nut and cardamom version from Better Homes and Gardens. It's so delish. This year, I was inspired to do something a little bit different - think outside the box, if you will. So I went all Boston baked beans on my usual recipe.

shards of Boston Baked Bean Brittle on a baking sheet
Isn't the color of this Boston Baked Bean Brittle just gorgeous?


This recipe cooks up in the microwave. Make sure to use a microwave safe bowl and work quickly as the candy hardens within seconds.
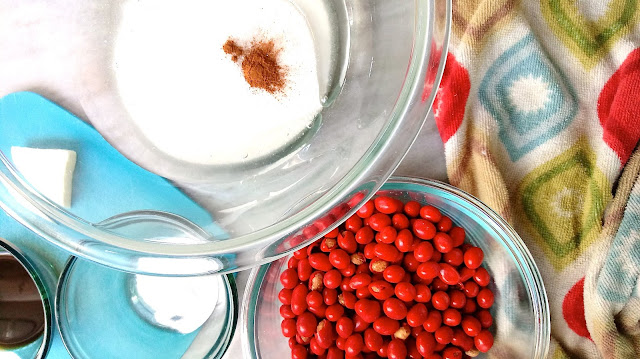
The ingredients for Boston Baked Bean Brittle measured out and sitting on the counter
You'll want to have all of the ingredients for this Boston Baked Bean Brittle measured out and ready to go.


You'll also want to measure out all of your ingredients and have them ready to go. The whole process will take about 8 minutes and you'll want everything to be on hand to dump and stir.
Boston Baked Bean Brittle sitting on a lined baking sheet before being broken into shards
This Boston Baked Bean Brittle needs to be spread as thinly as possible.


Make sure to have your baking sheet already lined as well. You'll need to pour the brittle out onto your pan very quickly and spread as thinly as possible. Thick pieces are a no-go with this brittle. It needs to be very thin to avoid breaking anyone's teeth. Trust me. I had a few thick pieces in my batch. It was no bueno.
shards of Boston Baked Bean Brittle sitting on a lined baking sheet
Boston Baked bean Brittle, you shard perfectly.


Once the brittle is cool and hard, break into shards by hand. Isn't the color just gorgeous?

an off centered photo of shards of Boston Baked Bean Brittle sitting on a lined baking sheet


Happy candy making, folks! See y'all next year! 😉 

Boston Baked Bean Brittle

INGREDIENTS
1 cup granulated sugar
1/2 cup light corn syrup
1/8 tsp cinnamon
1/8 tsp salt
1 1/2 cups Boston baked beans
1 Tbsp butter
1 tsp baking soda
1 tsp vanilla extract

DIRECTIONS
1. Line a large baking sheet with parchment paper or a silicon liner. Measure out all of your ingredients and have them ready to go.
2. In a microwave safe bowl, whisk together the sugar, salt, and cinnamon. Add the corn syrup and microwave on high for 3 minutes.
3. Stir and microwave another 3 minutes.
4. Add nuts and butter and microwave for 2 to 3 minutes more.
5. Quickly stir in the baking soda and vanilla and immediately pour out onto your prepared baking sheet making sure to spread as thinly as possible.
6. Allow to cool and harden. Then break into shards.

Boston Baked Bean Brittle Pin

Sunday, December 17, 2017

Easy Cranberry Spice Cake

This is a fabulous Christmas cake - and it is so fabulously easy, too.

a close up of the Easy Cranberry Spice Cake covered in buttercream and topped with sugared cranberries
These gorgeous sugared cranberries turn this Easy Cranberry Spice Cake into something special.
My Easy Cranberry Spice Cake starts out with a box of yellow cake mix. I know, I know. I'm all about the cake mix these days. We gotta keep things easy, right?

the Easy Cranberry Spice Cake covered in buttercream and topped with sugared cranberries in its baking dish
I baked this Easy Cranberry Spice Cake in a 9 x 13 inch baking dish.


I like to doctor my cake mix by adding an extra egg, subbing whole milk for the water, subbing melted butter for the oil, and then doubling the amount of butter. For this cake, I also added a bunch of fresh cranberries and some Chinese five spice (heck yeah!). I baked it up in a 9 x 13 inch baking pan to keep things easy.

I love 9 x 13 cakes. They are the easiest cakes ever. They aren't as glamorous as layer cakes or as cute as cupcakes, but they really are the easiest and they're just as yummy. You can totally bake this cake into a batch of pretty cupcakes if you are so inclined.

a close up of sugared cranberries sitting on a piece of parchment paper


The sugared cranberries are also a breeze. I dump my cup of berries into a mixture of meringue powder and water, and then toss them into a dish of sugar. Then, they dry out on a piece of parchment paper. Dump, dump, and dry. So easy.

a close up of cut pieces of Easy Cranberry Spice Cake on a serving tray
Aren't these luscious slices of Easy Cranberry Spice Cake tempting?


This lovely cake is very tender and moist. The flavor of the tart berries really pops in your mouth and pairs perfectly with that fabulous spice. And the sweet and fluffy Chinese five spice buttercream? Well, that stuff just sends the whole cake over to amazingly-delicious-ville!

I used Chinese five spice because that's what I had in my pantry. I've also made this cake with chai spice, which is also delicious. Look for these spice blends in the spice aisle.

a close up from above of cur pieces of Easy Cranberry Spice Cake
Easy Cranberry Spice Cake - a festive, delicious, and easy Christmas cake to whip up this season.

I sprinkled the sugared cranberries all over the top of my cake so that each piece of cake would have some. There are far prettier ways to use these gorgeous berries for decorating your cake, but I like an even distribution for eating. 😋

Easy Cranberry Spice Cake

INGREDIENTS
For the sugared cranberries:
2 tsp meringue powder (I got mine at Michael's)
2 Tbsp water
1 cup fresh cranberries, rinsed and dried
1 cup granulated sugar

For the cake:
1 15.25 oz box yellow cake mix
4 large eggs
1 cup whole milk
1 cup unsalted butter, melted (2 sticks)
2 tsp Chinese five spice or chai spice
2 1/2 cups fresh cranberries, roughly chopped

* These ingredients are based on a cake mix that calls for 3 eggs, 1 cup of water, and 1/2 cup of oil. I added an extra egg, subbed whole milk for the water, and subbed melted butter for the oil, and then doubled the amount of butter.

For the buttercream:
1 1/2 cups unsalted butter, softened (3 sticks)
4 cups powdered sugar
1 tsp Chinese five spice or chai spice
a pinch of salt
1 tsp vanilla extract
1 to 3 Tbsp whipping cream

DIRECTIONS:
1. For the sugared cranberries, mix up the meringue powder and water and whisk until well combined.
2. Throw in your rinsed and dried cranberries and toss to coat.
3. Fill another dish with sugar and scoop the berries out of the meringue mixture. Drop them into the sugar, roll them all around, and set them on a piece of parchment paper to dry. They should be done in a couple of hours. They will feel crisp when you touch them.
4. Preheat oven to 350 degrees and butter a 9 x 13 inch baking dish or pan.
5. Mix up your cake batter, except for the cranberries, and let it sit a few minutes on the counter.
6. Fold in the cranberries and dump into prepared pan. Spread evenly.
7. Bake the cake for the time recommended on your box and then cool completely.
8. For the buttercream, beat butter for 30 seconds and then beat in the powdered sugar, spice, and vanilla.
9. Beat in cream one tablespoon at a time until you have a nice spreadable consistency. I used 2 Tbsp. Beat on high for 2 to 3 minutes until light and fluffy.
10. Frost your cake and decorate with the sugared cranberries.

Easy Cranberry Spice Cake Pin

Monday, December 11, 2017

Eggnog Cream Pie

Boy did I have a ball baking up pies for the blog last month. And I have the waste line to prove it. Ha! Here's another holiday gem I just had to share with y'all - Eggnog Cream Pie!

a close up of Eggnog Cream Pie topped with puffs of whipped cream, maraschino cherries and Christmas cookie sprinkles
Want guests to die in their pie? Serve them this gorgeous Eggnog Cream Pie!
This holiday pie has a gorgeous Christmas cookie crust, a rich and creamy eggnog pudding filling, and a fresh and luscious nutmeg & rum whipped cream. It's also topped with bright red maraschino cherries and adorable Christmas cookie sprinkles. Want guests to die in their pie (not literally, of course)? Make this one!

Christmas cookies sitting in a food processor


Christmas cookie crumbs sitting in a food processor


This fantabulous pie starts with a bag of store-bought red and green sprinkled Christmas cookies. Zap 'em in a food processor till you have fine crumbs.

Christmas cookie crust sitting on a rustic baking sheet
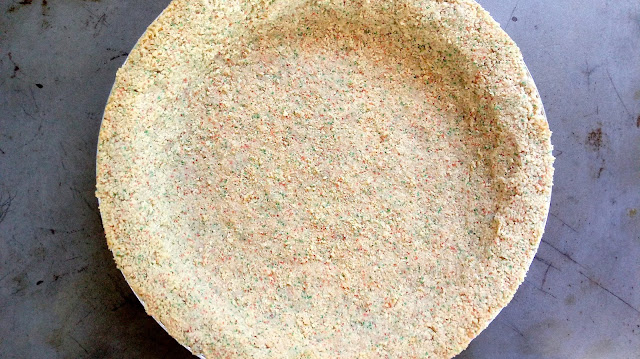
The red and green flecks in this Eggnog Cream Pie crust are so pretty and so very Christmas-y.


Reserve a little bit of cookie crumbs for the top of your pie and mix the rest with melted butter. Press the mixture into your pie plate and bake for 8 minutes.

The red and green flecks in this pie crust are so pretty and so very Christmas-y. 

After your cookie crust has cooled, whisk together a box of vanilla pudding mix with full fat eggnog. Also very Christmas-y.

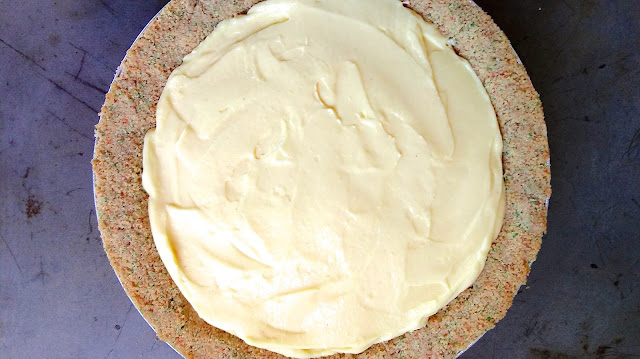
pudding filled Eggnog Cream Pie on a rustic baking sheet

Pour into your crust and refrigerate while you make the whipped cream.

The beautiful whipped cream that tops this Eggnog Cream Pie is spiked with nutmeg and rum. It's quite delectable. Taste with caution as you may end up needing to make a whole new batch just for the pie.

finished Eggnog Cream Pie on a rustic baking sheet
Tada! The finished Eggnog Cream Pie.


Top the pie with puffs of whipped cream and sprinkle with cookie crumbs. Then, top each puff of cream with a maraschino cherry.

Ho, ho, ho! Me-rry Christmas!

a close up of Eggnog Cream Pie sliced
Christmas cookie sprinkles and sweet cherries finish off this fantabulous Eggnog Cream Pie.

Eggnog Cream Pie
(makes 1 deep dish pie)

INGREDIENTS
9 oz bag red and green sprinkled Christmas cookies
5 Tbsp melted butter
5.1 oz box vanilla instant pudding and pie filling
2 1/2 cups full fat eggnog
2 cups whipping cream
1 Tbsp boxed vanilla instant pudding and pie filling mix
2 Tbsp spiced rum (optional, but preferable)
1/2 tsp nutmeg
1/3 cup powdered sugar
about 10 to 12 maraschino cherries

DIRECTIONS
1. Preheat oven to 350 degrees.
2. Throw the whole bag of Christmas cookies in the food processor and zap until they're fine crumbs.
3. Set aside 2 Tbsp of crumbs and mix the rest with 5 Tbsp of melted butter. Press into pie plate and bake for 8 minutes. Cool completely.
4. Whisk together the box of vanilla pudding mix and the eggnog for 3 minutes until nice and thick. Pour into your cooled crust and refrigerate while you make the cream.
5. In the bowl of your stand mixer (I like to put my bowl and whisk in the fridge so they're nice and cold) pour in the cream, the Tbsp of vanilla instant pudding mix, the nutmeg, the rum, and the powdered sugar, and whip together until stiff peaks form.
6. Cut one corner of a Ziploc freezer bag a little smaller than your piping tip, insert tip, and fill with whipped cream.
7. Pipe puffs of cream all around your pie, sprinkle the puffs with the reserved cookie crumbs, and top each one with a maraschino cherry.
8. Refrigerate until ready to serve. Pipe all the leftover whipped cream into a pretty dish and serve alongside your pie.

* You can also just pile all of the whipped cream on top of your pie all at once like a traditional cream pie.

Egg Nog Cream Pie Pin

Monday, November 27, 2017

Fluffy Pumpkin Sourdough Dinner Rolls

I'm a sourdough fanatic. You may already know this about me. I've been converting some of my favorite bread recipes to sourdough starter only recipes in order to eliminate the use of any commercial yeast.

If you've been thinking of jumping on the sourdough band wagon, do it! It is so incredibly rad - and rewarding. You can get started on making your own sourdough starter with instructions from King Arthur Flour.

Lemme just take a second to get a little real with y'all. I used to be intimidated by recipes using yeast, much less a sourdough starter. Trust me when I say that it isn't rocket science. Also, bread dough is VERY forgiving. Keep reading to see some of my bread making imperfections.

a close up of the inside of a Fluffy Pumpkin Sourdough Rolls next to a bowl of soup
These Fluffy Pumpkin Sourdough Dinner Rolls are just perfect alongside any soup or stew.


These Fluffy Pumpkin Sourdough Dinner Rolls are soft and fluffy with subtle hints of pumpkin and spice, and a sourdough flavor that really shines through! They are tremendous slathered with salted butter and go perfectly with any soup or stew you can throw at 'em.

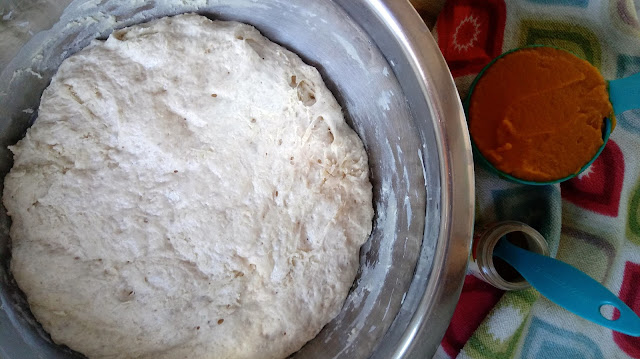
a bowl of sourdough sponge next to a cup of pumpkin puree and a jar of spice


I like to start my process the night before. The longer the dough ferments, the more sourdough flavor your bread will have. I mix up my sponge, cover it tightly, and leave it on the counter to do its thing overnight. The sponge will about double in size and smell delectably yeasty in the morning.

a ball of dough on a floured surface next to a scraper


Knead in the pumpkin, the pumpkin pie spice, and enough flour to make a workable dough. I ended up adding 2 more cups of flour. It just depends on how wet your pumpkin puree is.

pumpkin sourdough cut into pieces on a floured surface next to a bench scraper


Cut the dough into 4 "equal" pieces (as with most things, I just eyeball it). Then, cut each piece into 3 for a total of 12 rolls. My rolls were not all exactly the same size or shape - more or less is good enough for me.

With floured hands, roll each piece into a ball.

a buttered glass dish with unbaked Fluffy Pumpkin Sourdough Dinner Rolls

Place your rolls in a buttered pan, cover with plastic wrap, and let rise at room temperature for 2 to 4 hours, or in a warm place for 1 to 2 hours, or until doubled in size. Again, the slower the proof, the more sourdough flavor your rolls will have.

a close up of puffy proofed unbaked Fluffy Pumpkin Sourdough Dinner Rolls


As you can see, my kneading didn't get the pumpkin as thoroughly mixed in as it could have been. No biggie. The swirl is pretty and the rolls end up just as fluffy and pumpkin flavored as a thoroughly mixed dough.

a close up of baked Fluffy Pumpkin Sourdough Dinner Rolls


Bake the rolls at 400 degrees for about 25 minutes and then brush with melted butter.

Hope I've calmed any sourdough or bread making jitters. Give it a try! Experiment! You won't regret it.

Fluffy Pumpkin Sourdough Rolls sitting in a napkin lined bread basket
Just look at the fluffiness of these Fluffy Pumpkin Sourdough Dinner Rolls!


Fluffy Pumpkin Sourdough Dinner Rolls
(makes 12 large rolls)

INGREDIENTS
2 1/2 cups all purpose flour
1 Tbsp sugar
1 tsp salt
1 cup sourdough starter
3/4 cup water
1 tsp pumpkin pie spice
1 cup pumpkin puree
1 to 2 cups more flour
2 Tbsp melted salted butter

DIRECTIONS
1. Mix the first 5 ingredients to make the sponge. Knead a few minutes until ingredients are well incorporated. Cover with plastic wrap and a clean towel and leave to rise on your countertop overnight or for 7 hours.
2. Knead in the pumpkin puree, pumpkin pie spice, and enough flour to make a workable dough. I used about 2 cups more flour.
3. Use a sharp knife or a bench scraper to cut dough into 4 equal pieces. Then, cut each piece into 3 to make a total of 12 equal portions.
4. Roll each piece into a ball with floured hands.
5. Place rolls with the smoothest side up in a buttered 9 x 13 inch baking pan or dish, cover with plastic wrap, and let rise 2 to 4 hours, or until doubled in size. The rolls will rise faster in a warm place, but will have more sourdough flavor if they rise slower at room temperature.
6. Preheat oven to 400 degrees and bake for about 25 minutes.
7. Immediately brush tops with melted butter.

Fluffy Pumpkin Sourdough Dinner Rolls Pin