Showing posts with label summer. Show all posts

Saturday, July 27, 2019

Blueberry Lemonade Popsicles

We're still settling into our new home even though it's been a year since we moved. New community, new climate... . It takes a while, and I'm all about giving myself and my family all the time and space we need to adjust. Blogging, I'm afraid, has taken a back seat to the scramblings of every day life in our new place. That said, I just had to carve out a few moments to practice taking blog photos in our new home (I am way rusty) and bring you our favorite summer popsicle.

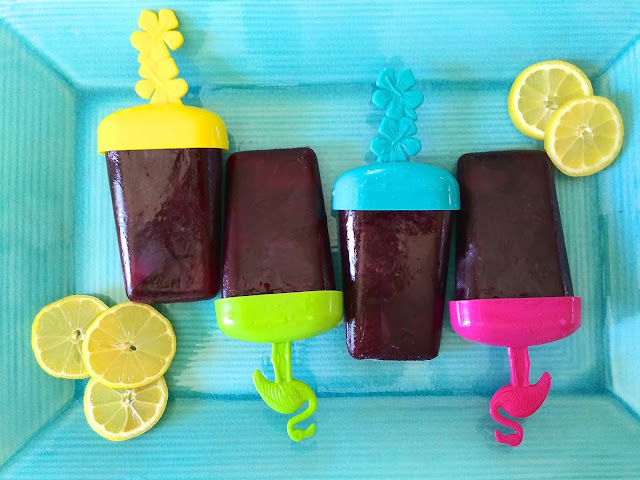
Blueberry Lemonade Popsicles laying on a teal serving platter with fresh slices of lemon
These Blueberry Lemonade Popsicles are the perfect summer treat!


These Blueberry Lemonade Popsicles are everything you want in a summer treat. Fresh blueberries - tart and sweet. Juicy fresh lemon adding just the perfect amount of pucker. Goodness, my mouth is watering already. Let's get started.

Sunday, June 2, 2019

Summer Reading Fun

If your family is anything like mine, keeping the kiddos interested in reading over the summer can be tricky. My littles have a lot of self-motivation when it comes to legos and art, and even looking through books, but not when it comes to actually reading them.

Libraries have great summer reading programs that we've enjoyed in the past, but I wanted to up the ante for my guys this year. I downloaded a simple reading chart and made a prize list with prizes that I think will keep them interested, excited, and driven throughout the whole summer. I hope. Fingers crossed.

summer reading charts and prize list sitting next to baskets of books


Here's a simple summer reading chart I downloaded for free from Busy Momma Media. I like how colorful it is and how many slots there are for books. You also get to insert how many books you will require for what particular prize(s). My guys will need to read 5 books to pick a prize from a prize list I've formulated just for them. Again, I'm hoping for motivation to last the whole summer.

Monday, August 13, 2018

Chocolaty Chocolate Dairy Free Ice Cream

Well, it's been a while, hasn't it? Did you miss me? I sure missed you. Lots going on in the Loverbee household this summer - new job, big move, diet overhaul, homeschool overhaul. More on these fabulous resets at a later date. But before our busy summer ends, I want to share one more ice scream recipe with y'all. This creamy treat is dairy free, intensely chocolaty, and a big favorite in our house.

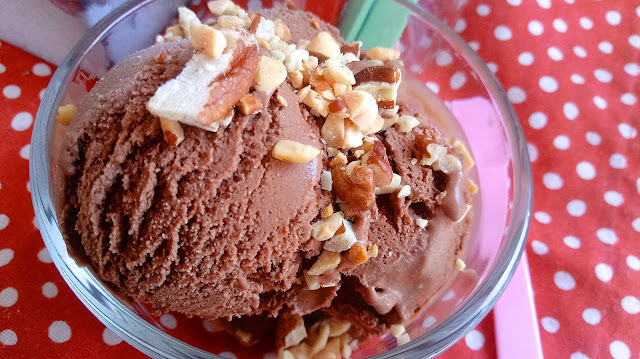
a close up of a scoop of Chocolaty Chocolate Dairy Free Ice Cream in a glass dish on a red and white polk a dot cloth
Our favorite Chocolaty Chocolate Dairy Free Ice Cream!


We make this Chocolaty Chocolate Dairy Free Ice Cream all summer long - all year long, really.

Wednesday, May 30, 2018

Loaded Coffee Ice Cream

If you don't have an ice cream maker yet, get one! I know, how bossy of me. Trust me on this one, though. You're not gonna regret it. See my Amazon pick below for the simple and affordable machine I use. Plus, this ice cream is worth every cent. You'll be glad you invested.

a close up of a double scoop of Loaded Coffee Ice Cream on a sugar cone with the ice cream container and a yellow ice cream scoop in the background on a red cutting board next to a floral towel
Chunks of sugar cone and swirls of hot fudge and caramel send this Loaded Coffee Ice Cream over the top.


This Loaded Coffee Ice Cream is Matthew's all time favorite. Loaded with sugar cone pieces this simple, but lovely, coffee flavored ice cream is a real winner. Oh, yeah. I forgot to mention the swirls of hot fudge and caramel. Silly me. This ice cream is a coffee lovers dream! Think jamoca almond fudge - but better!

Monday, May 14, 2018

Caramel Chai Ice Cream

Last summer I was obsessed with popsicles. (You may have noticed. Hee, hee.) The summer before that I was all about homemade ice cream. I thought I'd share some of our family's favorite creations with y'all since summertime is just around the corner. First on the docket is this fabulous Caramel Chai Ice Cream.

A container of Caramel Chai Ice Cream with a yellow ice cream scoop next to a stack of waffle cone bowls with a waffle cone bowl full of two scoops of the ice cream next to a teal colored ice cream spoon and a colorful floral napkin on a butcher block cutting board


a close up of a waffle cone bowl filled with two scoops of the Caramel Chai Ice Cream and a teal colored ice cream spoon next to a colorful napkin on a butcher block cutting board


Ribbons of caramel get swirled into this perfectly chai spiced easy ice cream. You're gonna love it! If you have yet to purchase an ice cream maker, I highly recommend it. Making homemade ice cream is so fun and so yummy. I have a simple inexpensive machine. See my Amazon picks below to see the one I own. It does a bang up job!!

Monday, April 23, 2018

Birthday Cake Ice Cream Sandwiches

Cake and ice cream. What's a birthday without cake and ice cream, right? Okay, okay. Some of us could totally do without the ice cream. Others of us could replace the whole shebang with a big ol' fat pie. But I digress.

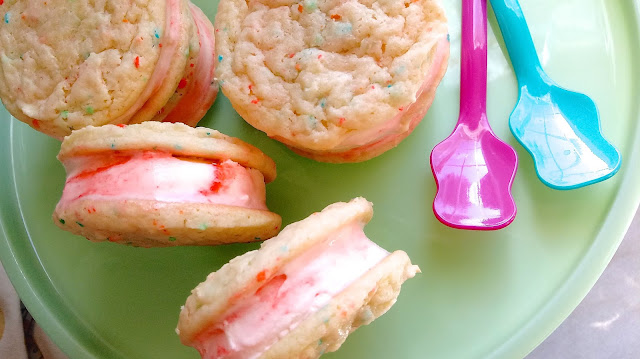
Birthday Cake Ice Cream Sandwiches sitting on a cake plate next to two spoons
Birthday Cake Ice Cream Sandwiches take cake and ice cream to a whole new level!


These Birthday Cake Ice Cream Sandwiches are the whole package. The flavor of vanilla cake speckled with sprinkles, beautifully swirly ice cream sandwiched in the middle, and no utensils or plates required. They're also wonderfully fun and spectacularly celebratory. Oh, and they're super easy to make. That's a win, win, and triple win in my book!

Thursday, August 31, 2017

Fresh Peach, Walnut, and Poppy Seed Green Salad

Move over peach pie. This Fresh Peach, Walnut, and Poppy Seed Green Salad showcases summer fresh peaches like no other dish.

If you're heading to a barbecue over the Labor Day weekend, bring along this fresh green salad loaded with ripe fragrant peaches. I love it alongside anything grilled - chicken, steak, even burgers.

Fresh Peach, Walnut, and Poppy Seed Green Salad  for Labor Day BBQ
Bright and fragrant peaches totally make this Fresh Peach, Walnut, and Poppy Seed Green Salad.
I didn't want to let peach season pass me by before I got to enjoy this lovely salad - and I'm not much into green salads, let me tell you. I'm more of a slaw or marinated veggies kinda gal, but this is one of my favs. It is so fresh and fabulous. And it's pretty too.

Fresh Peach, Walnut, and Poppy Seed Green Salad


Gorgeous green romaine, spinach, and sliced green onions form the perfect bed for bright and beautiful sliced peaches and toasted walnuts. All is tossed with perfectly sweet and tangy poppy seed dressing. So yum!

Fresh Peach, Walnut, and Poppy Seed Green Salad
A drizzle of sweet and tangy poppy seed dressing is just lovely over this Fresh Peach, Walnut, and Poppy Seed Green Salad.


Fresh Peach, Walnut, and Poppy Seed Green Salad

INGREDIENTS
1/2 cup walnuts
1/2 a head of romaine lettuce, washed, dried, and torn
2 large handfuls of spinach, torn
3 to 4 peaches (ripe, but firm), sliced
3 green onions, sliced
about 1/3 cup of poppy seed dressing, maybe more (I love Brianna's)

DIRECTIONS
1. Preheat oven to 350 degrees.
2. Add walnuts to a baking sheet and bake for about 7 minutes until you can smell the walnuts toasting. Watch them carefully so they don't burn. Cool walnuts and then roughly chop.
3. In a large bowl, lay down the romaine and spinach. Sprinkle on peaches and then the green onions and walnuts.
4. Drizzle on the the dressing and toss gently just before serving.


Friday, August 4, 2017

My Favorite Fresh Strawberry Pie

I'm already starting to think about what kinds of goodies I wanna make this Fall. Don't worry, I won't jump into all the pumpkin stuff until an appropriate period of grieving over the end of summer has passed. Or, will I? Just kidding. I totally won't. I don't want to be one of those people. You know who I'm talkin' about.

Fresh Strawberry Pie with Sourdough Crust
This fresh strawberry pie with sourdough crust doesn't last long in my house.

Let's just continue to enjoy summer together with my favorite fresh strawberry pie. There are a bunch of different ways to make this perfect summertime treat. Here's how I like to do it.

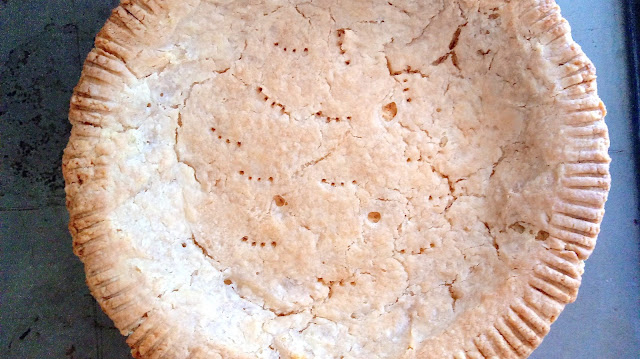
Homemade Sourdough Pie Crust
This sourdough pie crust is rich and flaky with a hint of sourdough flavor.

I start with a sourdough crust. One batch of my sourdough pastry will make two or three 9" pie crusts. I like to make up a batch and freeze the extra crusts for later use. Just make sure you start the process the night before you want pie as the sourdough crust needs time to ferment. When I'm pressed for time (and energy) I like to use a store-bought graham cracker crust. I buy a gluten free one, but a regular graham cracker crust is perfectly fine too. The sweet graham cookie flavor goes perfect with this pie. In fact, I sometimes prefer it.

On a side note, in case you're wondering why I either choose gluten free or sourdough products, it's because wheat can be hard for some people to digest. When I stopped eating wheat products my battle with indigestion all but disappeared. I still eat wheat, occasionally, but I try to ferment it using my sourdough starter whenever I can. The probiotics (friendly yeast and bacteria in my starter) break down the structure of the wheat making it easier to digest. I know, a bit scientific. Bottom line, my tummy feels better when I avoid straight up wheat.

Fresh Strawberry Pie with Sourdough Crust

While my sourdough crust cools, I cook up my gelatin mixture using Taste of Home's recipe. A cornstarch and sugar slurry gets heated until thick. Then, I add in a small box of strawberry Jello.

Fresh Strawberry Pie with Sourdough Crust
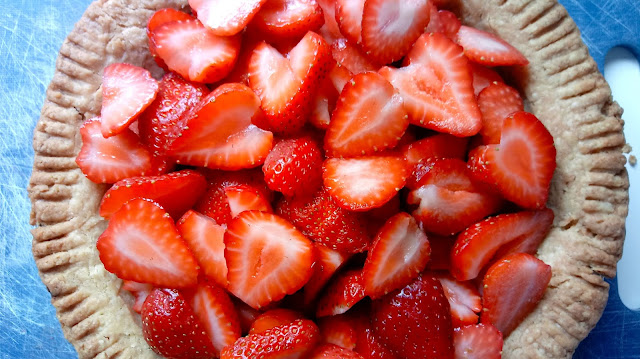
Is there anything better than fresh strawberries piled into a homemade crust?

While my gelatin mixture cools in the fridge, I slice up the strawberries and pile them into my crust.

Fresh Strawberry Pie with Sourdough Crust

The cooled gelatin mixture gets poured on top of the fresh berries and the pie goes into the fridge for a few hours 'til set.

Cool Whip topped fresh strawberry pie
I like to top my fresh strawberry pie with good ol' Cool Whip to keep things easy.

Lastly, I top my pie with a whole honk'n container of Cool Whip. Fresh whipped cream is also good if you don't mind the extra step. I like the flavor, stability, and easiness of Cool Whip, so that's what I usually go with for this pie.

A slice of this pie on a warm summer night is just the right way to enjoy summer. My advice? Strawberry on until the pumpkins take over. 🍓

Fresh Strawberry Pie

INGREDIENTS
1 9" sourdough pie crust using my sourdough pastry recipe (use my recipe to roll out 2 or 3 crusts and freeze the extra crusts for later use) OR use a store-bought graham cracker crust
3/4 cup granulated sugar
2 Tbsp cornstarch
1 cup water
1 3 oz package strawberry Jello
4 cups sliced strawberries
1 8 oz tub Cool Whip, thawed in the fridge

DIRECTIONS
1. Blind bake your sourdough pie crust. (If using a store-bought graham cracker crust, skip down to step 2.) After you've rolled out your crust, lined your pie plate, and rested the crust in the freezer for 5 minutes, gently line your crust with foil and fill with pie weights or dried beans. Bake at 375 degrees for 20 minutes. Remove the foil and pie weights, pierce the bottom of your crust with a fork, and bake another 15 to 20 minutes until golden brown. If the edges are getting too brown, cover them with foil.
2. In a medium saucepan, combine sugar, cornstarch, and water and bring to a boil. Cook and stir for about 2 minutes until thick.
3. Remove from heat and stir in the strawberry Jello. Refrigerate mixture for 15 minutes.
4. Slice your berries, if you haven't already, and arrange them into your cooled pie crust.
5. When the timer is up for your gelatin mixture, pour it over the berries as evenly as possible. Refrigerate pie for a few hours until set.
6. Spread the whole tub of Cool Whip over the top of your pie.
7. Continue to say "yes" to strawberries and "no" to pumpkin.

Fresh Strawberry Pie with Sourdough Crust

Thursday, July 27, 2017

Strawberry Lemonade Popsicles

Nothin' says summer like a glass of strawberry lemonade. Even better than that, try these Strawberry Lemonade Popsicles.

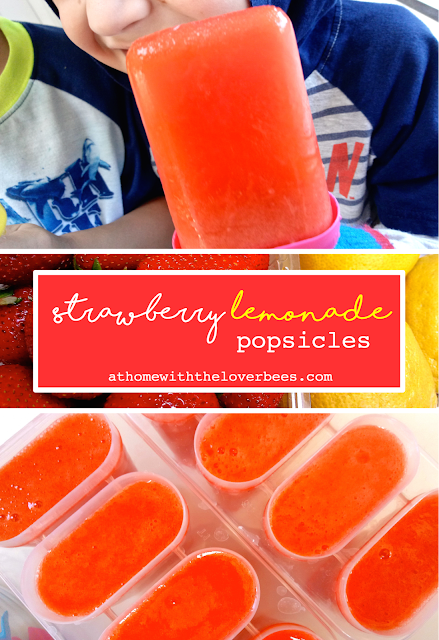
strawberry lemonade popsicles
Nothin' better than a strawberry lemonade popsicle!

These pops are the perfect summertime treat. They kinda taste like a pink Starburst candy - only better and fresher. These pops are sweet and tart and fruity and the prettiest strawberry pink color.

strawberry lemonade made into popsicles

You'll need the zest of one lemon and the juice of three. Also, hull and halve a cup and a half of strawberries.

strawberry lemonade popsicles ready to blend up

Throw your fruit, juice, and zest in a high speed blender with some sugar and water. After blending, give it a taste and add in more water or berries until you like the flavor.

strawberry lemonade popsicles poured into popsicle molds
These strawberry lemonade popsicles boast a pretty strawberry pink hue.

Freeze your pops for about 4 hours or until completely frozen. Just a head's up, it will be hard to wait. 😉

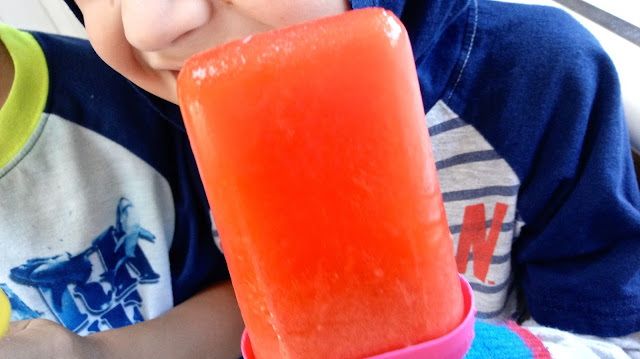
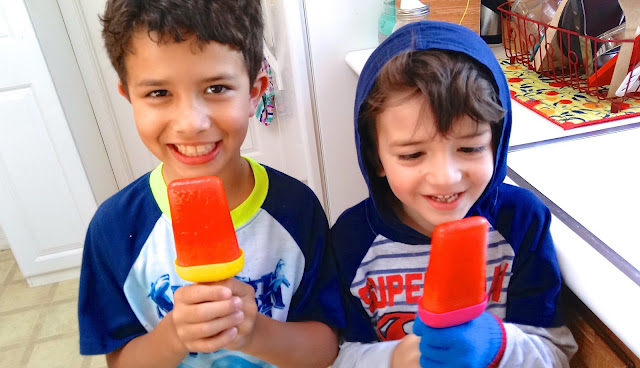
our favorite summertime treat - strawberry lemonade popsicles
The boys enjoying their favorite summertime treat.

Make a batch for your next pool day and watch the kids go nuts. Happy popsicle making!

Strawberry Lemonade Popsicles
Makes 8 to 10 medium popsicles

INGREDIENTS
3 large lemons
1 1/2 to 2 cups halved strawberries
1/2 cup sugar
About 2 cups water

DIRECTIONS
1. Zest one lemon and juice them all.
2. Pour strained lemon juice, lemon zest, strawberries, sugar, and 1 cup of water into a high speed blender and blend on low until the strawberries are broken down.
3. Increase blender speed to high and blend until you can no longer see flecks of lemon zest and mixture is smooth. Taste and add in more water to taste. I ended up using about 2 cups total. You can also add in more berries.
4. Pour into popsicle molds. Mixture may separate. That's okay.
5. Freeze for 4 hours or until completely solid.

strawberry lemonade popsicles on Pinterest

Friday, July 21, 2017

Summer Fun: Art Camp

This was SO MUCH FUN!!! I was texting a friend of mine about arts & crafts when all of a sudden I had a brilliant idea - an arts & crafts weekend. She has a little girl around Mateo's age who also loves creating, so we set a date and got to planning.

arts and crafts

Some of the projects we ended up doing were simple and straightforward and only required the purchase of supplies. Others took a bit more prep and organization.


We decorated pillowcases and hand towels with fabric paint, made our very own comic books, and hammered nails into wooden boards for string art. We also did a directed multi-media project, photograph reproductions, and a segmented watercolor poster. These projects may sound overwhelmingly artsy, but they aren't as complicated as all that - especially in the hands of 7 year olds.

I also had a box of simple art supplies, and a sketch pad, for each child to use if they finished projects early and needed something to do.


You'll need an assortment of fabric paints for the fabric painting project. I found some at the dollar store that were easy to use. I also picked up some solid colored pillowcases and hand towels. You'll need to insert a piece of cardboard inside of the pillowcases as the fabric paint can sometimes bleed through. You could do aprons, cloth napkins, or t-shirts too. White is nice, but as long as it's a solid color, you're good to go.


For the comic books, I simply printed out some comic book pages from Kids Activities Blog and gave each child a stack. They used supplies from their art boxes to write and draw their stories. They also made covers out of folded 11 x 17 inch sheets of paper and then stapled everything together.

string art


string art

I had my hubby cut up a half inch board into 8 x 8 and 8 x 6 inch pieces for our string art project. Each child sanded their own board with a small piece of sand paper. Then, they traced or drew a simple shape onto their boards. After a brief demonstration, the kids hammered 1 inch nails every quarter inch or so along their shapes. I helped them tie the string of their choice at their starting point and they looped the string around the nails in the style they preferred, tying them up at the end.


I prepped for the directed multi-media project by scattering different art supplies down the center of the table like a runner. I used stickers, ribbons, different kinds of tape, tissue paper, glue and glitter glue, scissors, a stapler, a hole punch, plus the supplies in their art boxes. I gave each child an 11 x 17 inch sheet of paper and gave them simple directions that they could interpret any way they wanted. "Draw a square on your page. Make your square into something. Add something shiny to your picture... ." It was a blast to see what each child came up with.


Our photograph reproduction project started with each child taking my camera phone outside and taking pictures of whatever they liked. We loaded the pics onto the computer and they chose which photograph they wanted to reproduce. They started drawing their reproductions with pencils and then chose which supplies to use to add in the color.


Our last project was a segmented watercolor poster. I showed the kids how they could make different patterns on their poster boards using lines. They could keep the lines from touching to make stripes or intersect them to make squares, diamonds, or triangles. Then they painted one segment at a time with water colors.

For those of you interested in planning your own art camp, here are a few tips. 

1. Gather all of your supplies before hand and have materials prepped - copied, cut, organized, packages opened, etc. 
2. You'll also want to make samples of some projects and print out photos or guides of others. 
3. Make sure each child has plenty of room to create. You can make stations for each child or a station for each craft or just make sure you have large spaces cleared for them to spread out.
4. Leave plenty of time for each craft. Different kids work at different paces and some will be more detailed than others. Have something available for children to do if they finish early. I had an art supply box and drawing pad for each child to use whenever they wished.
5. A dollar store is a great place to get all kinds of supplies.
6. If you notice any of the kids getting antsy or bored, take a break for a snack, a stretch, a game of chase outside, a splash in the pool, etc.
7. Get a plastic table cloth to cover your table for activities involving fabric paint, tempera paint, or glitter glue. This will save you many a headache.
8. Ask others to join in on the planning if coming up with all of the activities seems too daunting. Or, have someone else take care of the snacks. My lovely friend actually did all of the cooking for our meals and snacks. It was so nice not to have to think about that aspect of our time together. Also, her food is spectacular. Thanks Sweet Friend.

If you do decide to throw such an affair, send me a pic or post a comment. I'd love to hear about your experience, what projects you chose, and how the kids enjoyed it.

Wednesday, July 5, 2017

Chocolate Mint Vegan Fudgesicles

Things are heat'n up, but we're keep'n it cool with batch after batch of homemade popsicles. Even Nora holds and eats her own popsicle now. We just can't stop with the popsicles over here. I think I may have recently made the same statement regarding nachos. Life is all popsicles and nachos up in here. Ha!


These fudgy lovelies are soooooooooooooooo chocolatey with a hint of mint that make them super refreshing. Yum, Yum!


They're also very easy to make. 

Coconut cream and milk get whisked together with cocoa powder, sugar, vanilla, and mint extract. Easy peasy lemon squeezy - or chocolate squeezy, in this case.


You need to put a little muscle power into whisking the mixture together so that all of the cocoa powder gets incorporated. You can also use a blender if you don't mind washing it out.


I like to pour my mixture into a pitcher or container with a spout for easy pouring and filling.


Also, be prepared for the smell of chocolate and mint to fill the air sending family members poking their heads into the kitchen to see what's up. 😉


Freeze these pops for 4 hours or until completely frozen.


We were all happy campers with this batch of pops. 

Until the next batch,
Mama Loverbee

Chocolate Mint Vegan Fudgesicles

INGREDIENTS
1 can coconut cream
1 can coconut milk
3/4 cup cocoa powder
1 tsp vanilla extract
1/2 tsp peppermint extract
a dash of salt
3/4 to 1 cup granulated sugar

DIRECTIONS
1. Whisk together all of the ingredients starting with 3/4 cup of sugar in a large bowl until cocoa powder is completely incorporated. You can also use a blender.
2. Taste and add in more sugar if you like.
3. Pour into popsicle molds and freeze 4 hours or until completely firm.


Thursday, June 22, 2017

Red, White, and Blue Jello Berry Trifle

The boys are so excited for our town's 4th of July parade. Last year was the first time we attended. They loved seeing kids from the community coming down the parade route with bikes and wagons all decked out in red, white, and blue. They've been waiting all year long to join in on the festivities, so I've been stocking up on decorations at the dollar store.


I've also been planning a little Independence Day fun of my own. I made a Red, White, and Blue Jello Berry Trifle for my cute patriotic cake toppers. Think jello poke cake with a bunch of fresh berries. Every year I struggle with whether to make red, white, and blue Jello parfaits, a Jello poke cake, or strawberry shortcake. This year I combined all three into one big fabulous dessert.


There's nothing like a bunch of beautiful fresh summer berries paired with some extremely processed foods, right? Ha! Just kidding. Let's keep it real though.


I've been trying to keep things more natural and fresh, but when I thought up this dessert I had to go back to the beloved 4th of July ingredients I grew up with - Jello and Cool Whip. So sue me. No, don't sue me. Please don't. Really. Don't.


I started by preparing my jello and cake mix according to the package directions. Any white or vanilla cake mix will do.


When my cake was cool and my Jello was set, I macerated my berries with a little bit of sugar and started putting my trifle together.

I was a little heavy handed with the layers in the beginning of my process and ran out of space on top, so I suggest keeping each layer about half an inch thick.


A layer of cubed cake goes down first. Then a layer of macerated blackberries and blueberries. I topped that with some blue Jello and then a layer of good ol' Cool Whip.

You can see how I ran out of room up top.

More cake goes down, followed by my red berry mixture and then the red Jello.


The trifle gets finished with a final layer of Cool Whip on top.


My cute celebratory cake toppers are the perfect finishing touch atop this gorgeously patriotic trifle. This dessert is cool, fresh, fun, and perfect for a hot summer day of celebrating our beloved country.

Red, White, and Blue Jello Berry Trifle

INGREDIENTS
1 box vanilla or white cake mix + ingredients to prepare according to package directions
1 6 oz box blue Jello
1 6 oz box red Jello (I used raspberry)
2 8 oz tubs Cool Whip, thawed in the fridge
1 pint blueberries, washed and halved
1 pint blackberries, washed and halved
1 pint raspberries, washed and halved
1 1/2 cups strawberries, washed and chopped
2 Tbsp sugar, divided

DIRECTIONS
1. Prepare your cake and Jello mixes according to package directions.
2. When Jello is set and cake is cool, macerate the berries. In a medium bowl, combine blueberries and blackberries with 1 Tbsp sugar and stir together.
3. In another bowl, combine raspberries and strawberries with the other Tbsp of sugar and stir together. Let berries sit 15 minutes.
4. Meanwhile, cut your cake into 1/2 inch cubes. Also, cube your jello.
5. Assemble your trifle by laying down a 1/2 inch layer of cake at the bottom. 
6. Top with all of the blueberry mixture including any juices.
7. Spoon a 1/2 inch layer of blue Jello on top of the berries, followed by a 1/2 inch layer of Cool Whip.
8. Add another 1/2 inch layer of cake.
8. Add all of the raspberry mixture on top of that including any juices.
9. Add a 1/2 inch layer of red jello, followed by another 1/2 inch layer of Cool Whip.

* You will have leftover cake, Jello, and Cool Whip.