Friday, December 15, 2017

Lemon & Pomegranate Syllabubs and a Super Cool Cookbook for Gifting

Calling all history buffs and theatrical patrons! Where my Hamilton peeps at? Have I got a cookbook for you - and an awesome cocktail!

top view of Lemon & Pomegranate Syllabubs garnished with lemon slices and pomegranate arils
Party like it's 1789 with this Lemon & Pomegranate Syllabub.


Before we get to the delicious recipe, let's talk a little Hamilton.

pic of The Hamilton Cookbook
The Hamilton Cookbook, by Laura Kumin, a fellow blogger over at Mother Would Know, is a history/cook book all about the life of Alexander Hamilton, how he lived, the food and drink of the period, and how folks entertained. I just love learning about how other people do (or in this case, did) food. I also absolutely love reviving vintage recipes, and there are some real gems in this book - great recipes for throwing an early American cocktail party this holiday season. 😉

Just to whet your appetite a bit, check out Laura's Lemon Syllabub recipe. Her version of this old fashioned cocktail typical of Hamilton's time is FABULOUS! (Read "fabulous" in a sing-song voice. Go on. Go back and do it! I'll wait.) This drink is part cocktail and part dessert. Laura likens it to lemon mousse atop sweet lemony wine. That's my kinda drink. Are you drooling already?


Okay, I tweaked the recipe to include a touch of pomegranate for festivity's sake. Also, it adds such a pretty pink color to the drink. I'm a sucker for a pretty cocktail.


Alright, Let's do this thang!


Whisk all of the ingredients together until frothy, pour into your glasses, and then leave them on the counter for 2 hours. Easy peasy. Refrigerate until ready to serve.


top view of Lemon & Pomegranate Syllabubs garnished with lemon slices and pomegranate arils


top view of Lemon & Pomegranate Syllabubs garnished with lemon slices and pomegranate arils


I garnished each glass with a slice of lemon, a sprinkling of pomegranate arils, and a pretty straw and spoon.

close up of foam topping of the Lemon & Pomegranate Syllabub
This Lemon & Pomegranate Syllabub sports a mousse-like topping best eaten with a spoon.


The top is so creamy and foamy. Delish!

Christmas is just a few cocktails away and there's still time to order this fabulous cookbook. Cheers!


Lemon & Pomegranate Syllabubs
Adapted from the Lemon Syllabub recipe found in The Hamilton Cookbook by Laura Kumin

(serves 4)


INGREDIENTS

juice of half a medium lemon
1/4 cup granulated sugar
1/3 cup 100% pomegranate juice
1 cup white wine
1 cup heavy cream
lemon slices and pomegranate arils for garnishing

DIRECTIONS

1. Whisk all of the ingredients together and taste. Add in more sugar if you like.
2. Whisk until mixture is nice and frothy.
3. Pour into 4 glasses and leave on counter for 2 hours.
4. Refrigerate until cold and ready to serve.
5. Garnish with slices of fresh lemon and pomegranate arils.

* Laura says the sweeter the wine, the sweeter the syllabub. A dry wine will give you a more tart cocktail.


* Also, you may want to serve the drink with a little spoon for eating the mousse-like topping.


Lemon & Pomegranate Syllabub Pin

Wednesday, December 13, 2017

Sparkling Christmas Sangria

I'm no mixologist, but I make a pretty mean Sparkling Christmas Sangria. It's time for a holiday partay y'all!

Sparkling Christmas Sangria in a glass pitcher with a glass next to it


This recipe makes a big batch, but it can easily be halved for a party of four.

sliced pear, apple, and halved cranberries sitting in a glass pitcher


First, muddle slices of red apple, green apple, pear, and halved cranberries. Aren't the colors just gorgeous?

fresh sliced apple, pear, and cranberries in a glass pitcher with red wine and cranberry juice


fresh sliced apple, pear, and cranberries in a glass pitcher with red wine and cranberry juice


Mix in a bottle of red wine and a bottle of 100% cranberry juice. Cover and refrigerate overnight for the flavors to meld.

Sparkling Christmas Sangria in a glass pitcher with a glass next to it


When you're ready to serve, mix in some spiced rum and some simple syrup to taste. The ratios I use are in the recipe below. I make my mixture a little sweeter than I like it so that it balances out when I add the club soda. If you don't like yours sparkling, mix in less simple syrup.

For a big party batch I mix up my preliminary wine mixture in a large plastic pitcher and then pour it into a pretty drink dispenser before adding in the simple syrup, rum, and club soda. For a half batch, I just use my favorite glass pitcher and everything fits nicely into it.

Merry Christmas folks!

Sparkling Christmas Sangria
(serves 10 to 12 people)

Ingredients
1 red apple, sliced
1 green apple, sliced
1 pear, sliced
1 cup cranberries, halved
1 bottle red wine
1 64 oz bottle 100% cranberry juice
2 cups sugar
2 cups water
6 oz spiced rum or to taste
1.5 liter bottle club soda or sparkling water, cold

DIRECTIONS
1. Dump fruit into a large pitcher and muddle, or smash up, with a wooden spoon.
2. Mix in the wine and cranberry juice, cover, and refrigerate overnight.
3. Make a simple syrup by heating the sugar and water in a small pot over medium low heat, stirring often, until sugar is completely dissolved. Pour into a sealable container and refrigerate overnight as well.
3. Pour sangria mixture into your drink dispenser along with the fruit.
4. Mix in the rum and about 8 oz of the simple syrup.
5. Pour the club soda down the side of the container to preserve as many bubbles as possible. Stir carefully.
6. Taste and add in more simple syrup and rum to taste.

* This recipe is easily halved for a smaller dinner party and should fit nicely into a pretty glass pitcher.

Sparkling Christmas Sangria Pin

Monday, December 11, 2017

Eggnog Cream Pie

Boy did I have a ball baking up pies for the blog last month. And I have the waste line to prove it. Ha! Here's another holiday gem I just had to share with y'all - Eggnog Cream Pie!

a close up of Eggnog Cream Pie topped with puffs of whipped cream, maraschino cherries and Christmas cookie sprinkles
Want guests to die in their pie? Serve them this gorgeous Eggnog Cream Pie!
This holiday pie has a gorgeous Christmas cookie crust, a rich and creamy eggnog pudding filling, and a fresh and luscious nutmeg & rum whipped cream. It's also topped with bright red maraschino cherries and adorable Christmas cookie sprinkles. Want guests to die in their pie (not literally, of course)? Make this one!

Christmas cookies sitting in a food processor


Christmas cookie crumbs sitting in a food processor


This fantabulous pie starts with a bag of store-bought red and green sprinkled Christmas cookies. Zap 'em in a food processor till you have fine crumbs.

Christmas cookie crust sitting on a rustic baking sheet
The red and green flecks in this Eggnog Cream Pie crust are so pretty and so very Christmas-y.


Reserve a little bit of cookie crumbs for the top of your pie and mix the rest with melted butter. Press the mixture into your pie plate and bake for 8 minutes.

The red and green flecks in this pie crust are so pretty and so very Christmas-y. 

After your cookie crust has cooled, whisk together a box of vanilla pudding mix with full fat eggnog. Also very Christmas-y.

pudding filled Eggnog Cream Pie on a rustic baking sheet

Pour into your crust and refrigerate while you make the whipped cream.

The beautiful whipped cream that tops this Eggnog Cream Pie is spiked with nutmeg and rum. It's quite delectable. Taste with caution as you may end up needing to make a whole new batch just for the pie.

finished Eggnog Cream Pie on a rustic baking sheet
Tada! The finished Eggnog Cream Pie.


Top the pie with puffs of whipped cream and sprinkle with cookie crumbs. Then, top each puff of cream with a maraschino cherry.

Ho, ho, ho! Me-rry Christmas!

a close up of Eggnog Cream Pie sliced
Christmas cookie sprinkles and sweet cherries finish off this fantabulous Eggnog Cream Pie.

Eggnog Cream Pie
(makes 1 deep dish pie)

INGREDIENTS
9 oz bag red and green sprinkled Christmas cookies
5 Tbsp melted butter
5.1 oz box vanilla instant pudding and pie filling
2 1/2 cups full fat eggnog
2 cups whipping cream
1 Tbsp boxed vanilla instant pudding and pie filling mix
2 Tbsp spiced rum (optional, but preferable)
1/2 tsp nutmeg
1/3 cup powdered sugar
about 10 to 12 maraschino cherries

DIRECTIONS
1. Preheat oven to 350 degrees.
2. Throw the whole bag of Christmas cookies in the food processor and zap until they're fine crumbs.
3. Set aside 2 Tbsp of crumbs and mix the rest with 5 Tbsp of melted butter. Press into pie plate and bake for 8 minutes. Cool completely.
4. Whisk together the box of vanilla pudding mix and the eggnog for 3 minutes until nice and thick. Pour into your cooled crust and refrigerate while you make the cream.
5. In the bowl of your stand mixer (I like to put my bowl and whisk in the fridge so they're nice and cold) pour in the cream, the Tbsp of vanilla instant pudding mix, the nutmeg, the rum, and the powdered sugar, and whip together until stiff peaks form.
6. Cut one corner of a Ziploc freezer bag a little smaller than your piping tip, insert tip, and fill with whipped cream.
7. Pipe puffs of cream all around your pie, sprinkle the puffs with the reserved cookie crumbs, and top each one with a maraschino cherry.
8. Refrigerate until ready to serve. Pipe all the leftover whipped cream into a pretty dish and serve alongside your pie.

* You can also just pile all of the whipped cream on top of your pie all at once like a traditional cream pie.

Egg Nog Cream Pie Pin

Friday, December 8, 2017

Paper Poinsettia Ornaments

The boys and I have Christmas fever. We can barely focus on our school work these days. Luckily, I had planned out this Christmas ornament craft ahead of time. We make homemade Christmas tree ornaments every year - usually out of scrapbook paper. This year we're making these gorgeous Paper Poinsettia Ornaments, both for our tree and to give away as gifts. The boys are so excited to give them out, and working on them a little each day is scratching that Christmas itch - along with copious amounts of Christmas music and the eating of many a Christmas cookie. 😊

pretty red paper poinsettias sitting in a basket
Our Paper Poinsettia Ornaments turned out fabulous!


We mixed and matched different shades and patterns of red paper to really make the ornaments pop.

kids glueing paper red paper poinsettias together


Here's what you'll need:
several sheets of various red colored and patterned paper (one scrapbook sized page will make about 2 flowers)
a printer
a pencil for tracing (see note below template)
sissors
a glue stick
red and/or yellow pipe cleaners (1 per flower)
red curling or mylar ribbon (6 to 8 inches per flower)
glue gun (optional)

Start by printing and cutting the template below. Trace the cutouts onto the back of your pretty red paper and cut 'em all out. Each poinsettia will require 6 large petals, 5 to 6 small petals, and one circular base.

an example of a petal puckered and folded back for the poinsettia project
sample puckered and bent petals for the paper poinsettias
For each petal, cut an inch up from the bottom, put a generous amount of glue on the back of one end and glue it over the other end to create a pucker at the bottom. Hold that pucker closed for several seconds to secure while also bending the petal back at the middle. Poinsettias are an open flower and you'll want the petals to tilt out instead of in. Allow the petals to dry.

a sample of a base with a ribbon attached for hanging


To the base, glue a six inch piece of curling ribbon to make a loop for hanging. Let dry.

If you have smaller children, you'll want to do this preliminary glue prep for the petals and bases beforehand. It's a little tedious.

a sample of the pipe cleaner centers that go in the middle of the paper poinsettias


To prep the center of the flower, cut a pipe cleaner in half and then in half again to get 4 equal pieces. Curl in the ends of each piece. Then, twist all four pieces together at the middle and separate out the little tendrils.

a demo of the large petals for the paper poinsettias glued onto the base


To put the flowers together (this is the fun part), glue the large petals, one at a time, onto the ribbon side of the base overlapping them a little as you go.

a demo of the small petals glued on top of the large petals for the paper poinsettias


Now glue the smaller petals in the center, also, overlapping them a little as you go.

a finished paper poinsettia sitting on a cute serving tray


Glue a pipe cleaner center smack dab in the middle. This is where you may want to use a glue gun if you have one. Pipe cleaners need a lot of glue to stay secure.

a Christmas tree decorated with the DIY Paper Poinsettia Christmas Tree Ornaments from At Home with the Loverbees


a Christmas tree decorated with the DIY Paper Poinsettia Christmas Tree Ornaments from At Home with the Loverbees


a close up of a Christmas tree decorated with the DIY Paper Poinsettia Christmas Tree Ornaments from At Home with the Loverbees


These paper Poinsettia Ornaments turned our little fake Christmas tree (we call it our "humble" tree) into something spectacular. Aren't they just gorgeous on the tree?

Here's that template:

template for the DIY Paper Poinsettia Christmas Tree Ornaments from At Home with the Loverbees


Note: If you're using 8 1/2 x 11 inch colored paper, you can load the paper right into your printer, making sure to print the template on the back side, and then cut out the petals for use. No tracing! If you're using scrapbook sized paper, you'll need to print out the template (card stock is best) and cut out 1 large petal, 1 small petal, and the base to use for tracing.

Happy Christmas crafting!

DIY Paper Poinsettia Christmas Tree Ornaments Pin

Tuesday, December 5, 2017

Cranberry Bliss Muffins

It's cranberry season y'all! I ADORE cranberries! When cranberry season hits I go cranberry crazy. I cook 'em up in jams with strawberries and raspberries, bake them into pies with apples, make cranberry sauce to fill cakes and cupcakes, add them to chutneys, and especially bake them into my favorite holiday muffin.

Cranberry Bliss Muffin and a muffin cut in half to reveal the cranberries and nuts sitting on a plate next to a cup of black coffee with floral yellow and red polk a dot linens in the background
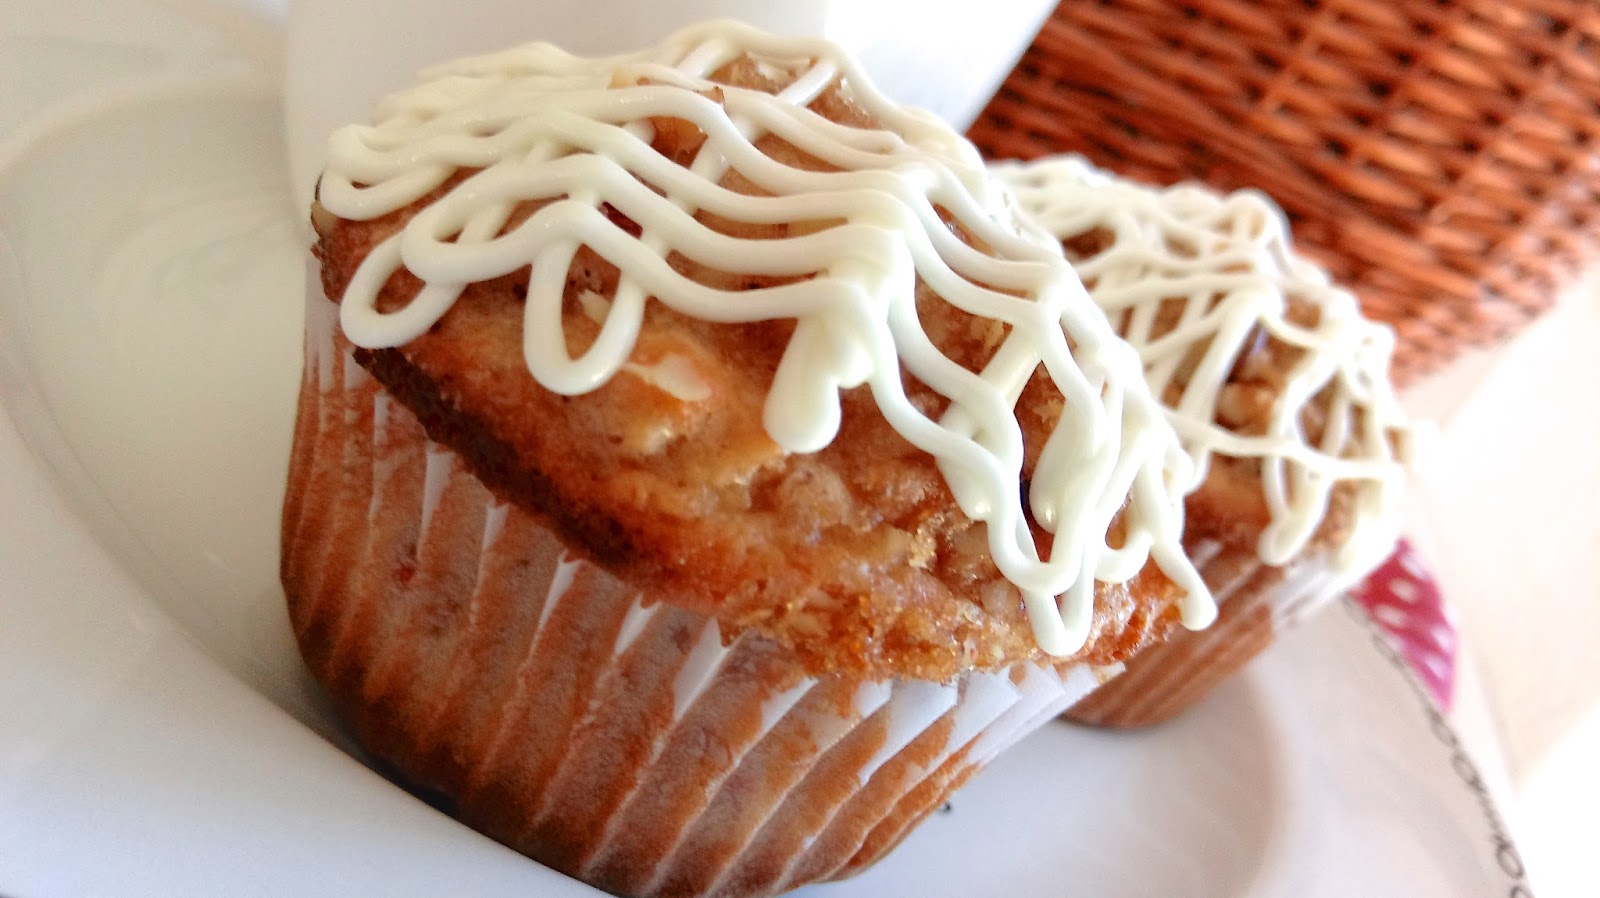
These Cranberry Bliss Muffins are the perfect Christmas brunch muffin.


These Cranberry Bliss Muffins are my favorite Christmas brunch muffin. They're reminiscent of those delicious dessert bars that Starbucks sells around the holidays. Spiked with brown sugar, orange zest, and packed full of fresh cranberries and toasted walnuts, these babies are a muffin made for thoroughly enjoying cranberry season. They're also topped with a brown sugar and walnut streusel and drizzled with white chocolate icing. How holiday is that?

brown sugar and butter getting creamed together in a stainless steel bowl for Cranberry Bliss Muffins


brown sugar and butter creamed together in a stainless steel bowl for Cranberry Bliss Muffins


cranberries, walnuts, and orange zest sitting on top of the muffin batter in a stainless steel bowl


Unlike most muffins, which call for oil, this muffin starts out by creaming butter and brown sugar till fluffy. You really want to beat in some air at this stage to keep those muffins soft and fluffy. You also want to make sure to alternate your wet and dry ingredients, barely stirring them in each time, just until mostly combined. Remember, we want to add the fluff and avoid the tough. At the end, all the goodies get gently folded in.

unbaked Cranberry Bliss Muffins in a muffin pan


baked Cranberry Bliss Muffins in a muffin pan


Top the muffins with a simple streusel, then bake. Let them cool in the pan for 15 to 20 minutes, then remove and cool completely.

a glass bowl full of chopped white chocolate next to a dish of cream and a kitchen towel


You can whip up your white chocolate icing while the muffins cool. Use your microwave to make a quick white chocolate ganache. The cooled ganache gets beaten into a bit of butter and a sprinkling of powdered sugar to make the perfect white chocolate icing for these sweet and festive holiday muffins.

Cranberry Bliss Muffins on a wire cooling rack
I like a double drizzle of white chocolate icing on my Cranberry Bliss Muffins.


Drizzle on as much, or as little, of the icing as you like. I like a lot, so each muffin gets double drizzled. 😋

Cranberry Bliss Muffins on a plate next to a cup of coffee with pretty linens in the background


a close up of a Cranberry Bliss Muffin on a plate


Happy cranberry season folks!

Cranberry Bliss Muffins
(makes about 22 muffins)

INGREDIENTS
For the muffin batter:
1 cup walnuts
3 cups flour
4 tsp baking powder
3/4 tsp salt
1/2 cup unsalted butter, softened
1 1/4 cups packed light brown sugar
2 large eggs
1 1/3 cups whole milk
1 Tbsp orange zest
1 1/2 cups cranberries, roughly chopped

For the streusel:
1/4 cup packed light brown sugar
1/2 cup finely chopped walnuts

For the white chocolate icing:
4 oz white chocolate baking bar, chopped
1/4 cup whipping cream
1/4 cup unsalted butter, softened
1/2 to 1 cup powdered sugar (maybe a cup more)

DIRECTIONS

1. Preheat oven to 350 degrees.
2. Put the nuts for the muffin batter on a sheet pan and bake for about 7 minutes to toast. Cool completely, roughly chop, and set aside.
3. Increase oven temp to 400 degrees.
4. Mix the streusel ingredients together in a small bowl and set aside.
5. In a medium bowl, whisk together the flour, baking powder, and salt. Set aside.
6. In a stand mixer, beat the butter and brown sugar for the muffin batter until light and fluffy.
7. Beat in the eggs, one at a time.
8. Alternate stirring in the flour mixture with the milk, beginning and ending with the flour and stirring until just combined each time. DO NOT OVER MIX!
9. Gently fold in the toasted walnuts, chopped cranberries, and orange zest.
10. Scoop 1/4 cup of batter into about 22 lined muffin cups.
11. Sprinkle tops with the streusel topping.
12. Bake for 20 to 25 minutes or until a toothpick inserted in the center comes out clean.
13. Cool in pans for 15 to 20 minutes, then remove muffins and cool completely.
14. To make the icing, place the chopped white chocolate in a heat proof bowl.
15. In another heat proof dish, heat the cream in your microwave for a minute or less until just simmering. Pour the hot cream over the white chocolate and let sit for 5 minutes. Stir until smooth and then let sit for 15 minutes more.
16. Beat with butter and powdered sugar until smooth. Beat in a little extra powdered sugar if your icing seems too runny.
17. Place icing in a Ziploc freezer bag, twist top closed, and cut a snippet off of one corner (less than 1/4 inch). Squeeze icing onto the tops of cooled muffins.

Cranberry Bliss Muffins Pin At Home with the Loverbees

Saturday, December 2, 2017

Savory Holiday Leftovers Bread Pudding

We're still rock'n the leftovers over here in Loverbee Land. It was just Matthew, the kids, and I this year, and our littles pretty much only eat turkey. That means that the hubbs and I are left with lotsa leftovers. To break up the monotony of turkey dinner plates, I whipped up one of my favorite recipes - savory bread pudding.

Holiday Leftovers Bread Pudding served up in a blue bowl with a dollop of cranberry sauce on top sitting next to the casserole and a red and white polk a dot napkin
This rich and fluffy Savory Holiday Leftovers Bread Pudding takes leftovers to a whole new level!


Savory bread pudding is one of my favorite comfort food dinners. This holiday leftovers version boasts forks full of fluffy eggy custard filled with all kinds of cheese and holiday leftover goodness. Yum and double yum!

I used roasted turkey and broccoli cheddar cornbread stuffing casserole for this recipe. Ham, prime rib roast, or any other holiday meat, and any kind of stuffing or dressing will work just as well.

a buttered casserole dish with a little stuffing sprinkled inside next to a cup full of stuffing and a Christmas towel


This Savory Holiday Leftovers Bread Pudding begins with a buttered 3 quart casserole dish.

a layer of stuffing in a buttered casserole dish


Break up about four cups of stuffing into the bottom of the dish.

chopped roasted turkey layered into a casserole dish


Top with a couple cups of chopped roast turkey. I'm getting hungry already!

a layer of cheese topping the Holiday Leftovers Bread Pudding


Finally, sprinkle on a cup of parmesan, reggiano, and/or asiago shredded cheese.

a large bowl of premixed custard for the Holiday Leftovers Bread Pudding next to the casserole and a whisk


Mix up your custard, pour over the goodies, and push them down into the mixture a bit.

the baked Holiday Leftovers Bread Pudding next to a jar of cranberry sauce and a Christmas dish towel


Bake for 45 to 60 minutes or until the center springs back when you poke it. Keep in mind that the pudding will take longer to cook if your stuffing/dressing was really moist and less time if it was more dry.

a serving of Holiday Leftovers Bread Pudding in a blue bowl topped with a dollop of cranberry sauce sitting next to the casserole and a jar of cranberry sauce
Serve this Savory Holiday Leftovers Bread Pudding with leftover cranberry sauce or gravy.


Serve with leftover cranberry sauce and/or gravy.

Savory Holiday Leftovers Bread Pudding

INGREDIENTS
4 cups leftover stuffing or dressing
2 cups chopped roast turkey or other leftover holiday meat
3/4 to 1 cup parmesan, reggiano, and/or asiago shredded cheese
6 large eggs
3 cups whole milk
1/2 tsp ground dry mustard
3/4 tsp salt
1/4 tsp fresh ground pepper

DIRECTIONS
1. Preheat oven to 350 degrees and butter a 3 quart casserole dish.
2. Break up the stuffing into small chunks into the bottom of your dish.
3. Sprinkle on the turkey and then the cheese.
4. In a large bowl, lightly beat the eggs. Then whisk in the the rest of the ingredients.
5. Pour the custard over the casserole and push the goodies down into the mixture a bit.
6. Bake for 45 minutes to 1 hour or until the top middle springs back when you gently poke it. The more moist your stuffing, the longer it will take to bake.
7. Serve with leftover cranberry sauce and/or gravy.

Holiday Leftovers Bread Pudding Pin