Showing posts with label pie. Show all posts

Friday, December 7, 2018

Easy Sour Cream Crumble Pie

Easy pie is the best kinda pie. All of the amazing homemade flavor with very little of the homemade work? Now we're talk'n.

a close up of a caramel apple Easy Sour Cream Crumble Pie next to a floral napkin
This apple version of my Easy Sour Cream Crumble Pie gets drizzled with salted caramel. Yum!


This Easy Sour Cream Crumble Pie can take on all kinds of glorious forms depending on your favorite fruit filling, spices, and drizzles.

Monday, March 26, 2018

Blackberry Granola Mini Breakfast Pies

These Blackberry Granola Mini Breakfast Pies are simply adorable. I made them for Nora's second birthday and she absolutely loves them. They're semi-healthy and perfect for any special breakfast or brunch.

a close up of a Blackberry Granola Mini Breakfast Pie sitting in a muffin tin

baked Blackberry Granola Mini Breakfast Pies sitting in a muffin tin next to a floral cloth


So, like I said, these puppies are semi-healthy. Since I was making them for my baby girl I used pure maple syrup in the blackberry filling and in the granola topping to keep things natural and lower in sugar. Feel free to add more sweetener to the filling. Just mix and taste adding in more maple syrup until it's as sweet as you like.

Monday, February 12, 2018

Red Velvet Pudding Pie

My poor heart shaped pan. It gets so little use. Sure, it gets to hold the occasional Valentine's Day heart shaped cake, but what kinda life is that? I thought I'd get it out for one more go before it's time to put away all the heart stuff and move on to Easter eggs. So, I put a pudding pie into it.

the finished Red Velvet Pudding Pie decorated with a drizzle of hot fudge, puffs of Cool Whip, and valentine sprinkles on a party table
Make a Red Velvet Pudding Pie to put that heart shaped pan to good use.

A Red Velvet Pudding Pie, that is! This pie is super easy to make. A chocolate cookie crust gets filled with red velvet pudding, drizzled with hot fudge right from the jar, and topped off with puffs of Cool Whip and pretty valentine sprinkles.

Monday, December 11, 2017

Eggnog Cream Pie

Boy did I have a ball baking up pies for the blog last month. And I have the waste line to prove it. Ha! Here's another holiday gem I just had to share with y'all - Eggnog Cream Pie!

a close up of Eggnog Cream Pie topped with puffs of whipped cream, maraschino cherries and Christmas cookie sprinkles
Want guests to die in their pie? Serve them this gorgeous Eggnog Cream Pie!
This holiday pie has a gorgeous Christmas cookie crust, a rich and creamy eggnog pudding filling, and a fresh and luscious nutmeg & rum whipped cream. It's also topped with bright red maraschino cherries and adorable Christmas cookie sprinkles. Want guests to die in their pie (not literally, of course)? Make this one!

Christmas cookies sitting in a food processor


Christmas cookie crumbs sitting in a food processor


This fantabulous pie starts with a bag of store-bought red and green sprinkled Christmas cookies. Zap 'em in a food processor till you have fine crumbs.

Christmas cookie crust sitting on a rustic baking sheet
The red and green flecks in this Eggnog Cream Pie crust are so pretty and so very Christmas-y.


Reserve a little bit of cookie crumbs for the top of your pie and mix the rest with melted butter. Press the mixture into your pie plate and bake for 8 minutes.

The red and green flecks in this pie crust are so pretty and so very Christmas-y. 

After your cookie crust has cooled, whisk together a box of vanilla pudding mix with full fat eggnog. Also very Christmas-y.

pudding filled Eggnog Cream Pie on a rustic baking sheet

Pour into your crust and refrigerate while you make the whipped cream.

The beautiful whipped cream that tops this Eggnog Cream Pie is spiked with nutmeg and rum. It's quite delectable. Taste with caution as you may end up needing to make a whole new batch just for the pie.

finished Eggnog Cream Pie on a rustic baking sheet
Tada! The finished Eggnog Cream Pie.


Top the pie with puffs of whipped cream and sprinkle with cookie crumbs. Then, top each puff of cream with a maraschino cherry.

Ho, ho, ho! Me-rry Christmas!

a close up of Eggnog Cream Pie sliced
Christmas cookie sprinkles and sweet cherries finish off this fantabulous Eggnog Cream Pie.

Eggnog Cream Pie
(makes 1 deep dish pie)

INGREDIENTS
9 oz bag red and green sprinkled Christmas cookies
5 Tbsp melted butter
5.1 oz box vanilla instant pudding and pie filling
2 1/2 cups full fat eggnog
2 cups whipping cream
1 Tbsp boxed vanilla instant pudding and pie filling mix
2 Tbsp spiced rum (optional, but preferable)
1/2 tsp nutmeg
1/3 cup powdered sugar
about 10 to 12 maraschino cherries

DIRECTIONS
1. Preheat oven to 350 degrees.
2. Throw the whole bag of Christmas cookies in the food processor and zap until they're fine crumbs.
3. Set aside 2 Tbsp of crumbs and mix the rest with 5 Tbsp of melted butter. Press into pie plate and bake for 8 minutes. Cool completely.
4. Whisk together the box of vanilla pudding mix and the eggnog for 3 minutes until nice and thick. Pour into your cooled crust and refrigerate while you make the cream.
5. In the bowl of your stand mixer (I like to put my bowl and whisk in the fridge so they're nice and cold) pour in the cream, the Tbsp of vanilla instant pudding mix, the nutmeg, the rum, and the powdered sugar, and whip together until stiff peaks form.
6. Cut one corner of a Ziploc freezer bag a little smaller than your piping tip, insert tip, and fill with whipped cream.
7. Pipe puffs of cream all around your pie, sprinkle the puffs with the reserved cookie crumbs, and top each one with a maraschino cherry.
8. Refrigerate until ready to serve. Pipe all the leftover whipped cream into a pretty dish and serve alongside your pie.

* You can also just pile all of the whipped cream on top of your pie all at once like a traditional cream pie.

Egg Nog Cream Pie Pin

Friday, November 17, 2017

Peanut Butter Banana Cream Pie

Oh me, oh my, it's banana cream pie! Well, actually, it's a Peanut Butter Banana Cream Pie... made with Nutter Butters. Uh, yeah!

Peanut Butter Banana Cream Pie sitting on a cake stand with a floral linen background
Meet this Thanksgiving's favorite cream pie - Peanut Butter Banana Cream Pie!


This pie is rich and creamy and packed with peanut butter and banana flavor. The pie starts with a buttery nutter butter crust, a layer of fresh and fragrant sliced banana, creamy dreamy banana cream pudding, more sliced banana, crumbled Nutter Butters, luscious peanut butter whipped cream, and more crumbled Nutter Butters. Whew! That's a mouthful.

Okay, let's make the crust.

Nutter Butter cookies sitting in a food processor


Nutter Butter cookie crumbs sitting in a food processor


Put 20 Nutter Butters in a food processor to make crumbs.

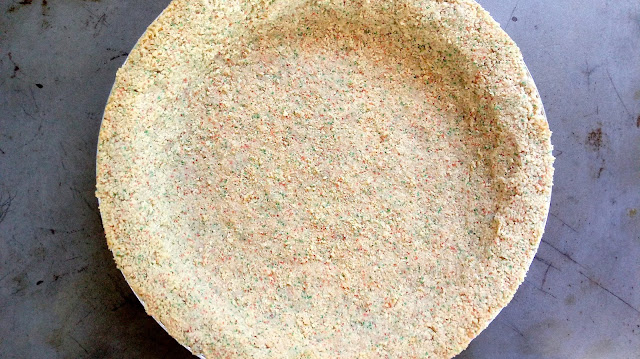
an unbaked Nutter Butter pie crust on a counter top next to a mixing bowl and towel


Add 4 tablespoons of melted butter and press into your pie dish. Bake for 8 minutes and cool completely.

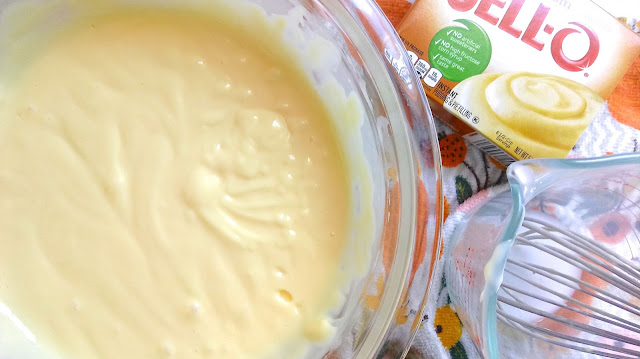
a bowl of banana cream pudding next to a measuring cup and box of pudding mix


Whip up your pudding.

a layer of sliced bananas on a Nutter Butter pie crust sitting on a rustic baking sheet


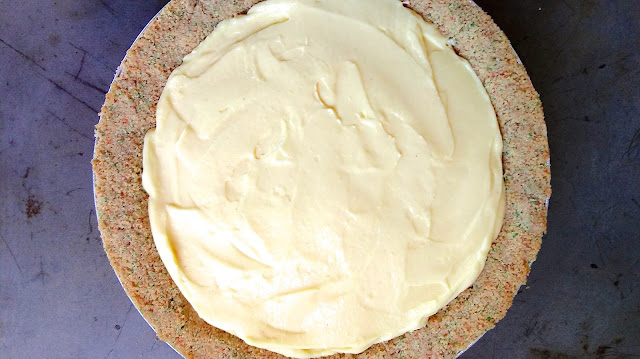
a layer of banana pudding on top of bananas in a Nutter Butter crust sitting on a rustic baking sheet


a layer of crumbled Nutter Butter cookies on top of sliced bananas and banana cream pudding in a Nutter Butter pie crust sitting on a rustic baking sheet


Lay down a layer of sliced bananas, pour in the pudding, lay down more sliced banana, and crumble some Nutter Butters on top of that.

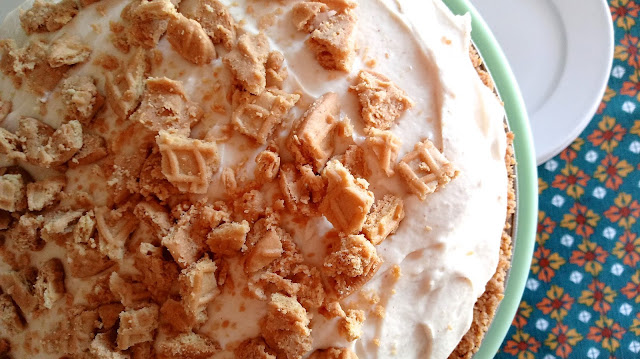
peanut butter whipped cream heaped onto the Peanut Butter Banana Cream Pie
Creamy dreamy peanut butter whipped cream tops this decadent Peanut Butter Banana Cream Pie.


Now, whip up that luscious peanut butter whipped cream. I used a natural peanut butter, but any pb will do. Heap the cream onto your pie and spread evenly.

finished Peanut Butter Banana Cream Pie sitting on a rustic baking sheet


Crumble some more Nutter Butters on top and refrigerate a few hours until set.

If you like cream pie on your Thanksgiving dessert table, then this is a must-make!

Happy Thanksgiving y'all!

Peanut Butter Banana Cream Pie
(makes 1 deep dish pie)

INGREDIENTS
16 oz package Nutter Butter sandwich cookies, divided
4 Tbsp melted butter
5.1 oz packet banana cream pudding/pie filling
2 1/2 cups cold whole milk
3 large bananas, sliced in 1/4 inch slices
1 pint whipping cream
1/4 cup peanut butter
1 Tbsp vanilla pudding mix
1/3 cup powdered sugar
1 tsp vanilla extract

DIRCTIONS
1. Preheat oven to 350 degrees.
2. Zap 20 Nutter Butters in a food processor to make crumbs. Mix in melted butter and press into a deep dish pie tin/plate.
3. Bake for 8 minutes and then allow to cool completely.
4. Whisk banana pudding mix with cold milk for 3 to 5 minutes until thick.
5. Line the bottom of your cooled crust with banana slices and pour in the pudding. Top with another layer of banana slices and then crumble about 4 or 5 more Nutter Butters over the slices. Set in the fridge while you make the whipped cream.
6. In a stand mixer, use the whisk attachment to whisk together the whipping cream, peanut butter, Tbsp of vanilla pudding mix, powdered sugar, and vanilla extract. Start low. As the cream thickens, increase to high and whisk until stiff peaks form. Keep an eye on it so as not to over-whip.
7. Pile the peanut butter cream on top of your pie and spread evenly.
8. Crumble a few more Nutter Butters on top.
9. Refrigerate pie for 2 to 4 hours until firm and set.
10. Keep refrigerated.

Peanut Butter Banana Cream Pie Pin

Tuesday, November 14, 2017

Easy Maple Ice Cream for Pie

Life is full of pie over here at the Loverbee house. Pie, pie, a whole lotta pie. What can I say? It's pie season! Most of our clan are pie and ice cream folk. Me? I can take it or leave it - the ice cream, that is. But if there's maple ice cream in the house, you better believe it's going on my pie.

a container filled with homemade maple ice cream with an ice cream scoop in it next to a pie
Take pie à la mode to a whole new level with this Easy Maple Ice Cream.

This homemade Maple Ice Cream takes pie à la mode to a whole new level - and it's so easy to make. It's rich, it's creamy, and that maple flavor will send you over the moon for pie and ice cream. It goes just perfectly with any fruit pie, crisp, or cobbler. Move over boring vanilla. You've been topped.

I prefer the flavor of maple flavored syrup over pure maple syrup in this ice cream. But that's just me. It gives the ice cream more of that maple bar flavor that I'm totally addicted to. Pure maple syrup is also delicious and what Matthew prefers. You can give both versions a try and decide for yourself.

Ingredients for Easy Maple Ice Cream for Pie prepped and sitting on a pumpkin towel


A jar full of Easy Maple Ice Cream Mix for Pie


Are you ready to see just how easy this is? Okay, pour all of the ingredients into a quart size jar, screw on the lid nice and tight, and shake till the ingredients are all blended together. So easy! If your ingredients are already super cold, you can pour your mixture straight into your ice cream maker.


I like to put my ice cream container in the freezer while my ice cream churns. Then, I spread it in, cover with foil, and freeze for 4 hours or so.

Step aside boring ol' vanilla. Easy Maple Ice Cream is in da house!


When you're ready to scoop, take the ice cream out and let it sit on the counter for 10 minutes to soften up a bit.

Easy Maple Ice Cream for Pie

INGREDIENTS
1 pint whipping cream
3/4 cup whole milk
1/2 cup maple flavored syrup or pure maple syrup
a hefty pinch of Kosher salt

DIRECTIONS
1. Make sure your ice cream maker's freezing component is frozen.
2. Pour all ingredients in a quart size jar, screw on the lid, and shake until blended. Leave in the fridge for 2 to 4 hours until very cold, unless all of your ingredients were already super cold.
3. Pour mixture in your ice cream machine and churn according to your machine's manual. Mine usually takes about 10 to 15 minutes.
4. Scoop into a freezer safe container, cover, and freeze for 4 hours.
5. Take out your ice cream and leave it on the counter to soften for 10 to 15 minutes before scooping.

Easy Maple Ice Cream for Pie Pin At Home with the Loverbees

Saturday, November 11, 2017

Carrot Cardamom Pie with Pistachio Cardamom Whipped Cream

Indian food is my very favorite. When my hubby suggested a carrot pie I turned to my favorite Indian dessert for inspiration - spiced carrot pudding. Ever had it? It's like a rice pudding made with shredded carrot instead of rice. Carrots are cooked down with sugar, milk, golden raisins, and cardamom to make a gorgeous pudding that's garnished with nuts. It's totally delish. These are the fabulous flavors I put into my Carrot Cardamom Pie with Pistachio Cardamom Whipped Cream.

Carrot Cardamom Pie with Pistachio Cardamom Whipped Cream sitting on a rustic baking sheet
Take Thanksgiving to the next level with my Carrot Cardamom Pie and Pistachio Cardamom Whipped Cream.


This Carrot Cardamom Pie is just as creamy and sweet as any ol' pumpkin or sweet potato pie. Roasting the carrots brings out their natural sweetness, and the cardamom adds a happy surprise of exotic autumn flavor to the custard. Oh, and the pistachio cardamom whipped cream? It really is something special. You may end up squirting half the piping bag down your throat. Save some for the pie, will ya!

a sheet pan of roasted carrots


Start by roasting yourself about 8 large carrots.

pureed carrots in a food processor


Once cooled, zap them in a food processor until pureed. You may need to stop your machine and push down the contents a few times.

blind baked sourdough pie crust on a rustic baking sheet


I used a sourdough pastry shell for my pie, but a regular one will do just fine - just make sure it's deep dish. I blind baked my crust for 15 to 20 minutes to avoid a soggy bottom.

unbaked Carrot Cardamom Pie sitting on a rustic baking sheet
baked Carrot Cardamom Pie sitting on a rustic baking sheet


Mix up your carrot custard and pour into your cooled crust. Wrap foil gently around the edges of the pie and bake for 20 minutes. Then, remove the foil and bake another 25 to 30 minutes until a knife inserted in the center comes out clean.

baked and finished Carrot Cardamom Pie with Pistachio Cardamom Whipped Cream
Get foodie fancy with this Carrot Cardamom Pie and Pistachio Cardamom Whipped Cream.


When your pie is completely cool, make your whipped cream and pipe pretty swirls all around it. Or, you can just heap it all on top like a cream pie. This recipe makes a stabilized whipped cream, so you don't have to worry about it turning into a puddle as it sits on your dessert table.

a close up of the Carrot Cardamom Pie with Pistachio Cardamom Whipped Cream
Pretty swirls of Pistachio Cardamom Whipped Cream top this foodie fabulous Carrot Cardamom Pie.
Go "foodie" this Thanksgiving by serving this spin on the classic pumpkin pie and amaze your guests with the delectable flavors of cardamom and pistachio.

Carrot Cardamom Pie with Pistachio Cardamom Whipped Cream on a cake plate with a slice in the background


Carrot Cardamom Pie with Pistachio Cardamom Whipped Cream
(makes 1 deep dish pie)

INGREDIENTS
For the Carrot Cardamom Pie:
about 8 to 10 large carrots
olive oil to coat
1 deep dish single pie crust (I used sourdough pastry)
4 large eggs
3/4 cup sugar
1 tsp cardamom
1/2 tsp cinnamon
12 oz evaporated milk

For the Pistachio Cardamom Whipped Cream:
1 pint whipping cream
1 Tbsp pistachio pudding mix
1/3 cup powdered sugar
a scant 1/2 tsp almond extract
1/4 tsp cardamom

another 1/4 tsp cardamom to garnish

DIRECTIONS
1. Preheat oven to 425 degrees, line a large baking sheet with foil and lightly grease.
2. Peel and cut carrots into similar sized pieces so they roast evenly. Toss them with a little olive oil, dump onto baking sheet, and roast for 30 to 45 minutes or until a knife easily slides into the chunks.
3. Allow carrots to cool and lower oven temp to 375 degrees.
4. Blind bake your crust. Line the crust with foil, fill with 1 lb dry beans, and bake for 15 minutes. Remove foil and beans, push down any puffiness, and bake another 5 minutes. Allow crust to cool for 10 to 15 minutes. Raise the oven temp to 400 degrees.
5. When carrots are cool enough, put them in a food processor and process until you have a puree. I had to stop the machine and push the mixture down several times.
6. Weigh out 15 oz of carrot puree (or about 1 1/2 cups) and place in a bowl.
7. Beat the eggs into the puree and then beat in the rest of the pie ingredients using a whisk.
8. Pour the custard into your cooled crust and lightly wrap the edges with foil. Bake for 20 minutes. Remove the foil and bake another 25 to 30 minutes or until a knife inserted in the center comes out clean. If the edges look too brown as the pie bakes, cover them again with foil.
9. Allow pie to cool completely.
10. Beat all of the ingredients for the whipped cream until stiff peaks form.
11. Pipe rosettes or simple puffs all around the pie, sprinkle a little cardamom over the cream, and serve with any leftover whipped cream. You can also just pile all of the whipped cream onto the pie at once for a more cream pie kinda look.

Carrot Cardamom Pie with Pistachio Cardamom Whipped Cream Pin

Wednesday, November 8, 2017

Honey Nut Pie

It's pie season! Hip, hip, hurray! I'm so excited! Can you tell? Let's talk favorite pie. Mine is pecan. Anybody else with me on that one? It's my very favorite pie of all time, forever and always. Don't worry, I will refrain from writing it a poem.

So, I've been playing around with my favorite pecan pie recipe and I've finally configured a Honey Nut Pie that I am totally in love with. It took a few tries to achieve the perfect combo of nuts and the right amount of honey. It was so worth the arduous work of tasting pie after pie to make this delectable Honey Nut Pie a nut lover's dream.

Cashews, pecans, and almonds mingle with subtle notes of honey in this fabulous Honey Nut Pie.


This pie is packed with chunky cashews, pecans, and almonds all toasted to nutty perfection and mingling together with lovely notes of honey. If you're a nut lover (like me), you are going to love this pie.

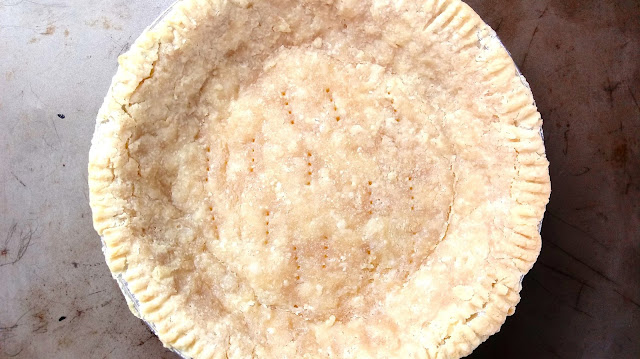
a pre-baked sourdough pie crust sitting on a rustic baking sheet


I like to use sourdough pastry for most of my pies. I usually make up a batch, roll out 2 or 3 crusts, and freeze them so I can pull 'em out whenever I crave pie. 😉 For this pie, I blind bake my crust to avoid a soggy bottom. This is especially helpful with my sourdough pastry recipe as it contains quite a bit of butter.

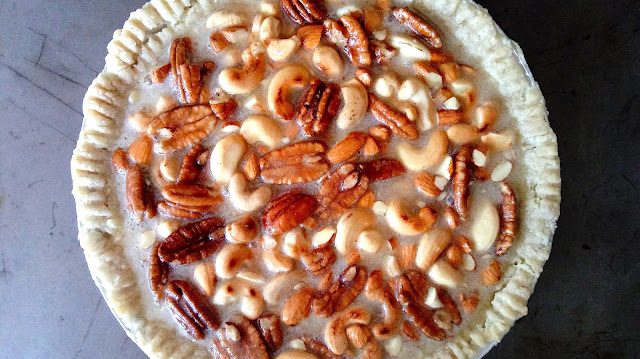
an unbaked nut pie sitting on a rustic baking sheet


This nut-liscious pie bakes in a deep dish crust. When the pie is done baking it will have a slight wobble in the center. No worries. The pie will set up as it cools.

Honey Nut Pie for all the nut lovers out there.


After 5 minutes out of the oven brush the top of the pie with a little warm honey to accentuate the honey flavor.

Spending Thanksgiving with any nut lovers? Bring this Honey Nut Pie along and watch 'em drool.

Honey Nut Pie
(makes one deep dish pie)

INGREDIENTS
1 deep dish single pie crust (I used sourdough pastry)
3 large eggs, lightly beaten
1/4 cup honey
3/4 cup light corn syrup
2/3 cup sugar
1 tsp vanilla extract
1/3 cup melted butter
3/4 cup raw cashews
3/4 cup pecans
1/2 cup almonds, roughly chopped
1 to 2 Tbsp honey for brushing on top

DIRECTIONS

1. Preheat oven to 375 degrees.
2. Toast your cashews (unless they've already been roasted) for 5 to 7 minutes.
3. Line the crust with foil, fill with 1 lb dry beans, and bake for 15 minutes. Remove foil and beans, push down any puffiness, and bake another 5 minutes. Allow to cool for 10 to 15 minutes.
4. Lower oven temp to 350 degrees and whisk together the eggs, honey, corn syrup, sugar, vanilla, and melted butter.
5. Stir in the nuts and fill your pie crust.
6. Cover the edges with foil and bake 25 minutes. While your pie cooks, place a heat safe dish with 1 to 2 Tbsp of honey on top of your oven to warm.
7. Remove foil from pie and bake another 20 to 25 minutes. You can add the foil back onto the edges at any time during baking if they are looking too brown. The finished pie should have a slight wobble in the middle.
8. Once out of the oven, let pie cool for 5 minutes (or until it looks set) and brush the top with warm honey.
9. Let pie cool for 2 hours before cutting.


Wednesday, October 4, 2017

Brown Sugar Apple Pie with Sourdough Crust

It's apple season! Hip, hip, hurray! My boys adore apple picking. When we lived in Orange County we went apple picking every year. We have some dear friends living up in Oak Glen on a property full of gorgeous apple trees. They would let us come up and pick all we wanted. We'd come down the mountain with our trunk packed full of apples. The days and weeks that followed saw apple pies, a batch or two of apple butter, apple breads, apple cakes, applesauce, and apple cider - most of which got frozen to be eaten and shared throughout the holiday season. I was always in a race against myself to use up every last apple. I always won, of course. Such great memories.

We still try to go apple picking each year, but now that we have to pay for our picking we limit ourselves to a few pies worth of apples. Which brings me to my favorite apple pie.

Brown Sugar Topped Apple Pie with Sourdough Crust
My tender, crisp, flaky, and sweet Brown Sugar Apple Pie with Sourdough Crust.
This Brown Sugar Apple Pie is the one I always make - my very favorite version of apple pie.

sourdough pie crust for Brown Sugar Topped Apple Pie
Make a batch of my sourdough pastry, line a few pie pans, and freeze them to be ready for pie season.


I like to use sourdough pastry for the bottom of my pie. It's so very buttery and flaky - my very favorite pie crust. When I'm in a pinch (or not up to making homemade pastry), I use Marie Calendar's deep dish frozen pie crust. Have I mentioned that I have an easy way to make almost every dish I do? Some days just call for easy.

apples for Brown Sugar Topped Apple Pie


For the apple filling, I always opt for half Granny Smith and half Golden Delicious apples. I'm in love with the flavor and texture this combo brings to my pie.

Brown Sugar Topped Apple Pie


I pile them high and deep after I've tossed them with sugar, flour, spices, and lemon juice.

Brown Sugar Topped Apple Pie
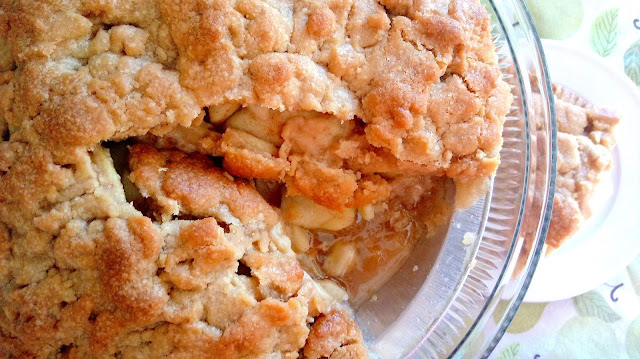
A perfectly tender and crisp brown sugar short crust tops my Brown Sugar Apple Pie.


I top my pie with a brown sugar short crust. This topping is crunchy and sugary, mingles perfectly with those gorgeous tender apples, and melts in your mouth. It's reminiscent of a tender brown sugar shortbread cookie. I got the recipe for this topping from a vintage southern cookbook years ago - one of those compilations of loved recipes put together by a ladies' club. I love those kinds of cookbooks. You can usually find them at second hand stores.

Brown Sugar Topped Apple Pie
This Brown Sugar Apple Pie is my very favorite version of apple pie.


My pies always bake up a little monstrous. It's all the butter. I make no apologies. 😉

Making this pie goes fairly quickly if your bottom pastry is ready to go. I like to make a batch of sourdough pastry, line a few pie tins, and freeze them to pull out whenever I have a hanker'n for pie.

If we've been apple picking, I like to put down four pies right away and freeze them for the holidays. This pie freezes so well. See my freezing instructions below.

Brown Sugar Apple Pie
(Makes one deep dish pie)

INGREDIENTS
1 unbaked deep dish single pie crust (I used sourdough pastry)
3 cups peeled and sliced granny smith apples (about 3 medium)
3 cups peeled and sliced golden delicious apples (about 3 medium)
2 Tbsp flour
3/4 cup granulated sugar
1/2 tsp cinnamon
1/8 tsp nutmeg
1 Tbsp fresh lemon juice

For the topping:
1/2 cup unsalted butter, softened (1 stick)
1/2 cup packed brown sugar
1 cup flour
a hefty pinch of salt

DIRECTIONS
1. Make sure your bottom crust is prepped and waiting for you in the freezer.
2. Preheat oven to 375 degrees.
3. In a large bowl, toss apple slices with the 2 Tbsp flour, the granulated sugar, cinnamon, nutmeg and lemon juice. Set aside.
4. Using a stand or hand mixer, beat 1/2 cup softened butter with the brown sugar and salt for 30 seconds.
5. Add the cup of flour and beat until mixture resembles cookie dough.
6. Place your pastry lined pie pan on top of a large baking sheet to catch any drips.
7. Load apples into pastry leaving behind any juices in the bowl.
8. Press brown sugar mixture evenly over apples trying to seal them up as best you can. You don't have to be exact.
9. Bake for 40 to 45 minutes.

TO FREEZE YOUR PIE: Add an additional Tbsp of flour to your apple mixture before you assemble your pie. Wrap your assembled raw pie very well in foil. Then, wrap the pie very well in plastic wrap. Then, wrap again in foil.

TO BAKE YOUR FROZEN PIE: Unwrap pie, place on a baking sheet, and bake at 400 degrees for 20 minutes. Reduce heat to 375 degrees and bake another 50 to 60 minutes. Cover pie with foil if it browns too quickly.

Brown Sugar Apple Pie Pin