Showing posts with label snack. Show all posts

Saturday, July 27, 2019

Blueberry Lemonade Popsicles

We're still settling into our new home even though it's been a year since we moved. New community, new climate... . It takes a while, and I'm all about giving myself and my family all the time and space we need to adjust. Blogging, I'm afraid, has taken a back seat to the scramblings of every day life in our new place. That said, I just had to carve out a few moments to practice taking blog photos in our new home (I am way rusty) and bring you our favorite summer popsicle.

Blueberry Lemonade Popsicles laying on a teal serving platter with fresh slices of lemon
These Blueberry Lemonade Popsicles are the perfect summer treat!


These Blueberry Lemonade Popsicles are everything you want in a summer treat. Fresh blueberries - tart and sweet. Juicy fresh lemon adding just the perfect amount of pucker. Goodness, my mouth is watering already. Let's get started.

Thursday, April 18, 2019

Chocolate Squash Banana Snack Cake

'Tis the season to indulge in summer squash. I'm a big fan of all squashes and summer squash lends itself so wonderfully to baked goods. Not to mention the bonus of the hidden veggie element in a sweet treat I give to my little ones. Sneaky mommy.

One of my favorite recipes is this Chocolate Squash Banana Snack Cake. Snack cake. Don't you just love those two words together? In my mind, that translates into "eat-any-time-without-feeling-guilty" cake. Ha!

Chocolate Squash Banana Snack Cake slices on a plate next to a glass of milk
Chocolate Squash Banana Snack Cake to make you feel better about eating cake in the middle of the day.

This yummy and easy cake utilizes any type of summer squash you have on hand.

Tuesday, December 5, 2017

Cranberry Bliss Muffins

It's cranberry season y'all! I ADORE cranberries! When cranberry season hits I go cranberry crazy. I cook 'em up in jams with strawberries and raspberries, bake them into pies with apples, make cranberry sauce to fill cakes and cupcakes, add them to chutneys, and especially bake them into my favorite holiday muffin.

Cranberry Bliss Muffin and a muffin cut in half to reveal the cranberries and nuts sitting on a plate next to a cup of black coffee with floral yellow and red polk a dot linens in the background
These Cranberry Bliss Muffins are the perfect Christmas brunch muffin.


These Cranberry Bliss Muffins are my favorite Christmas brunch muffin. They're reminiscent of those delicious dessert bars that Starbucks sells around the holidays. Spiked with brown sugar, orange zest, and packed full of fresh cranberries and toasted walnuts, these babies are a muffin made for thoroughly enjoying cranberry season. They're also topped with a brown sugar and walnut streusel and drizzled with white chocolate icing. How holiday is that?

brown sugar and butter getting creamed together in a stainless steel bowl for Cranberry Bliss Muffins


brown sugar and butter creamed together in a stainless steel bowl for Cranberry Bliss Muffins


cranberries, walnuts, and orange zest sitting on top of the muffin batter in a stainless steel bowl


Unlike most muffins, which call for oil, this muffin starts out by creaming butter and brown sugar till fluffy. You really want to beat in some air at this stage to keep those muffins soft and fluffy. You also want to make sure to alternate your wet and dry ingredients, barely stirring them in each time, just until mostly combined. Remember, we want to add the fluff and avoid the tough. At the end, all the goodies get gently folded in.

unbaked Cranberry Bliss Muffins in a muffin pan


baked Cranberry Bliss Muffins in a muffin pan


Top the muffins with a simple streusel, then bake. Let them cool in the pan for 15 to 20 minutes, then remove and cool completely.

a glass bowl full of chopped white chocolate next to a dish of cream and a kitchen towel


You can whip up your white chocolate icing while the muffins cool. Use your microwave to make a quick white chocolate ganache. The cooled ganache gets beaten into a bit of butter and a sprinkling of powdered sugar to make the perfect white chocolate icing for these sweet and festive holiday muffins.

Cranberry Bliss Muffins on a wire cooling rack
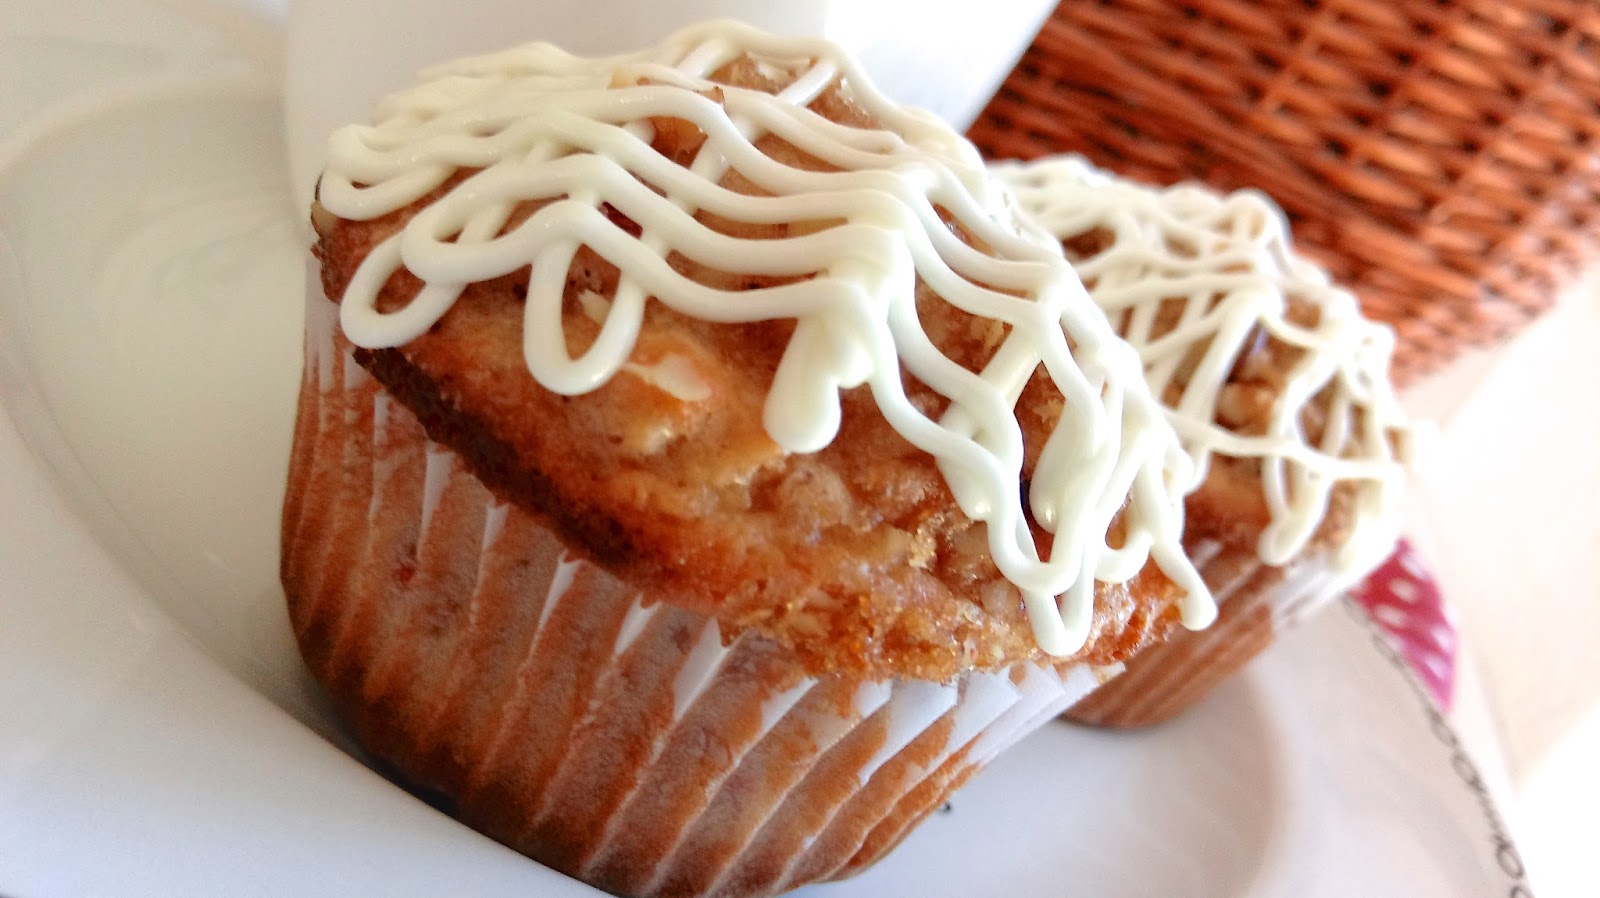
I like a double drizzle of white chocolate icing on my Cranberry Bliss Muffins.


Drizzle on as much, or as little, of the icing as you like. I like a lot, so each muffin gets double drizzled. ๐Ÿ˜‹

Cranberry Bliss Muffins on a plate next to a cup of coffee with pretty linens in the background


a close up of a Cranberry Bliss Muffin on a plate


Happy cranberry season folks!

Cranberry Bliss Muffins
(makes about 22 muffins)

INGREDIENTS
For the muffin batter:
1 cup walnuts
3 cups flour
4 tsp baking powder
3/4 tsp salt
1/2 cup unsalted butter, softened
1 1/4 cups packed light brown sugar
2 large eggs
1 1/3 cups whole milk
1 Tbsp orange zest
1 1/2 cups cranberries, roughly chopped

For the streusel:
1/4 cup packed light brown sugar
1/2 cup finely chopped walnuts

For the white chocolate icing:
4 oz white chocolate baking bar, chopped
1/4 cup whipping cream
1/4 cup unsalted butter, softened
1/2 to 1 cup powdered sugar (maybe a cup more)

DIRECTIONS

1. Preheat oven to 350 degrees.
2. Put the nuts for the muffin batter on a sheet pan and bake for about 7 minutes to toast. Cool completely, roughly chop, and set aside.
3. Increase oven temp to 400 degrees.
4. Mix the streusel ingredients together in a small bowl and set aside.
5. In a medium bowl, whisk together the flour, baking powder, and salt. Set aside.
6. In a stand mixer, beat the butter and brown sugar for the muffin batter until light and fluffy.
7. Beat in the eggs, one at a time.
8. Alternate stirring in the flour mixture with the milk, beginning and ending with the flour and stirring until just combined each time. DO NOT OVER MIX!
9. Gently fold in the toasted walnuts, chopped cranberries, and orange zest.
10. Scoop 1/4 cup of batter into about 22 lined muffin cups.
11. Sprinkle tops with the streusel topping.
12. Bake for 20 to 25 minutes or until a toothpick inserted in the center comes out clean.
13. Cool in pans for 15 to 20 minutes, then remove muffins and cool completely.
14. To make the icing, place the chopped white chocolate in a heat proof bowl.
15. In another heat proof dish, heat the cream in your microwave for a minute or less until just simmering. Pour the hot cream over the white chocolate and let sit for 5 minutes. Stir until smooth and then let sit for 15 minutes more.
16. Beat with butter and powdered sugar until smooth. Beat in a little extra powdered sugar if your icing seems too runny.
17. Place icing in a Ziploc freezer bag, twist top closed, and cut a snippet off of one corner (less than 1/4 inch). Squeeze icing onto the tops of cooled muffins.

Cranberry Bliss Muffins Pin At Home with the Loverbees

Tuesday, August 15, 2017

Back to School: Prepping Our New Homeschool Space

This homeschooling mama is gearing up for the new school year. It starts NEXT WEEK! Ahhhhhhhhhhhhhhhhhhh! I'm only slightly panicking and lamenting and wondering where my summer has gone.

Most moms are rejoicing right now as their kids are starting school. I love those pics of mom's jumping for joy or lounging in a pool while their children, all dressed and ready for school, watch on. Ha! So great. Homeschool mamas enjoy that experience at the end of the school year when summer starts. We all get to take turns celebrating.

Okay, back to gearing up. I've been working on revamping and reorganizing our school area. Nora got her own room this past year and we moved the boys into the nice big room we were using for school. We spent the end of the last school year utilizing half of the dining room for school work and storage. Not a pretty sight.

homeschool back to school
We've got the benefit of sweet morning sunlight flooding our new homeschool space.

Fortunately, we just got rid of an old couch that was on its last leg. That cleared up a whole bunch of space in our spacious living room. I divided the room in two and moved in a work table and a couple of bookcases to house our school supplies. Now my dining room is free to be pretty again. That is very happy for me. ๐Ÿ˜‚

back to school homeschool space

A new space is exciting and encouraging for me and the boys as we jump into a new school year. When I was little new clothes, new school supplies, and a brand new backpack and lunch box helped launch me into a new school year with excitement and a better attitude than I would have had otherwise. Since we homeschool we don't really need a lot of that same equipment that worked so well to motivate me, so I'm getting creative.

homeschool back to school supplies

Along with our new work space, some new supplies gorgeously displayed and a slew of exciting school snacks on my docket are just the right touches to boost our morale as we get back to formal learning.

back to school snack mix
An easy back to school snack mix made up of our favorite snacks.


To kick things off I put together a quick snack mix full of the boys' favorite store-bought snackies. I filled a big jar with cheese crackers, BBQ kettle chips, pretzels, and cheese puffs. Having something like this on hand makes my life so much easier. We can grab a handful without losing too much traction when we're right in the middle of something.

I've also been trying to anticipate the Nora factor. I'm using the bottom shelves of our new school storage area for wood puzzles and baskets of toys that will, hopefully, distract our little princess from distracting us during school time. I'll let y'all know how that goes. I'm not super hopeful, but I gotta try. Wish us luck.

Stay tuned for one of my favorite new school-time snack recipes.

Tuesday, April 11, 2017

The Huevo-dilla

The Huevo-dilla! This is all Matthew's doing. He named it too. A stroke of husband genius, I tell you.


I think it was a Sunday night and I didn't want to cook - I never want to cook on Sunday nights. Matthew took the reigns of the operation and made a quesadilla with a fried egg and some Tapatio hot sauce sprinkled inside of it. A legend was born - at least in our household. We joke that if we ever started up a food truck it would be a Huevo-dilla truck. Perfect street food. You could fancy it up in all kinds of ways too.

This is what we cook when we're too late or too tired to run into town, we don't want to cook, or just because we're craving one. It often serves as our Sunday night meal.


The trick is the fried egg. You want it a little runny, but not too runny. It needs to be just right so that when you bite into your Huevo-dilla, the egg yolk pops and just enough yolk oozes out to moisten your dilla but not to turn it into a big soggy mess. Although egg yolk dripping down your hand may not be such a bad thing.

If you're ever hit'n the food truck scene and you see a Huevo-dilla truck, look for me. ๐Ÿ˜‰

The Huevo-dilla

INGREDIENTS
2 corn tortillas
About ½ cup of shredded sharp cheddar cheese
1 large egg
a few dashes of Tapatio hot sauce
olive oil spray
salt & pepper to taste

DIRECTIONS
1. Heat a skillet or the flat side of a grill pan over medium high heat.
2. Place corn tortillas on your pan and toast one side. Flip them and add ¼ cup cheese on top of each.
3. Meanwhile, in another skillet or on the other side of the grill pan, spray some olive oil.
4. Crack your egg and sprinkle with salt and pepper. Cook 2 to 3 minutes until edges look cooked, then flip. Cook another couple of minutes until the yolk seems almost over medium - but just barely. You want to keep it a little runny.
5. Place your egg on top of one of the cheese covered tortillas. Add a few dashes of Tapatio and cover with other tortilla.
6. Be happy!