Friday, December 8, 2017

Paper Poinsettia Ornaments

The boys and I have Christmas fever. We can barely focus on our school work these days. Luckily, I had planned out this Christmas ornament craft ahead of time. We make homemade Christmas tree ornaments every year - usually out of scrapbook paper. This year we're making these gorgeous Paper Poinsettia Ornaments, both for our tree and to give away as gifts. The boys are so excited to give them out, and working on them a little each day is scratching that Christmas itch - along with copious amounts of Christmas music and the eating of many a Christmas cookie. 😊

pretty red paper poinsettias sitting in a basket
Our Paper Poinsettia Ornaments turned out fabulous!


We mixed and matched different shades and patterns of red paper to really make the ornaments pop.

kids glueing paper red paper poinsettias together


Here's what you'll need:
several sheets of various red colored and patterned paper (one scrapbook sized page will make about 2 flowers)
a printer
a pencil for tracing (see note below template)
sissors
a glue stick
red and/or yellow pipe cleaners (1 per flower)
red curling or mylar ribbon (6 to 8 inches per flower)
glue gun (optional)

Start by printing and cutting the template below. Trace the cutouts onto the back of your pretty red paper and cut 'em all out. Each poinsettia will require 6 large petals, 5 to 6 small petals, and one circular base.

an example of a petal puckered and folded back for the poinsettia project
sample puckered and bent petals for the paper poinsettias
For each petal, cut an inch up from the bottom, put a generous amount of glue on the back of one end and glue it over the other end to create a pucker at the bottom. Hold that pucker closed for several seconds to secure while also bending the petal back at the middle. Poinsettias are an open flower and you'll want the petals to tilt out instead of in. Allow the petals to dry.

a sample of a base with a ribbon attached for hanging


To the base, glue a six inch piece of curling ribbon to make a loop for hanging. Let dry.

If you have smaller children, you'll want to do this preliminary glue prep for the petals and bases beforehand. It's a little tedious.

a sample of the pipe cleaner centers that go in the middle of the paper poinsettias


To prep the center of the flower, cut a pipe cleaner in half and then in half again to get 4 equal pieces. Curl in the ends of each piece. Then, twist all four pieces together at the middle and separate out the little tendrils.

a demo of the large petals for the paper poinsettias glued onto the base


To put the flowers together (this is the fun part), glue the large petals, one at a time, onto the ribbon side of the base overlapping them a little as you go.

a demo of the small petals glued on top of the large petals for the paper poinsettias


Now glue the smaller petals in the center, also, overlapping them a little as you go.

a finished paper poinsettia sitting on a cute serving tray


Glue a pipe cleaner center smack dab in the middle. This is where you may want to use a glue gun if you have one. Pipe cleaners need a lot of glue to stay secure.

a Christmas tree decorated with the DIY Paper Poinsettia Christmas Tree Ornaments from At Home with the Loverbees


a Christmas tree decorated with the DIY Paper Poinsettia Christmas Tree Ornaments from At Home with the Loverbees


a close up of a Christmas tree decorated with the DIY Paper Poinsettia Christmas Tree Ornaments from At Home with the Loverbees


These paper Poinsettia Ornaments turned our little fake Christmas tree (we call it our "humble" tree) into something spectacular. Aren't they just gorgeous on the tree?

Here's that template:

template for the DIY Paper Poinsettia Christmas Tree Ornaments from At Home with the Loverbees


Note: If you're using 8 1/2 x 11 inch colored paper, you can load the paper right into your printer, making sure to print the template on the back side, and then cut out the petals for use. No tracing! If you're using scrapbook sized paper, you'll need to print out the template (card stock is best) and cut out 1 large petal, 1 small petal, and the base to use for tracing.

Happy Christmas crafting!

DIY Paper Poinsettia Christmas Tree Ornaments Pin

Tuesday, December 5, 2017

Cranberry Bliss Muffins

It's cranberry season y'all! I ADORE cranberries! When cranberry season hits I go cranberry crazy. I cook 'em up in jams with strawberries and raspberries, bake them into pies with apples, make cranberry sauce to fill cakes and cupcakes, add them to chutneys, and especially bake them into my favorite holiday muffin.

Cranberry Bliss Muffin and a muffin cut in half to reveal the cranberries and nuts sitting on a plate next to a cup of black coffee with floral yellow and red polk a dot linens in the background
These Cranberry Bliss Muffins are the perfect Christmas brunch muffin.


These Cranberry Bliss Muffins are my favorite Christmas brunch muffin. They're reminiscent of those delicious dessert bars that Starbucks sells around the holidays. Spiked with brown sugar, orange zest, and packed full of fresh cranberries and toasted walnuts, these babies are a muffin made for thoroughly enjoying cranberry season. They're also topped with a brown sugar and walnut streusel and drizzled with white chocolate icing. How holiday is that?

brown sugar and butter getting creamed together in a stainless steel bowl for Cranberry Bliss Muffins


brown sugar and butter creamed together in a stainless steel bowl for Cranberry Bliss Muffins


cranberries, walnuts, and orange zest sitting on top of the muffin batter in a stainless steel bowl


Unlike most muffins, which call for oil, this muffin starts out by creaming butter and brown sugar till fluffy. You really want to beat in some air at this stage to keep those muffins soft and fluffy. You also want to make sure to alternate your wet and dry ingredients, barely stirring them in each time, just until mostly combined. Remember, we want to add the fluff and avoid the tough. At the end, all the goodies get gently folded in.

unbaked Cranberry Bliss Muffins in a muffin pan


baked Cranberry Bliss Muffins in a muffin pan


Top the muffins with a simple streusel, then bake. Let them cool in the pan for 15 to 20 minutes, then remove and cool completely.

a glass bowl full of chopped white chocolate next to a dish of cream and a kitchen towel


You can whip up your white chocolate icing while the muffins cool. Use your microwave to make a quick white chocolate ganache. The cooled ganache gets beaten into a bit of butter and a sprinkling of powdered sugar to make the perfect white chocolate icing for these sweet and festive holiday muffins.

Cranberry Bliss Muffins on a wire cooling rack
I like a double drizzle of white chocolate icing on my Cranberry Bliss Muffins.


Drizzle on as much, or as little, of the icing as you like. I like a lot, so each muffin gets double drizzled. 😋

Cranberry Bliss Muffins on a plate next to a cup of coffee with pretty linens in the background


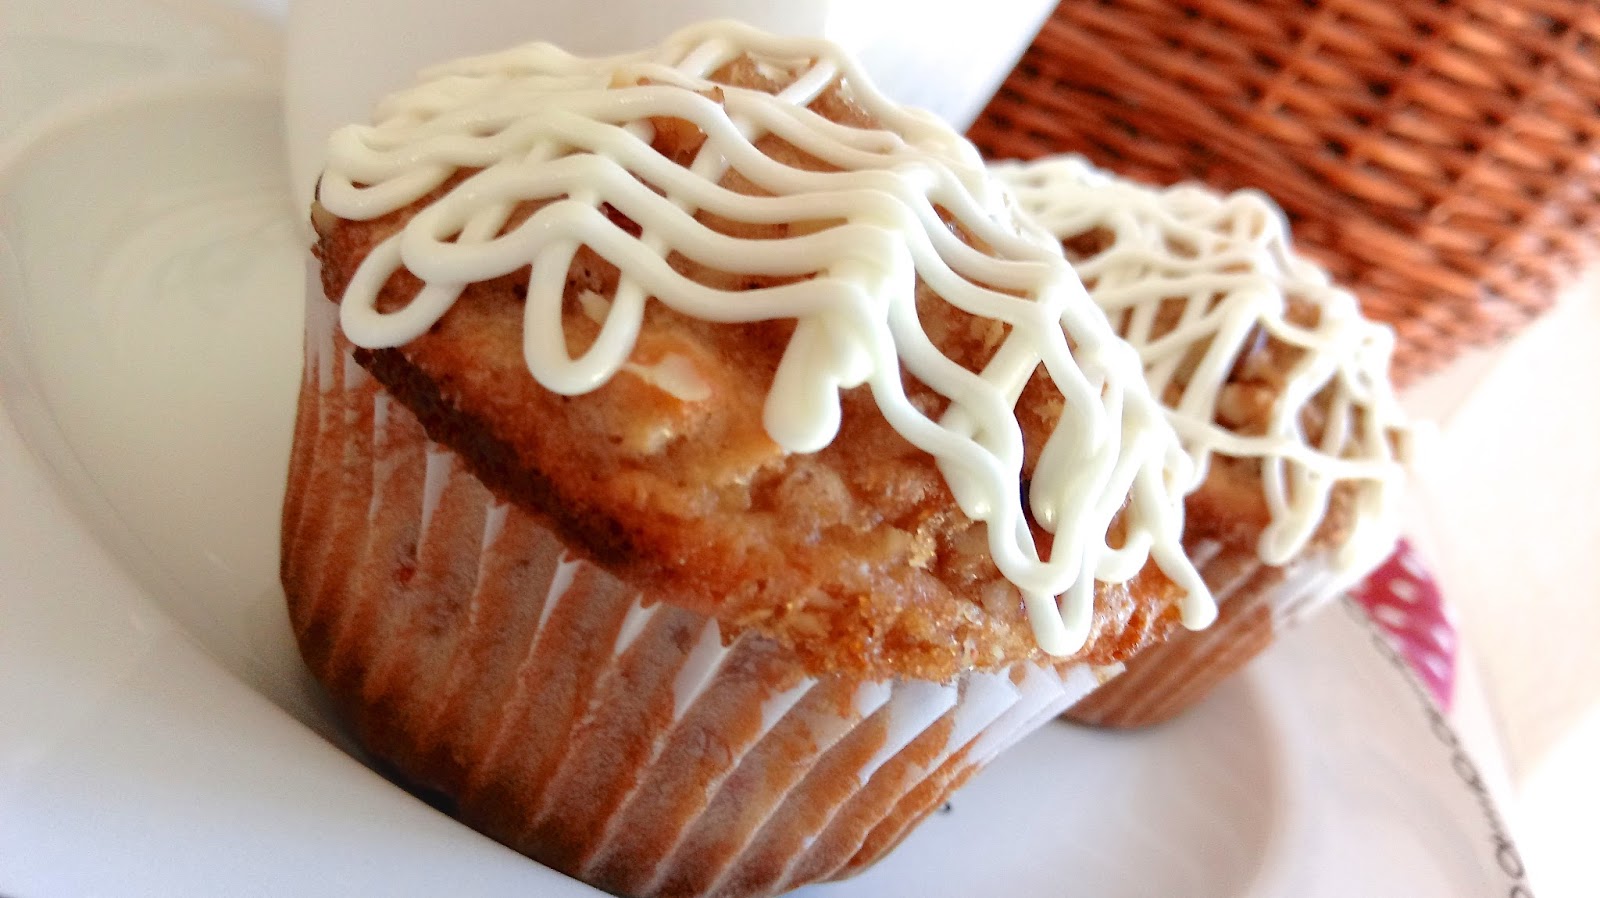
a close up of a Cranberry Bliss Muffin on a plate


Happy cranberry season folks!

Cranberry Bliss Muffins
(makes about 22 muffins)

INGREDIENTS
For the muffin batter:
1 cup walnuts
3 cups flour
4 tsp baking powder
3/4 tsp salt
1/2 cup unsalted butter, softened
1 1/4 cups packed light brown sugar
2 large eggs
1 1/3 cups whole milk
1 Tbsp orange zest
1 1/2 cups cranberries, roughly chopped

For the streusel:
1/4 cup packed light brown sugar
1/2 cup finely chopped walnuts

For the white chocolate icing:
4 oz white chocolate baking bar, chopped
1/4 cup whipping cream
1/4 cup unsalted butter, softened
1/2 to 1 cup powdered sugar (maybe a cup more)

DIRECTIONS

1. Preheat oven to 350 degrees.
2. Put the nuts for the muffin batter on a sheet pan and bake for about 7 minutes to toast. Cool completely, roughly chop, and set aside.
3. Increase oven temp to 400 degrees.
4. Mix the streusel ingredients together in a small bowl and set aside.
5. In a medium bowl, whisk together the flour, baking powder, and salt. Set aside.
6. In a stand mixer, beat the butter and brown sugar for the muffin batter until light and fluffy.
7. Beat in the eggs, one at a time.
8. Alternate stirring in the flour mixture with the milk, beginning and ending with the flour and stirring until just combined each time. DO NOT OVER MIX!
9. Gently fold in the toasted walnuts, chopped cranberries, and orange zest.
10. Scoop 1/4 cup of batter into about 22 lined muffin cups.
11. Sprinkle tops with the streusel topping.
12. Bake for 20 to 25 minutes or until a toothpick inserted in the center comes out clean.
13. Cool in pans for 15 to 20 minutes, then remove muffins and cool completely.
14. To make the icing, place the chopped white chocolate in a heat proof bowl.
15. In another heat proof dish, heat the cream in your microwave for a minute or less until just simmering. Pour the hot cream over the white chocolate and let sit for 5 minutes. Stir until smooth and then let sit for 15 minutes more.
16. Beat with butter and powdered sugar until smooth. Beat in a little extra powdered sugar if your icing seems too runny.
17. Place icing in a Ziploc freezer bag, twist top closed, and cut a snippet off of one corner (less than 1/4 inch). Squeeze icing onto the tops of cooled muffins.

Cranberry Bliss Muffins Pin At Home with the Loverbees

Saturday, December 2, 2017

Savory Holiday Leftovers Bread Pudding

We're still rock'n the leftovers over here in Loverbee Land. It was just Matthew, the kids, and I this year, and our littles pretty much only eat turkey. That means that the hubbs and I are left with lotsa leftovers. To break up the monotony of turkey dinner plates, I whipped up one of my favorite recipes - savory bread pudding.

Holiday Leftovers Bread Pudding served up in a blue bowl with a dollop of cranberry sauce on top sitting next to the casserole and a red and white polk a dot napkin
This rich and fluffy Savory Holiday Leftovers Bread Pudding takes leftovers to a whole new level!


Savory bread pudding is one of my favorite comfort food dinners. This holiday leftovers version boasts forks full of fluffy eggy custard filled with all kinds of cheese and holiday leftover goodness. Yum and double yum!

I used roasted turkey and broccoli cheddar cornbread stuffing casserole for this recipe. Ham, prime rib roast, or any other holiday meat, and any kind of stuffing or dressing will work just as well.

a buttered casserole dish with a little stuffing sprinkled inside next to a cup full of stuffing and a Christmas towel


This Savory Holiday Leftovers Bread Pudding begins with a buttered 3 quart casserole dish.

a layer of stuffing in a buttered casserole dish


Break up about four cups of stuffing into the bottom of the dish.

chopped roasted turkey layered into a casserole dish


Top with a couple cups of chopped roast turkey. I'm getting hungry already!

a layer of cheese topping the Holiday Leftovers Bread Pudding


Finally, sprinkle on a cup of parmesan, reggiano, and/or asiago shredded cheese.

a large bowl of premixed custard for the Holiday Leftovers Bread Pudding next to the casserole and a whisk


Mix up your custard, pour over the goodies, and push them down into the mixture a bit.

the baked Holiday Leftovers Bread Pudding next to a jar of cranberry sauce and a Christmas dish towel


Bake for 45 to 60 minutes or until the center springs back when you poke it. Keep in mind that the pudding will take longer to cook if your stuffing/dressing was really moist and less time if it was more dry.

a serving of Holiday Leftovers Bread Pudding in a blue bowl topped with a dollop of cranberry sauce sitting next to the casserole and a jar of cranberry sauce
Serve this Savory Holiday Leftovers Bread Pudding with leftover cranberry sauce or gravy.


Serve with leftover cranberry sauce and/or gravy.

Savory Holiday Leftovers Bread Pudding

INGREDIENTS
4 cups leftover stuffing or dressing
2 cups chopped roast turkey or other leftover holiday meat
3/4 to 1 cup parmesan, reggiano, and/or asiago shredded cheese
6 large eggs
3 cups whole milk
1/2 tsp ground dry mustard
3/4 tsp salt
1/4 tsp fresh ground pepper

DIRECTIONS
1. Preheat oven to 350 degrees and butter a 3 quart casserole dish.
2. Break up the stuffing into small chunks into the bottom of your dish.
3. Sprinkle on the turkey and then the cheese.
4. In a large bowl, lightly beat the eggs. Then whisk in the the rest of the ingredients.
5. Pour the custard over the casserole and push the goodies down into the mixture a bit.
6. Bake for 45 minutes to 1 hour or until the top middle springs back when you gently poke it. The more moist your stuffing, the longer it will take to bake.
7. Serve with leftover cranberry sauce and/or gravy.

Holiday Leftovers Bread Pudding Pin

Wednesday, November 29, 2017

Advent Drawing Journal

This year the boys and I are drawing our way through Advent. My guys LOVE to draw and I wanted to really engage them as we prepare our hearts for Christmas as a family. So, I put together a simple printable book to take us through each day.

pages for the Advent Drawing Journal sprawled out on a table with a can of markers and color pencils next to them
This year we're drawing our way through Advent with this homemade Advent Drawing Journal.


Each page has a line for the scripture for the day, a box for drawing, and a few lines for jotting down any reflections we'll talk about together.

There are a few different lists of scriptures you could use for this project. I opted for my Anglican family prayer book's list:

Week 1 of Advent
Mark 13:33-37
Isaiah 2:1-5
Luke 10:21-24
Isaiah 25:6-9
Matthew 7:24-29
Psalm 27:1-6
Psalm 147:1-12

Week 2 of Advent
Isaiah 11:6-9
Isaiah 35:5-10
Matthew 18:12-14
Matthew 11:28-30
Matthew 11:7-10
Psalm 1
Psalm 80:1-3

Week 3 of Advent
Philippians 4:4-7
Psalm 25:1-8
Matthew 21:28-31a
Isaiah 45:5-8
Psalm 30
Isaiah 56:1
Luke 1:46-55

You could also use the traditional Catholic list of verses. If you want a more nativity focused story, you can use the list from John Piper's "Desiring God" website. I've left the top line of the journal page blank so you can insert the scripture readings of your preference.

Each day I'll read out the scripture reading for that day from a kid friendly version of the Bible, like the New Living Translation (you can use any translation you like). Then, we'll talk about what was read, what it might mean, what it has to do with Christmas, our thoughts and feelings, etc. After that, the boys will get a chance to draw and color anything they like having to do with the reading and our discussion. Finally, they'll write a couple of sentences about what they want to remember about that day's selection.

You can staple the book together or use a hole punch and weave in a pretty ribbon. Also, you may want to print the cover on cardstock. Here are my templates for printing:


Happy preparations y'all!

Advent Drawing Journal Pin

Monday, November 27, 2017

Fluffy Pumpkin Sourdough Dinner Rolls

I'm a sourdough fanatic. You may already know this about me. I've been converting some of my favorite bread recipes to sourdough starter only recipes in order to eliminate the use of any commercial yeast.

If you've been thinking of jumping on the sourdough band wagon, do it! It is so incredibly rad - and rewarding. You can get started on making your own sourdough starter with instructions from King Arthur Flour.

Lemme just take a second to get a little real with y'all. I used to be intimidated by recipes using yeast, much less a sourdough starter. Trust me when I say that it isn't rocket science. Also, bread dough is VERY forgiving. Keep reading to see some of my bread making imperfections.

a close up of the inside of a Fluffy Pumpkin Sourdough Rolls next to a bowl of soup
These Fluffy Pumpkin Sourdough Dinner Rolls are just perfect alongside any soup or stew.


These Fluffy Pumpkin Sourdough Dinner Rolls are soft and fluffy with subtle hints of pumpkin and spice, and a sourdough flavor that really shines through! They are tremendous slathered with salted butter and go perfectly with any soup or stew you can throw at 'em.

a bowl of sourdough sponge next to a cup of pumpkin puree and a jar of spice


I like to start my process the night before. The longer the dough ferments, the more sourdough flavor your bread will have. I mix up my sponge, cover it tightly, and leave it on the counter to do its thing overnight. The sponge will about double in size and smell delectably yeasty in the morning.

a ball of dough on a floured surface next to a scraper


Knead in the pumpkin, the pumpkin pie spice, and enough flour to make a workable dough. I ended up adding 2 more cups of flour. It just depends on how wet your pumpkin puree is.

pumpkin sourdough cut into pieces on a floured surface next to a bench scraper


Cut the dough into 4 "equal" pieces (as with most things, I just eyeball it). Then, cut each piece into 3 for a total of 12 rolls. My rolls were not all exactly the same size or shape - more or less is good enough for me.

With floured hands, roll each piece into a ball.

a buttered glass dish with unbaked Fluffy Pumpkin Sourdough Dinner Rolls

Place your rolls in a buttered pan, cover with plastic wrap, and let rise at room temperature for 2 to 4 hours, or in a warm place for 1 to 2 hours, or until doubled in size. Again, the slower the proof, the more sourdough flavor your rolls will have.

a close up of puffy proofed unbaked Fluffy Pumpkin Sourdough Dinner Rolls


As you can see, my kneading didn't get the pumpkin as thoroughly mixed in as it could have been. No biggie. The swirl is pretty and the rolls end up just as fluffy and pumpkin flavored as a thoroughly mixed dough.

a close up of baked Fluffy Pumpkin Sourdough Dinner Rolls


Bake the rolls at 400 degrees for about 25 minutes and then brush with melted butter.

Hope I've calmed any sourdough or bread making jitters. Give it a try! Experiment! You won't regret it.

Fluffy Pumpkin Sourdough Rolls sitting in a napkin lined bread basket
Just look at the fluffiness of these Fluffy Pumpkin Sourdough Dinner Rolls!


Fluffy Pumpkin Sourdough Dinner Rolls
(makes 12 large rolls)

INGREDIENTS
2 1/2 cups all purpose flour
1 Tbsp sugar
1 tsp salt
1 cup sourdough starter
3/4 cup water
1 tsp pumpkin pie spice
1 cup pumpkin puree
1 to 2 cups more flour
2 Tbsp melted salted butter

DIRECTIONS
1. Mix the first 5 ingredients to make the sponge. Knead a few minutes until ingredients are well incorporated. Cover with plastic wrap and a clean towel and leave to rise on your countertop overnight or for 7 hours.
2. Knead in the pumpkin puree, pumpkin pie spice, and enough flour to make a workable dough. I used about 2 cups more flour.
3. Use a sharp knife or a bench scraper to cut dough into 4 equal pieces. Then, cut each piece into 3 to make a total of 12 equal portions.
4. Roll each piece into a ball with floured hands.
5. Place rolls with the smoothest side up in a buttered 9 x 13 inch baking pan or dish, cover with plastic wrap, and let rise 2 to 4 hours, or until doubled in size. The rolls will rise faster in a warm place, but will have more sourdough flavor if they rise slower at room temperature.
6. Preheat oven to 400 degrees and bake for about 25 minutes.
7. Immediately brush tops with melted butter.

Fluffy Pumpkin Sourdough Dinner Rolls Pin

Saturday, November 25, 2017

Creamy Turkey and Mushroom Soup with Mushroom Ravioli

Thanksgiving leftovers are the best! They're already comfort food. They're also absolutely fabulous thrown into soups, stews, casseroles, and pies. Most years I make a big ol' pot of turkey, or creamy turkey, noodle soup. This year I thought I'd mushroom it up a little - okay, a lot. So I made a pot of Creamy Turkey and Mushroom Soup with Mushroom Ravioli.

a close up of a blue bowl filled with Creamy Turkey & Mushroom Soup with Mushroom Ravioli


a close up of a blue bowl filled with Creamy Turkey & Mushroom Soup with Mushroom Ravioli next to a couple of pumpkin rolls


This soup is packed with mushroom and roasted turkey flavor. A little bit of rendered bacon, some cream, and a sprinkling of Herbes de Provence don't hurt anything either. 😉

Ingredients for Creamy Turkey & Mushroom Soup with Mushroom Ravioli sitting on a red cutting board on top of a white counter top


The mushroom triple threat in this luxurious soup comes from baby portobellos cooked down with the mirepiox, a can of cream of mushroom soup stirred into the broth, and mushroom stuffed ravioli cooked in at the end. De-lish!

a large cast iron dutch oven with bacon cooking in it


Start by rendering two slices of bacon.

a large cast iron dutch oven with veggies cooking in it


Then, cook the mirepiox in the bacon grease.

a large cast iron dutch oven with mushrooms and veggies cooking in it


Add in the mushrooms and cook until most of the liquid is gone. This concentrates that lovely mushroom flavor.

Creamy Turkey & Mushroom Soup with Mushroom Ravioli cooking in a large cast iron dutch oven


Turkey broth, cream of mushroom soup, roasted turkey, and seasonings get added to the pot and simmered for 15 minutes. The flavors meld together in a glorious symphony of mushroom and roasted turkey awesomeness.

a measuring cup filled with a slurry to thicken a pot of Creamy Turkey & Mushroom Soup with Mushroom Ravioli


finished Creamy Turkey & Mushroom Soup with Mushroom Ravioli in a large cast iron dutch oven


After that, the ravioli gets stirred in, and then the cream. Lastly, a slurry of cornstarch and broth gets added in to thicken up the soup a bit.

a bowl and two pumpkin rolls next to a large cast iron dutch oven full of soup


a close up of a blue bowl full of Creamy Turkey & Mushroom Soup with Mushroom Ravioli next to 2 pumpkin rolls


I served this soup with Fluffy Sourdough Pumpkin Rolls. Recipe coming soon!

Enjoy those leftovers everyone!

Creamy Turkey & Mushroom Soup with Mushroom Ravioli

INGREDIENTS
2 strips of bacon, diced
4 cups chopped mirepiox (onions, carrots & celery)
2 cloves garlic, minced
8 oz sliced baby portobello mushrooms
2 cups roasted turkey or chicken, chopped
1 to 1 1/2 tsp salt
1 tsp Herbes de Provence
1 10.5 oz can cream of mushroom soup
8 cups turkey or chicken broth
2 9 oz packages mushroom ravioli
1 cup whipping cream
1 Tbsp corn starch

DIRECTIONS
1. In a large dutch oven or soup pot, cook bacon over medium high heat until rendered and crispy.
2. Add mirepiox and cook until veggies are starting to brown. Add garlic and cook 1 minute.
3. Add in the mushrooms and cook until most of the liquid has evaporated.
4. Add in the broth, cream of mushroom soup, turkey, herbs, and 1 tsp of the salt. Bring to a boil. Cover and simmer for 15 minutes.
5. Add ravioli and cook for 4 minutes.
6. Stir in the cream.
7. Taste the soup and add up to 1/2 tsp more salt, or to taste.
8. Make a slurry by whisking together 1 Tbsp cornstarch and a little broth from the soup. Stir the slurry into the soup and bring to a boil. Then cook for 2 or 3 minutes until soup thickens a little.

Creamy Turkey & Mushroom Soup with Mushroom Ravioli Pin