Showing posts with label craft. Show all posts

Thursday, February 1, 2018

DIY: How to Turn Any Box Into a Gift Box for Valentine's Day

My guys love making gifts. I mean LOVE it! They're always on the look out for a good cardboard box - both for creating and for using to stuff their creations into. I took a cue from them this week and turned a bunch of boxes inside out to use as gift boxes for Valentine's Day. The boys were, of course, thrilled.

our homemade Valentine's Day gift boxes made out of repurposed boxes turned inside out
Turn any box into a homemade Valentine's Day gift box!


I love how each box has the artist written all over it. Can you guess who made which box?

an flat waffle box sitting on a table


a flat rat glue trap box sitting on a table


You can use just about any box in your home. We used a snack box, a waffle box, and a rat glue trap box. You heard me.

Friday, July 14, 2017

Summer Fun: Flower Power Wreath

Looking for something to keep the kiddos busy? This wreath is totally kid friendly, but feel free to hog this one if you need some mommy creative space. 😉

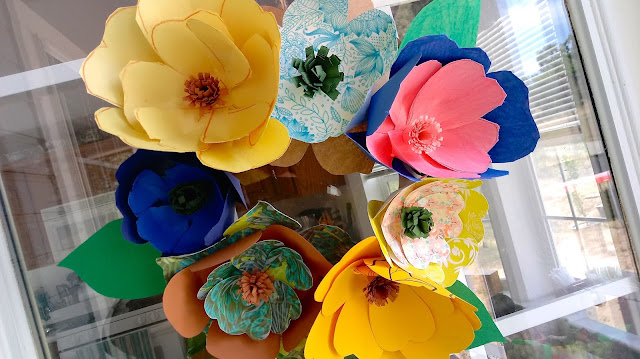
My door was without adornment since the wind had turned my Usnea wreath into a wonky mess. Plus, the boys were jonesin for a project, so I had them try their hand at the paper flowers I used for my Easter garland this past spring. I pulled the scraggly Usnea off of my wreath base and the boys and I re-did the wreath with our handmade flowers.


paper flower wreath

The boys did a great job with this craft and the wreath turned out super cute.


We started the project by tracing our petal templates. We used a combo of colored construction paper and printed scrapbook paper.


I taught the boys how to glue their flowers together and they went to town. See my Easter garland post for directions and templates for these flowers.


I used a glue gun to affix the flowers to our paper plate base. See my nature wreath post on instructions for making your own wreath base.


paper flower wreath

I promptly hung up our masterpiece on my naked front door. Ezra was so proud when he showed his daddy our handiwork.


Hope you're inspired to get those kiddos to work with all of that vacation time on their hands. 😉


paper flower wreath

Wednesday, June 21, 2017

Patriotic Cake Topper

This Independence Day is gonna be a fun one at the Loverbee's. I'm trying out a new red, white, and blue dessert that I'll be sharing with y'all soon. I also made some cake toppers to decorate my scrumptious treat.


These patriotic cake toppers aren't just for cakes. They can be used on all kinds of desserts, including trifle (hint, hint). 

I've included my template at the bottom of this post for those of you that would like to print and use. For those of you interested in making your own cake toppers, I've laid out my process below.

For this project you'll need:
- a computer and printer
- cardstock
- a black Sharpie
- patterned/colored paper for the back of your toppers
- colorful paper straws or skewers
- a glue stick
- scissors
- a scanner to reproduce/share


I started by printing out my phrases in a pretty font. I used card stock to ensure my topper didn't turn out flimsy. I downloaded some patriotic patterns for the backing and printed those out too. Scrapbook paper will also work great.


I drew a boarder around my phrases with a black Sharpie. You could definitely be more elaborate. I just kept it simple.


Next, I placed the patterned paper behind my phrase so that the white parts of both papers were facing each other. I cut around the boarder I drew being careful to hold on tightly to both papers so that they both cut exactly the same. You want them to match up when you glue them together over the straw.


I used cute and colorful paper straws to hold up my toppers. I taped down the straw onto the back of the phrase, then covered the back with glue. I placed the patterned paper white side down over the straw and sealed it all up as evenly as possible. You can trim away any uneven white edges with scissors.

If you want your toppers to be reproducible, scan the pieces into your computer before you glue them together. 

Here are my templates:


Happy party planning, and stay tuned for my red, white, and blue dessert coming soon!


Sunday, April 30, 2017

A Mother's Day Craft

We gave my mom an early Mother's Day present when we were down to see her over spring break. That worked out great, because this blog post would have totally spoiled her surprise.

My parents are becoming empty nesters and my mom just converted one of the bedrooms in her house into a sewing and craft room.


What better way to celebrate her new craft room than with a craft of our own to help her decorate? The boys and I revamped an old lamp shade with handmade flowers and ribbons for her new room.


I chose a simple flower that would be easy for the boys to make. They started with spirals that they rolled up into flowers. Super easy for little fingers. We used both felt and paper.


Mama was in charge of the hot glue gun for this project. I glued on the ribbons while the boys rolled their flowers. Then they picked which ones they wanted to put where. I put the dots of glue with the glue gun and they stuck on their flowers and leaves.


These cute little flowers can go on all sorts of crafts. Hot glue them onto a card, headband, wreath, napkin rings, etc. 

Here is the template we used.


After cutting out the circles, cut along each spiral until you get to the center. Then, roll your flowers starting with the center and wrapping the length of the spiral around it forming a sort of cone shape. Continue wrapping and secure the end to the outermost part of your flower with a small drop of glue.

By the way, Grandma loved her surprise.

Sunday, April 9, 2017

Easter Egg Treat Packets

Easter is coming up fast. We're getting geared up to finish our last week of school before spring break and before heading down to spend Easter with my parents. Before we do I wanted to get one last Easter craft in with the boys.


This craft was inspired by some adorable bunny surprise packets I saw on Craft with MomFor this craft we used an egg pattern instead of bunnies and laced them together with yarn.


I prepped the eggs for the boys and they got started on decorating them with watercolors.


You can decorate the eggs with markers, crayons, or color pencils as well.


After the eggs dried we laced up one side. Then we stuffed them with chocolate eggs and jelly beans and laced up the other side. You can use ribbon if you prefer, but a flat ribbon tends to twist - especially as little fingers are doing the work. I recommend yarn or string.


Here's the egg pattern I used.

Happy Easter!

Tuesday, March 28, 2017

Easter Egg & Paper Flower Garland

I totally let myself hog this project. I needed some creative space and some mama time so I didn't invite the kids to help on this one. I warded them off by telling them I was making them an Easter surprise - which I kinda was. Kids can definitely help out with this project if you want. Little kids can stuff eggs and cut leaves. Bigger kids can make flowers and tie on the eggs.

This Easter garland boasts beautiful handmade paper flowers and plastic Easter eggs stuffed with treats. The eggs are tied onto the garland with pretty ribbons in coordinating colors.

the finished Easter Egg & Paper Flower Easter Garland with flowers and ribbon tied eggs hanging on a white wall

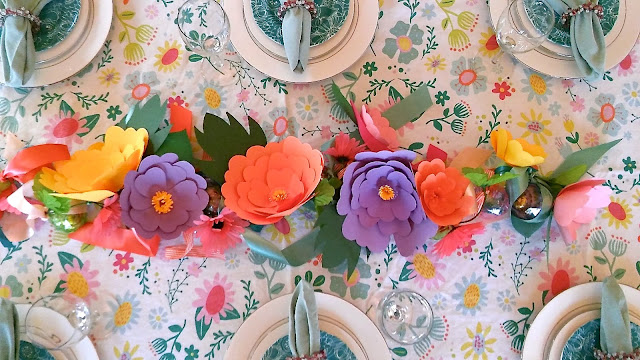
You can hang it up or use it as a centerpiece along the center of your Easter table.

the finished Easter Egg & Paper Flower Easter Garland with flowers and easter eggs tied up with ribbons laying as a centerpiece in the middle of a set Easter table

Kiddos can untie ribbons and open eggs after Easter dinner.

My inspiration for this craft was a gorgeous floral garland from Oh Happy Day. It was wrapped around a giant paper maché egg. How fun is that? I love that site. I've since become obsessed with paper flowers. Stay tuned for a Mother's Day craft that's just as fun and pretty.

A dollar store is a great place to pick up supplies for this craft. Michael's will do too. For this project you'll need:
- construction paper in pastel colors
- a glue stick
- green twist ties (the kind you get at the grocery store produce section)
- large and small pastel plastic Easter eggs
- treats to fill your eggs
- ribbon in multi colors
- a cheap garland
a pic of the paper flowers (pink, purple, orange, and yellow) all finished next to ribbons on a table


I started the project by making paper flowers. They are the most time consuming aspect of this craft. I saw a Martha Stewart flower making kit online and just kind of copied it. I made my own templates and got to work. Go to the bottom of this post for templates.

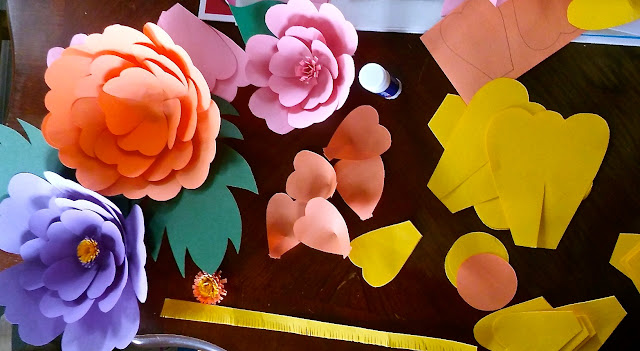
I made 3 large flowers and about 6 small ones. I used templates P1, P2, P3, B1, and L1 to make big flowers. Templates P3, P4, B2, and L2 make small flowers. Cut out all of your petals and leaves. You'll need 1 leaf, 1 round base, and about 6 of each petal size per flower. You'll also need to cut 1 or 2 half inch strips the length of your construction paper to make the center.

purple, orange, and yellow paper flowers on a table with flower pieces for assembly

You can see one here at the bottom of the picture. Cut little slits along the whole length of your strip(s) to make fringe. Also, prep your petals by cutting a slit in them about 1/3 of the way up from the bottom. Glue one piece over the other causing the petal to pucker as you see above.

paper flower tutorial pic with a finished flower next to a glue stick and a pair of scissors


Cut a small green twist tie in half and glue half of it to the base leaving half of it hanging out. That way you can use it to affix your flower to the garland. Next, glue your leaf down onto the base.

a tutorial pic on how to glue the paper flowers together with petals, leaves, scissors, and glue


Now you can start gluing down your largest petals overlapping them a little as you go. Then glue down the next size. Big flowers have 3 layers, small flowers have 2. Once your petals are all glued fold your leaf up a bit so it isn't so flat looking. I even added a little glue to the big ones to attach them to the side of the big flowers.

Last, roll up your long fringed strip like a fruit roll up and glue it closed. Bend down some of the fringe starting at the outer edge leaving the fringe in the middle standing straight up or bending it in towards the center a little. Glue this to the center of your flower.

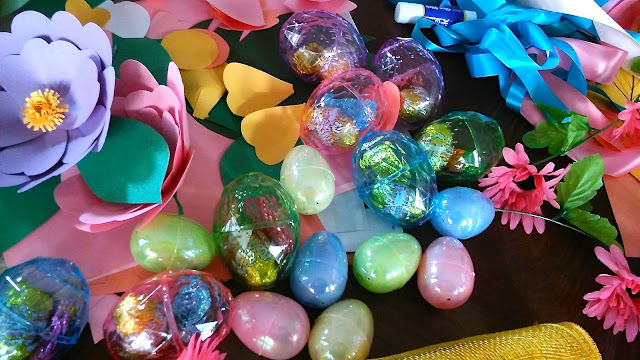
pastel sparkly easter eggs for the Easter Egg & Paper Flower Easter Garland


Once your flowers are ready to go stuff your eggs with treats. I used chocolate peanut butter eggs, chocolate bunnies and carrots, and cute little Easter erasers.

an easter egg tied with a pretty ribbon to go on the Easter Egg & Paper Flower Easter Garland


Cut lengths of ribbon for your eggs. I like the ribbons to dangle festively from the garland. To tie on large plastic eggs you'll need 16 to 18 inch pieces of ribbon. To tie on small or medium eggs cut 10 to 12 inch pieces. Tie an egg on to your garland to make sure you like the length of ribbon hanging.

paper flowers ready to be fastened to a garland


Instead of starting my garland from scratch I used a dollar store garland leftover from Nora's birthday party. This cheap garland was simple and sparse - the perfect base for adding a whole bunch of cuteness. You can also use a long sturdy ribbon.

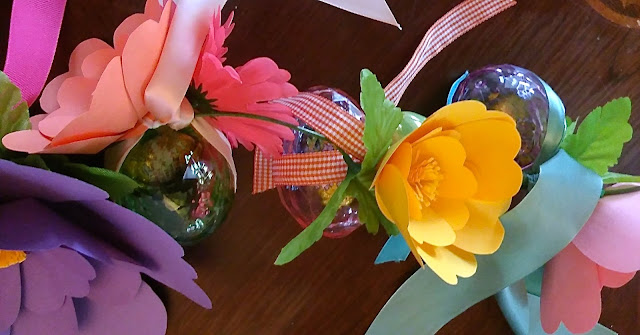
paper flowers fastened to a garland


First affix your flowers to your garland interspersing them evenly along the length. Then you can start tying on eggs. The stuffed eggs will make your garland a little heavy so take that into account if you hang it.

a close up of the Easter Egg & Paper Flower Easter Garland

Happy Easter crafting! Here are my templates.


Easter Egg & Paper Flower Easter Garland template 1
Easter Egg & Paper Flower Easter Garland template 2

Easter Egg & Paper Flower Easter Garland Pin