Showing posts with label DIY. Show all posts

Monday, March 12, 2018

Mini Easter Treat Baskets

We've been raiding the recycle bin again, and just in time for Easter fun. The boys and I put together these simple little Easter treat baskets for giving away sweets. We love turning boxes into all sorts of wonderfulness - especially for giving away.

finished Mini Easter Treat Baskets with pink tissue paper filling them and lacy pastel blue ribbon wrapped around for decoration
These Mini Easter Treat Baskets are made out of tea boxes.


These Mini Easter Treat Baskets are just perfect for giving out your favorite Easter cookies, candies, and goodies.

Thursday, February 1, 2018

DIY: How to Turn Any Box Into a Gift Box for Valentine's Day

My guys love making gifts. I mean LOVE it! They're always on the look out for a good cardboard box - both for creating and for using to stuff their creations into. I took a cue from them this week and turned a bunch of boxes inside out to use as gift boxes for Valentine's Day. The boys were, of course, thrilled.

our homemade Valentine's Day gift boxes made out of repurposed boxes turned inside out
Turn any box into a homemade Valentine's Day gift box!


I love how each box has the artist written all over it. Can you guess who made which box?

an flat waffle box sitting on a table


a flat rat glue trap box sitting on a table


You can use just about any box in your home. We used a snack box, a waffle box, and a rat glue trap box. You heard me.

Wednesday, November 1, 2017

Easy Thanksgiving Garland

Thanksgiving is my favorite. I'm sorry to say that the discipline of gratitude isn't always on my radar throughout the year - except for the month of November. In November the weather is grand, the anticipation of an amazing feast with the ones I love fills my mind and heart, and my home is warm with good ol'-fashioned comfort food and the sweet faces of my little family. I admit, it's much easier for me to have thoughts and feelings of gratitude at this time of year.

So, my goal each November is to take advantage of a thankful disposition and usher our little family into a season of gratitude in whatever way fits us best. This year I've incorporated my boys' love for decorating with a discipline of gratitude in this easy Thanksgiving garland.

wide orange ribbon twirled around an archway like streamers and decorated with felt fall leaves and little chalkboard style cards to write thanksgivings on


a close up of wide orange ribbon twirled around an archway like streamers and decorated with felt fall leaves and little chalkboard style cards to write thanksgivings on
This garland is fairly simple to make. No sewing, no gluing - just a few thumb tacks here and there.

Here's what you'll need for this craft to line a descent sized archway:

6 yards wide orange wired ribbon
2 dozen felt leaves (mine came already cut)
4 to 6 dozen mini clothespins
8 to 10 sheets of card stock to print the thankful cards
a printer
sissors
chalk
a handful of push pins

a tray with craft supplies for Thanksgiving Garland - felt leaves, orange ribbon, push pins, mini clothespins, thankful chalkboard card print outs


Print out about 8 copies of the thankful cards using the template below. I thought a chalkboard design would be cute and we could write out our thanksgivings in chalk. My printer printed them best in the black and white setting. You can have kids cut them out.

Measure out where you want to hang your garland. When I say that, I really mean, kinda hold it up and try to picture where you want it to start and end. 😉 It can go around an archway, doorway, or just draped along a wall. You could also twirl in some little white twinkly lights. That would be so pretty.
wide orange ribbon twirled around an archway like streamers and decorated with felt fall leaves and little chalkboard style cards to write thanksgivings on
Our Easy Thanksgiving Garland hangs in our dining room as a daily reminder to give thanks.


I thought it would be fun to have our garland hanging in our dining room where we'll be enjoying Thanksgiving dinner.

twirled orange ribbon hanging on the wall

Hang the ribbon by pushing a thumb tack into one end and pinning it to the wall. I had two 3 yard long ribbons to work with, so I started them both at the top middle of my archway to get the most even hanging on either side of the arch.

Twirl the ribbon like a streamer bending the wire a little, if you need to, to get it to stay twisted. Press a tack through the ribbon and into the wall wherever you see fit to secure it.
a close up of wide orange ribbon twirled around an archway like streamers and decorated with felt fall leaves and little chalkboard style cards to write thanksgivings on
This Easy Thanksgiving Garland sports the most adorable chalkboard thankful cards for us to write our thanksgivings on throughout the month.


Once your ribbon is secure, have kids use the clothespins to hang up leaves and thankful cards. If you have small children helping, you may need to rearrange some of the decorations. Just say'n. 

Throughout the month, the whole family can grab a card and write something they're thankful for with chalk. Have fun talking about new additions to the garland at dinnertimes. You can also share your favorite thanksgivings at your Thanksgiving feast.

4 chalkboard printable cards with the word "thankful" written on each one


Aren't these chalkboard cards just adorable? Happy crafting!

Easy Thanksgiving Garland Pin

Monday, October 2, 2017

Easy, No Sew, No Glue Spooky Eyeball Halloween Garland

Boo! Scared ya, didn't I? Just play'n.

We've been super busy over here at Loverbee central. The boys and I didn't get the great start to the new school year that I was hoping for. On top of that, Nora's sleep schedule continues to derail me. I've had to cut down on baking to once a week. (deep sigh)

So, that said, here is this busy family's easy Halloween craft - easy peasy and super spookely cute.

This craft involves a little cutting, tying, and the hanging of a few simple decorations. It'll take you longer to say "Easy, No Sew, No Glue Spooky Eyeball Halloween Garland" than it will be to put this cutie together. If your kids can tie a knot, they can probably do this whole project by themselves.

Easy, No Sew, No Glue Halloween Spooky Eyeball Garland
Make this Easy, No Sew, No Glue Spooky Eyeball Halloween Garland for cuteness sakes!


Here's what you'll need:
4 yards burlap
3 yards orange ribbon
3 yards purple ribbon
2 dozen Christmas ornament hangers
2 dozen spooky eyeball ornaments

I found my eyeball ornaments at a 99 Cents Only store. I've also seen felt ones. If you can't find any, you can cut circles out of white card stock, have kids draw spooky eyeballs on them, and use a hole punch to make a hole at the top of each.

burlap for Easy, No Sew, No Glue Halloween Spooky Eyeball Garland


Start by prepping your burlap. My sections came in 36 x 18 inch pieces. I kept the length and cut each piece in half longways to get a width of 9 inches. By the way, to keep your burlap from unraveling, pull out a string from the center, where you plan to cut. Then, cut along the center, right where you pulled out the string. Here's a tutorial from Decor by the Seashore if you'd like a visual.

burlap knots for Easy, No Sew, No Glue Halloween Spooky Eyeball Garland


Now, tie each piece of burlap together with a simple knot.

ribbon for Easy, No Sew, No Glue Halloween Spooky Eyeball Garland


Next, cut your orange ribbon in half. Then, cut each piece in half again. You should end up with four, more or less, equal pieces. Do the same for the purple ribbon.

ribbon bows for Easy, No Sew, No Glue Halloween Spooky Eyeball Garland


I tied my orange and purple ribbons together in between each burlap knot. I just tied a simple bow.

eyeball ornaments for Easy, No Sew, No Glue Halloween Spooky Eyeball Garland


Have kids loop a Christmas ornament hook through each eyeball and let them go crazy adding them to the garland. I found it easiest to hang the garland first.

Easy, No Sew, No Glue Halloween Spooky Eyeball Garland looped on chandelier


I draped my garland along our dining room chandelier since we don't have a proper mantel.

Easy, No Sew, No Glue Halloween Spooky Eyeball Garland
"Eye see you," says the Easy, No Sew, No Glue Spooky Eyeball Halloween Garland.


You can also hang it on a wall, mantel, arch, or doorway.

Eye'll be seeing ya! 😉

Easy, No Sew, No Glue, Spooky Eyeball Halloween Garland

Friday, July 21, 2017

Summer Fun: Art Camp

This was SO MUCH FUN!!! I was texting a friend of mine about arts & crafts when all of a sudden I had a brilliant idea - an arts & crafts weekend. She has a little girl around Mateo's age who also loves creating, so we set a date and got to planning.

arts and crafts

Some of the projects we ended up doing were simple and straightforward and only required the purchase of supplies. Others took a bit more prep and organization.


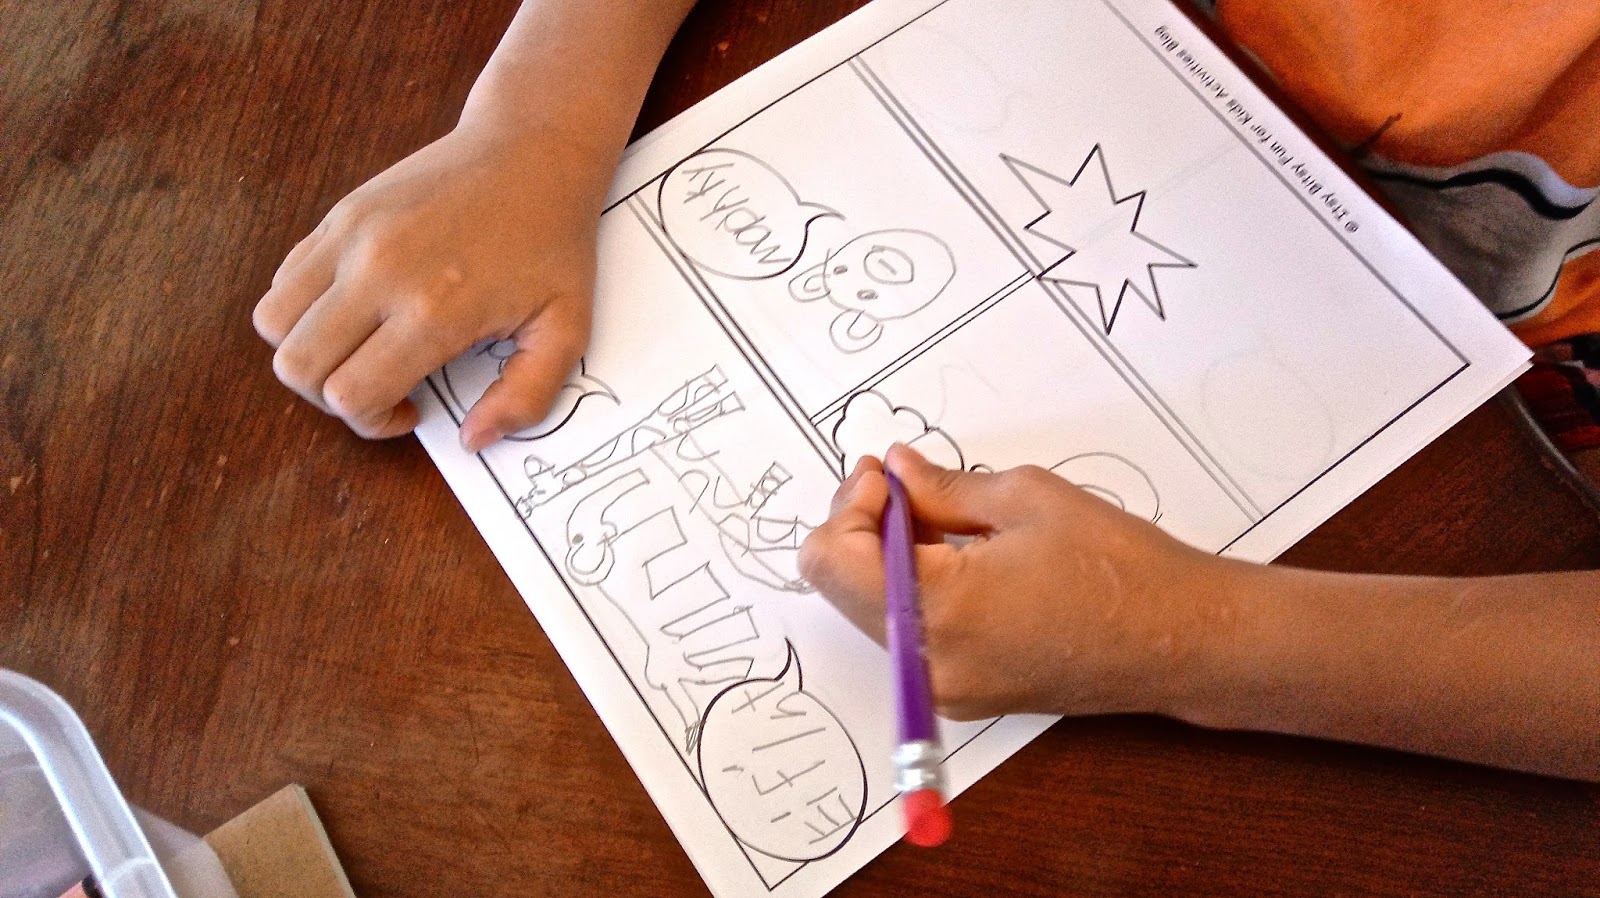
We decorated pillowcases and hand towels with fabric paint, made our very own comic books, and hammered nails into wooden boards for string art. We also did a directed multi-media project, photograph reproductions, and a segmented watercolor poster. These projects may sound overwhelmingly artsy, but they aren't as complicated as all that - especially in the hands of 7 year olds.

I also had a box of simple art supplies, and a sketch pad, for each child to use if they finished projects early and needed something to do.


You'll need an assortment of fabric paints for the fabric painting project. I found some at the dollar store that were easy to use. I also picked up some solid colored pillowcases and hand towels. You'll need to insert a piece of cardboard inside of the pillowcases as the fabric paint can sometimes bleed through. You could do aprons, cloth napkins, or t-shirts too. White is nice, but as long as it's a solid color, you're good to go.


For the comic books, I simply printed out some comic book pages from Kids Activities Blog and gave each child a stack. They used supplies from their art boxes to write and draw their stories. They also made covers out of folded 11 x 17 inch sheets of paper and then stapled everything together.

string art


string art

I had my hubby cut up a half inch board into 8 x 8 and 8 x 6 inch pieces for our string art project. Each child sanded their own board with a small piece of sand paper. Then, they traced or drew a simple shape onto their boards. After a brief demonstration, the kids hammered 1 inch nails every quarter inch or so along their shapes. I helped them tie the string of their choice at their starting point and they looped the string around the nails in the style they preferred, tying them up at the end.


I prepped for the directed multi-media project by scattering different art supplies down the center of the table like a runner. I used stickers, ribbons, different kinds of tape, tissue paper, glue and glitter glue, scissors, a stapler, a hole punch, plus the supplies in their art boxes. I gave each child an 11 x 17 inch sheet of paper and gave them simple directions that they could interpret any way they wanted. "Draw a square on your page. Make your square into something. Add something shiny to your picture... ." It was a blast to see what each child came up with.


Our photograph reproduction project started with each child taking my camera phone outside and taking pictures of whatever they liked. We loaded the pics onto the computer and they chose which photograph they wanted to reproduce. They started drawing their reproductions with pencils and then chose which supplies to use to add in the color.


Our last project was a segmented watercolor poster. I showed the kids how they could make different patterns on their poster boards using lines. They could keep the lines from touching to make stripes or intersect them to make squares, diamonds, or triangles. Then they painted one segment at a time with water colors.

For those of you interested in planning your own art camp, here are a few tips. 

1. Gather all of your supplies before hand and have materials prepped - copied, cut, organized, packages opened, etc. 
2. You'll also want to make samples of some projects and print out photos or guides of others. 
3. Make sure each child has plenty of room to create. You can make stations for each child or a station for each craft or just make sure you have large spaces cleared for them to spread out.
4. Leave plenty of time for each craft. Different kids work at different paces and some will be more detailed than others. Have something available for children to do if they finish early. I had an art supply box and drawing pad for each child to use whenever they wished.
5. A dollar store is a great place to get all kinds of supplies.
6. If you notice any of the kids getting antsy or bored, take a break for a snack, a stretch, a game of chase outside, a splash in the pool, etc.
7. Get a plastic table cloth to cover your table for activities involving fabric paint, tempera paint, or glitter glue. This will save you many a headache.
8. Ask others to join in on the planning if coming up with all of the activities seems too daunting. Or, have someone else take care of the snacks. My lovely friend actually did all of the cooking for our meals and snacks. It was so nice not to have to think about that aspect of our time together. Also, her food is spectacular. Thanks Sweet Friend.

If you do decide to throw such an affair, send me a pic or post a comment. I'd love to hear about your experience, what projects you chose, and how the kids enjoyed it.

Tuesday, March 28, 2017

Easter Egg & Paper Flower Garland

I totally let myself hog this project. I needed some creative space and some mama time so I didn't invite the kids to help on this one. I warded them off by telling them I was making them an Easter surprise - which I kinda was. Kids can definitely help out with this project if you want. Little kids can stuff eggs and cut leaves. Bigger kids can make flowers and tie on the eggs.

This Easter garland boasts beautiful handmade paper flowers and plastic Easter eggs stuffed with treats. The eggs are tied onto the garland with pretty ribbons in coordinating colors.

the finished Easter Egg & Paper Flower Easter Garland with flowers and ribbon tied eggs hanging on a white wall

You can hang it up or use it as a centerpiece along the center of your Easter table.

the finished Easter Egg & Paper Flower Easter Garland with flowers and easter eggs tied up with ribbons laying as a centerpiece in the middle of a set Easter table

Kiddos can untie ribbons and open eggs after Easter dinner.

My inspiration for this craft was a gorgeous floral garland from Oh Happy Day. It was wrapped around a giant paper maché egg. How fun is that? I love that site. I've since become obsessed with paper flowers. Stay tuned for a Mother's Day craft that's just as fun and pretty.

A dollar store is a great place to pick up supplies for this craft. Michael's will do too. For this project you'll need:
- construction paper in pastel colors
- a glue stick
- green twist ties (the kind you get at the grocery store produce section)
- large and small pastel plastic Easter eggs
- treats to fill your eggs
- ribbon in multi colors
- a cheap garland
a pic of the paper flowers (pink, purple, orange, and yellow) all finished next to ribbons on a table


I started the project by making paper flowers. They are the most time consuming aspect of this craft. I saw a Martha Stewart flower making kit online and just kind of copied it. I made my own templates and got to work. Go to the bottom of this post for templates.

I made 3 large flowers and about 6 small ones. I used templates P1, P2, P3, B1, and L1 to make big flowers. Templates P3, P4, B2, and L2 make small flowers. Cut out all of your petals and leaves. You'll need 1 leaf, 1 round base, and about 6 of each petal size per flower. You'll also need to cut 1 or 2 half inch strips the length of your construction paper to make the center.

purple, orange, and yellow paper flowers on a table with flower pieces for assembly

You can see one here at the bottom of the picture. Cut little slits along the whole length of your strip(s) to make fringe. Also, prep your petals by cutting a slit in them about 1/3 of the way up from the bottom. Glue one piece over the other causing the petal to pucker as you see above.

paper flower tutorial pic with a finished flower next to a glue stick and a pair of scissors


Cut a small green twist tie in half and glue half of it to the base leaving half of it hanging out. That way you can use it to affix your flower to the garland. Next, glue your leaf down onto the base.

a tutorial pic on how to glue the paper flowers together with petals, leaves, scissors, and glue


Now you can start gluing down your largest petals overlapping them a little as you go. Then glue down the next size. Big flowers have 3 layers, small flowers have 2. Once your petals are all glued fold your leaf up a bit so it isn't so flat looking. I even added a little glue to the big ones to attach them to the side of the big flowers.

Last, roll up your long fringed strip like a fruit roll up and glue it closed. Bend down some of the fringe starting at the outer edge leaving the fringe in the middle standing straight up or bending it in towards the center a little. Glue this to the center of your flower.

pastel sparkly easter eggs for the Easter Egg & Paper Flower Easter Garland


Once your flowers are ready to go stuff your eggs with treats. I used chocolate peanut butter eggs, chocolate bunnies and carrots, and cute little Easter erasers.

an easter egg tied with a pretty ribbon to go on the Easter Egg & Paper Flower Easter Garland


Cut lengths of ribbon for your eggs. I like the ribbons to dangle festively from the garland. To tie on large plastic eggs you'll need 16 to 18 inch pieces of ribbon. To tie on small or medium eggs cut 10 to 12 inch pieces. Tie an egg on to your garland to make sure you like the length of ribbon hanging.

paper flowers ready to be fastened to a garland


Instead of starting my garland from scratch I used a dollar store garland leftover from Nora's birthday party. This cheap garland was simple and sparse - the perfect base for adding a whole bunch of cuteness. You can also use a long sturdy ribbon.

paper flowers fastened to a garland


First affix your flowers to your garland interspersing them evenly along the length. Then you can start tying on eggs. The stuffed eggs will make your garland a little heavy so take that into account if you hang it.

a close up of the Easter Egg & Paper Flower Easter Garland

Happy Easter crafting! Here are my templates.


Easter Egg & Paper Flower Easter Garland template 1
Easter Egg & Paper Flower Easter Garland template 2

Easter Egg & Paper Flower Easter Garland Pin

Sunday, March 12, 2017

Project Pretty Nursery

We recently moved our baby girl out of our room and into the small room the boys were sharing. The boys moved into our school/guest room which suits them better with a bigger space. I dearly miss our school room set up, but this arrangement is best for everyone right now.

That little room needed a total overhaul, let me tell you. Those boys were rough on it. We had to scrub the walls, paint, replace the blinds, and replace the curtain rod. We still have to replace the window screen. Our little labors of love.


I was so excited to put this nursery together never having decorated for a little girl before. My inspiration for the room were some adorable fabric banners a friend sent me for Nora. They're made with vintage fabric squares sewn onto a vintage blue ribbon.


Here is one of the banners draped on the curtains. I hung the other on Nora's changing table. 

I chose a vintage light blue color for the walls - Sherwin Williams' Watery. I used vintage fabrics, vintage paper, and floral accents throughout the room. It was so much fun to work on this project. I love girly things. Here are some of the floral details I incorporated into the room.


I used a lot of items I already had on hand - baskets, tea tins, throw pillows, an old mirror, and some cute cottage style chairs a neighbor had given me a few years back. I love thinking about how to use what I already have on hand. The room boasts a couple of handmade projects too.


I put together a banner with ribbon, mini clothespins, and handmade paper dolls that I made last year.


I also hung up a large decorative frame made out of toilet paper roll flowers that I put together for Nora before she was born. I found this idea on Pinterest.

Nora's rocking chair corner is quite cozy with a lamp, baby books, and extra pillows within arm's length. Oh, and Nora's handmade quilt made by Grandma.

The changing table has everything I need in the easy to reach fabric drawers and hamper underneath. The vintage style chairs on either side provide extra surfaces whenever I need to put something down without having to leave my pretty girl on the table unattended.

I put up a gallery wall with hand-painted letters hanging on ribbons, frames filled with vintage paper, my toilet paper roll flower frame, an old mirror that used to be in our living room, and a dollar store metallic flower. 


These hooks are left over from the boys' old room. We just re-secured them to the wall as they were a little worse for the wear. I added a cute floral wreath above that I usually put on our front door in the summer months and hung some princess dresses below.


Such a sweet project. Having a little girl is super fun!