Friday, October 13, 2017

Gluten Free Chocolate Pumpkin Jack-o-lantern Cookies

We're still keep'n it easy over here in Loverbee Land. Also, I've got doctored cake mix on the brain as I've been baking through my Easy Gourmet Cupcake series. All that to say, cake mix cookies are how we're doin' this thang.

This recipe goes out to all my gluten free peeps. Hope you guys haven't been feeling left out. I'll be making you guys an easy gourmet gluten free cupcake soon, so stay tuned for that.

Gluten Free Chocolate Pumpkin Jack-o-lantern Cookies
These Gluten Free Chocolate Pumpkin Jack-o-lantern Cookies are rich with chocolate and autumn spice.


These ghoulish cookies are super chocolatey and full of fall spice. They're also crispy on the outside and chewy on the inside - just like a cookie should be. They're the perfect vehicle for Halloween decorating fun.

Ingredients for Gluten Free Chocolate Pumpkin Jack-o-lantern Cookies


I doctored a gluten free chocolate cake mix with pumpkin and cinnamon to make these adorable jack-o-lantern cookies for the boys to decorate. Even in the midst of busyness I have to get my bake on, and the boys need stuff to decorate. That's how we roll up in this place.

I used cinnamon for a more Mexican hot chocolate kinda flavor. I'm not a huge fan of pumpkin pie spice with chocolate. But that's just me. If you love pumpkin pie spice, then go for it.

Jack-o-lantern pan for Gluten Free Chocolate Pumpkin Jack-o-lantern Cookies


You'll need a jack-o-lantern pan to make these molded cookies. Wilton makes one you can order online. I suggest buying two pans. That way you can bake all your cookies at once.

Making cookie dough for Gluten Free Chocolate Pumpkin Jack-o-lantern Cookies


First, beat butter, pumpkin, and the spice of your choice until well combined.

Making cookie dough for Gluten Free Chocolate Pumpkin Jack-o-lantern Cookies


Beat in the chocolate cake mix until mixture resembles cookie dough.
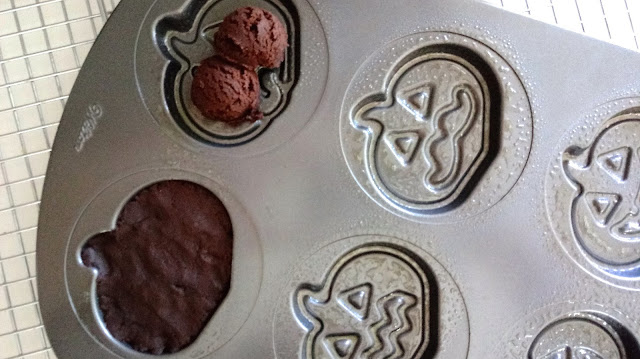
cookie dough for Gluten Free Chocolate Pumpkin Jack-o-lantern Cookies


Spray each mold with oil spray and scoop 1/4 cup of dough into each. Press the dough down into each face spreading evenly as you go.

Gluten Free Chocolate Pumpkin Jack-o-lantern Cookies


Bake for 10 minutes and cool cookies completely in the pans. Then, remove them very carefully. I used a butter knife to help dislodge the edges.

candy for decorating Gluten Free Chocolate Pumpkin Jack-o-lantern Cookies


Prep your decorating station by filling a couple of freezer bags with chocolate hazelnut spread and snipping off the corners for piping. Also, open up the candies for easy grabbing.

decorating Gluten Free Chocolate Pumpkin Jack-o-lantern Cookies


My guys had a blast decorating their jack-o-lanterns. I, of course, peeled off the candy to enjoy my cookie. 😉

Gluten Free Chocolate Pumpkin Jack-o-lantern Cookies
Kids will love decorating these Gluten Free Chocolate Pumpkin Jack-o-lantern Cookies.


Gluten Free Chocolate Pumpkin Jack-o-lantern Cookies
(makes 12 jack-o-lantern cookies)

INGREDIENTS
1/2 cup unsalted butter, softened
1/4 cup pumpkin puree
1/2 tsp cinnamon or pumpkin pie spice
15 oz box gluten free chocolate cake mix (I used Betty Crocker's)
oil spray to grease cookie pan

To Decorate:
1/2 cup chocolate hazelnut spread
assorted Halloween candies
* For gluten free eaters, make sure your store-bought spread and candies read "gluten free" on the labels, or check the ingredients very carefully.

DIRECTIONS
1. Preheat oven to 350 degrees.
2. Using a stand or hand mixer, beat butter, pumpkin puree, and spice until creamy and well combined.
3. Beat in all of the chocolate cake mix until mixture comes together. It should look like cookie dough.
4. Spray your jack-o-lantern pan (just in the molds) generously with oil spray.
5. Scoop 4 Tbsp of dough into each jack-o-lantern face pushing down and spreading to fill the mold.
6. Bake for 10 minutes. They will look sunken in a little. That's okay.
7. Let cookies cool in pan completely and then remove them very carefully.
8. If you only have one pan, wipe it out and then spray again with oil spray before re-scooping.
9. When you're ready to decorate, spoon the chocolate hazelnut spread evenly into 2 Ziplock freezer bags, twist tops closed, and secure with twist ties. Snip 1/4 inch off of one corner for kids to use as glue to stick on their candies.

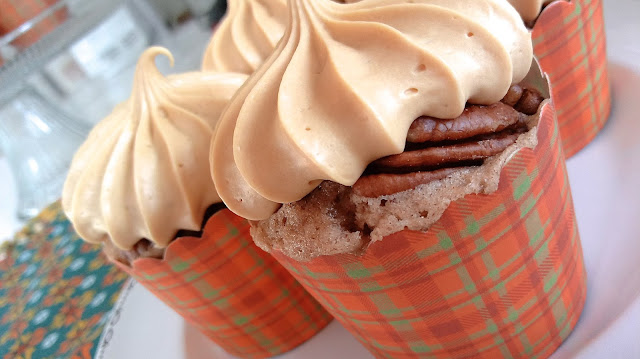
Gluten Free Chocolate Pumpkin Jack-o-lantern Cookies Pin

Tuesday, October 10, 2017

Easy Gourmet Cupcakes: Salted Caramel Pecan Spice

It's fall y'all! I know I did a lot of complaining about attack of the pumpkins a couple months back, but I actually adore fall. The weather is so very awesomely awesome. I love the excuse to eat soup every day, enjoy a mug of creamed tea in the middle of the afternoon, and live in my favorite sweater. Ahhhhhh, fall.

Enter in, my Easy Gourmet Salted Caramel Pecan Spice Cupcakes. You'll fall in love with fall baking with this easy cupcake recipe.

Easy Gourmet Salted Caramel Pecan Spice Cupcakes
These Salted Caramel Pecan Spice Cupcakes have fall baking written all over them.


This delectable cupcake has all the best things about fall going on in it - warm autumn spice, toasted pecans, salted caramel. Although, salted caramel is a year round kinda flavor. Don't ya think?

Ingredients for Easy Gourmet Salted Caramel Pecan Spice Cupcakes


A box of spice cake mix, a couple of cups of pecans, and a can of dulce de leche are the star ingredients in this easy fall recipe.

unbaked Easy Gourmet Salted Caramel Pecan Spice Cupcakes


Doctor the cake mix by adding an extra egg, subbing whole milk for the water, subbing melted butter for the oil, and then doubling the amount of butter. Scoop about 1/4 cup into each muffin cup and gently press in some pecans.

baked Easy Gourmet Salted Caramel Pecan Spice Cupcakes
Toasted pecans adorn the tops of fluffy spice cake in my Easy Gourmet Salted Caramel Pecan Spice Cupcakes.

The nuts get toasted to perfection while the cupcakes bake.

making salted caramel buttercream for Easy Gourmet Salted Caramel Pecan Spice Cupcakes


To make the salted caramel buttercream, beat 3 sticks of butter, 1 cup of dulce de leche, a teaspoon and a half of vanilla, and a teaspoon and a half of salt.

making salted caramel buttercream for Easy Gourmet Salted Caramel Pecan Spice Cupcakes


Then, beat in 3 cups of powdered sugar.

making salted caramel buttercream for Easy Gourmet Salted Caramel Pecan Spice Cupcakes


Scrape down the bowl and beat in another 3 cups of powdered sugar.

making salted caramel buttercream for Easy Gourmet Salted Caramel Pecan Spice Cupcakes


Scrape down the bowl again and beat the buttercream for 3 minutes.

making salted caramel buttercream for Easy Gourmet Salted Caramel Pecan Spice Cupcakes

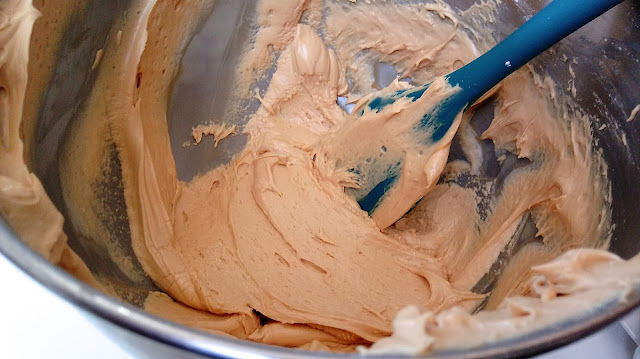
This salted caramel buttercream is softer than most of the frostings and buttercreams I usually work with. But it's oh so creamy and fluffy. Think marshmallow cream - but with all the flavor of perfectly sweet and perfectly salty salted caramel.

Btw, any leftover buttercream can serve as a fabulous dip for sliced apples.

Easy Gourmet Salted Caramel Pecan Spice Cupcakes


The spice cake is so tender and packed with warm autumn flavors. The pecans are nutty and crunchy with just a hint of sweetness. The buttercream is fluffy beyond belief and exactly the flavor you imagine when you think "salted caramel." We've got ourselves a real fall goodie with this cupcake, folks.

Happy fall baking!

Easy Gourmet Salted Caramel Pecan Spice Cupcakes
(Makes 24 cupcakes)

INGREDIENTS
For the cupcakes:
15.25 oz box spice cake mix
1 cup unsalted butter, melted and slightly cooled
1 cup whole milk
4 large eggs
* These ingredients are based on a cake mix that calls for 3 eggs, 1 cup of water, and 1/2 cup of oil. I added an extra egg, subbed whole milk for the water, and subbed melted butter for the oil, and then doubled the amount of butter.

2 or 3 cups of pecan halves to press into the cupcake batter before baking

For the buttercream:
1 1/2 cups unsalted butter, softened
1 cup dulce de leche
1 1/2 tsp vanilla extract
1 1/2 tsp salt
6 cups powdered sugar

DIRECTIONS
1. Preheat oven to 350 degrees and line 2 cupcake pans with 24 cupcake liners.
2. In a large bowl, add all of the ingredients for the cupcakes and mix well using a hand mixer, whisk, or wooden spoon. The batter should be smooth.
3. Scoop a scant 1/4 cup of batter (or use a size 20 cupcake scoop) into each liner.
4. Gently press 4 to 6 pecan halves onto the top of each cupcake.
5. Bake cupcakes for the time recommended on your cake mix box for cupcakes. Check them at the earliest time by inserting a toothpick into the center of one of the cupcakes near the center of the oven until it comes out clean.
6. Let the cupcakes cool in the pan for 15 minutes and then remove them to cool completely.
7. For the salted caramel buttercream, beat the butter, dulce de leche, salt, and vanilla until creamy and well combined.
8. Scrape down the bowl and beat in 3 cups powdered sugar.
9. Scrape down the bowl again and beat in 3 more cups powdered sugar.
10. Scrape down the bowl and beat buttercream for 3 minutes.
11. Snip off one corner of a Ziplock freezer bag a little smaller than your piping tip. Slide in your piping tip and set bag in a tall cup to easily fill with buttercream.
12. Twist the top of your bag closed and pipe frosting onto each cupcake.

Easy Gourmet Salted Caramel Pecan Spice Cupcake Pin

Saturday, October 7, 2017

Leftover Brisket Two Ways

So, I made the Pioneer Woman's braised brisket this week. It slowly braises in the oven in a sea of flavor for the good of all mankind. ðŸ˜‰ So. So. Good.

I turned my tasty leftovers into football food - 'cause I'm all about the football. You know me, football fanatic and all. I jest. But I do love football food. Football food is my true team. "Go, football food!"

Smokey Brisket Sheet Pan Nachos
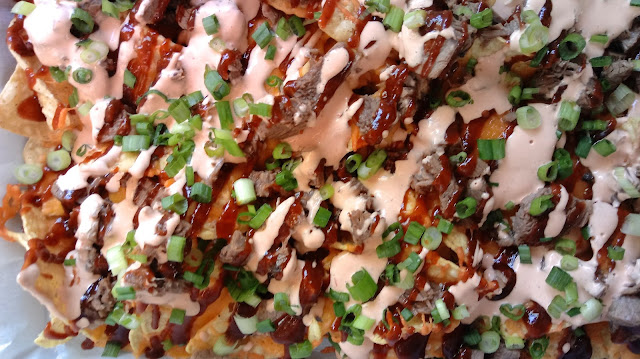
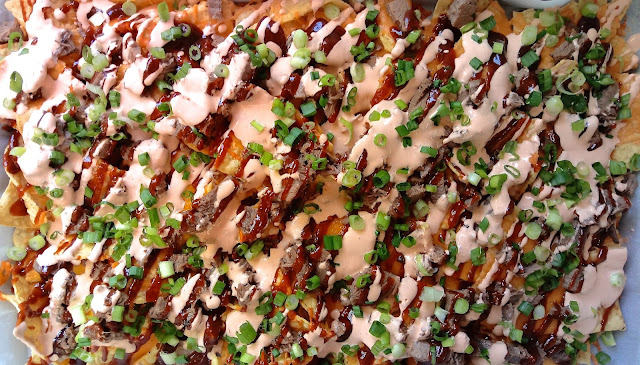
Smokey Chipotle BBQ Brisket Sheet Pan Nachos.
had to make nachos. I couldn't not make nachos, right? These Smokey Chipotle BBQ Brisket Sheet Pan Nachos are smothered in sharp cheddar, hickory smoked BBQ sauce, and chipotle cream.

Braised Brisket for Smokey Brisket Sheet Pan Nachos


chipotle cream for Smokey Brisket Sheet Pan Nachos


Smokey Brisket Sheet Pan Nachos


Smokey Brisket Sheet Pan Nachos


As if a tray full of fabulous nachos wasn't enough, I put the rest of the brisket into delicious Buttery Baked Brisket Sandwiches.

Buttery Baked Brisket Sandwiches
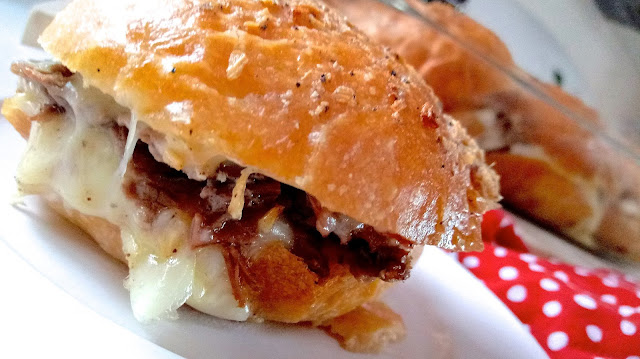
Buttery Baked Brisket Sandwiches on sourdough rolls with horseradish mayo, swiss, and smoked provolone.


These Buttery Baked Brisket Sandwiches are loaded with flavor packed brisket, horseradish mayo, swiss and smoked provolone cheese. Uh, yeah!

braised brisket for Buttery Baked Brisket Sandwiches


sourdough rolls for Buttery Baked Brisket Sandwiches


sourdough rolls for Buttery Baked Brisket Sandwiches


Buttery Baked Brisket Sandwiches


Buttery Baked Brisket Sandwiches


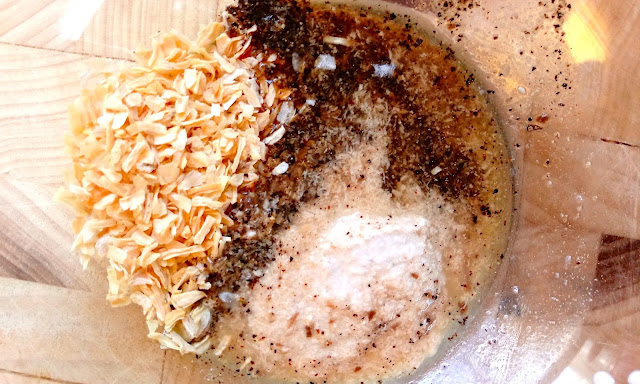
Sauce ingredients for Buttery Baked Brisket Sandwiches


Buttery Baked Brisket Sandwiches

This is why I love football season. Come on, game day!

If you don't have time to braise a brisket, pick up one of those precooked packages from the deli section to whip up these easy and delectable game day yummies.
Smokey Brisket Sheet Pan Nachos

INGREDIENTS
1 7 to 10 oz bag corn tortilla chips
1 8 oz bag shredded sharp cheddar
2 cups chopped or shredded brisket, warmed in its braising liquid
1/2 cup hickory smoked BBQ sauce
1/2 cup sour cream
1 to 2 chipotle peppers in adobo sauce
1/3 cup sliced green onions

DIRECTIONS
1. Blend sour cream with 1 or 2 chipotle peppers (I used an immersion blender).
2. Preheat oven to 400 degrees and line a large baking sheet with parchment paper.
3. Lay down a layer of chips on your baking sheet and top with all of the cheese.
4. Bake for about 7 minutes until cheese is melted and chips are toasty.
5. Use a slotted spoon to spoon brisket over nachos.
6. Squirt BBQ sauce all over nachos.
7. Drizzle on the chipotle cream.
8. Sprinkle the green onions on top.

Buttery Baked Brisket Sandwiches

INGREDIENTS
1/2 cup mayo
1 tsp horseradish or 2 tsp prepared horseradish or to taste
12 sourdough rolls
6 to 8 oz swiss cheese
6 to 8 oz smoked provolone
2 or 3 cups thinly sliced brisket, warmed in its braising liquid
1/2 cup unsalted butter (1 stick), melted
2 tsp dried onion
2 tsp brisket braising liquid
1 tsp prepared horseradish
1/4 tsp salt
1/4 tsp fresh ground pepper

DIRECTIONS
1. Preheat oven to 350 degrees and lightly spray a 9 x 13 inch baking dish or pan with oil spray.
2. Mix mayo with horseradish according to your taste.
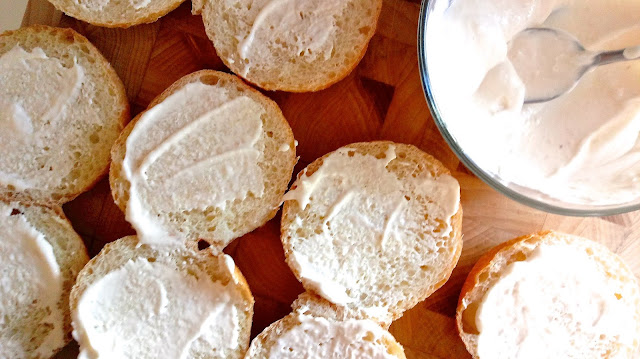
3. Cut rolls in half and spread with horseradish mayo.
4. Divide cheese evenly amongst rolls.
5. Distribute brisket evenly with a slotted spoon.
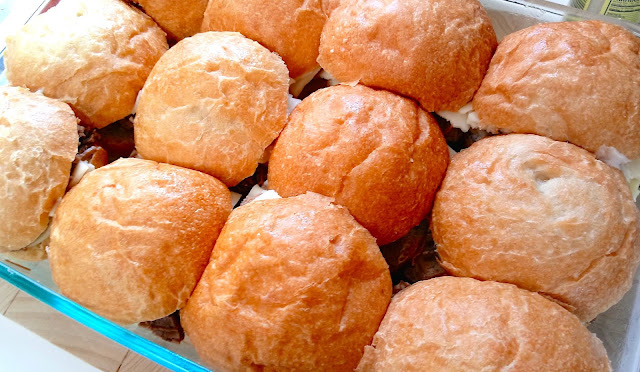
6. Close sandwiches and stuff into prepared dish.
7. Whisk together melted butter with the rest of the ingredients and pour over sandwiches.
8. Cover with foil and let rest 10 minutes.
9. Then, bake for 20 minutes.
10. Remove foil and bake another 10 minutes.

Leftover Brisket Smokey Nachos and Buttery Baked Sandwiches Pin

Wednesday, October 4, 2017

Brown Sugar Apple Pie with Sourdough Crust

It's apple season! Hip, hip, hurray! My boys adore apple picking. When we lived in Orange County we went apple picking every year. We have some dear friends living up in Oak Glen on a property full of gorgeous apple trees. They would let us come up and pick all we wanted. We'd come down the mountain with our trunk packed full of apples. The days and weeks that followed saw apple pies, a batch or two of apple butter, apple breads, apple cakes, applesauce, and apple cider - most of which got frozen to be eaten and shared throughout the holiday season. I was always in a race against myself to use up every last apple. I always won, of course. Such great memories.

We still try to go apple picking each year, but now that we have to pay for our picking we limit ourselves to a few pies worth of apples. Which brings me to my favorite apple pie.

Brown Sugar Topped Apple Pie with Sourdough Crust
My tender, crisp, flaky, and sweet Brown Sugar Apple Pie with Sourdough Crust.
This Brown Sugar Apple Pie is the one I always make - my very favorite version of apple pie.

sourdough pie crust for Brown Sugar Topped Apple Pie
Make a batch of my sourdough pastry, line a few pie pans, and freeze them to be ready for pie season.


I like to use sourdough pastry for the bottom of my pie. It's so very buttery and flaky - my very favorite pie crust. When I'm in a pinch (or not up to making homemade pastry), I use Marie Calendar's deep dish frozen pie crust. Have I mentioned that I have an easy way to make almost every dish I do? Some days just call for easy.

apples for Brown Sugar Topped Apple Pie


For the apple filling, I always opt for half Granny Smith and half Golden Delicious apples. I'm in love with the flavor and texture this combo brings to my pie.

Brown Sugar Topped Apple Pie


I pile them high and deep after I've tossed them with sugar, flour, spices, and lemon juice.

Brown Sugar Topped Apple Pie
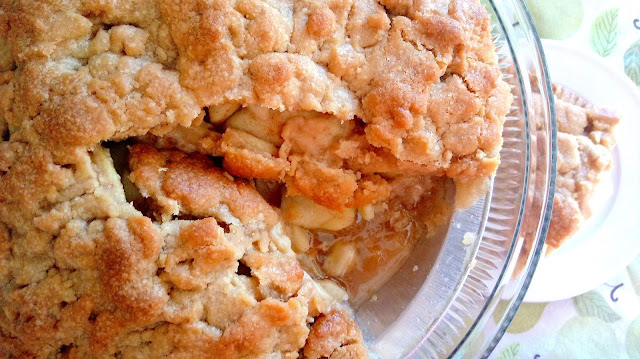
A perfectly tender and crisp brown sugar short crust tops my Brown Sugar Apple Pie.


I top my pie with a brown sugar short crust. This topping is crunchy and sugary, mingles perfectly with those gorgeous tender apples, and melts in your mouth. It's reminiscent of a tender brown sugar shortbread cookie. I got the recipe for this topping from a vintage southern cookbook years ago - one of those compilations of loved recipes put together by a ladies' club. I love those kinds of cookbooks. You can usually find them at second hand stores.

Brown Sugar Topped Apple Pie
This Brown Sugar Apple Pie is my very favorite version of apple pie.


My pies always bake up a little monstrous. It's all the butter. I make no apologies. 😉

Making this pie goes fairly quickly if your bottom pastry is ready to go. I like to make a batch of sourdough pastry, line a few pie tins, and freeze them to pull out whenever I have a hanker'n for pie.

If we've been apple picking, I like to put down four pies right away and freeze them for the holidays. This pie freezes so well. See my freezing instructions below.

Brown Sugar Apple Pie
(Makes one deep dish pie)

INGREDIENTS
1 unbaked deep dish single pie crust (I used sourdough pastry)
3 cups peeled and sliced granny smith apples (about 3 medium)
3 cups peeled and sliced golden delicious apples (about 3 medium)
2 Tbsp flour
3/4 cup granulated sugar
1/2 tsp cinnamon
1/8 tsp nutmeg
1 Tbsp fresh lemon juice

For the topping:
1/2 cup unsalted butter, softened (1 stick)
1/2 cup packed brown sugar
1 cup flour
a hefty pinch of salt

DIRECTIONS
1. Make sure your bottom crust is prepped and waiting for you in the freezer.
2. Preheat oven to 375 degrees.
3. In a large bowl, toss apple slices with the 2 Tbsp flour, the granulated sugar, cinnamon, nutmeg and lemon juice. Set aside.
4. Using a stand or hand mixer, beat 1/2 cup softened butter with the brown sugar and salt for 30 seconds.
5. Add the cup of flour and beat until mixture resembles cookie dough.
6. Place your pastry lined pie pan on top of a large baking sheet to catch any drips.
7. Load apples into pastry leaving behind any juices in the bowl.
8. Press brown sugar mixture evenly over apples trying to seal them up as best you can. You don't have to be exact.
9. Bake for 40 to 45 minutes.

TO FREEZE YOUR PIE: Add an additional Tbsp of flour to your apple mixture before you assemble your pie. Wrap your assembled raw pie very well in foil. Then, wrap the pie very well in plastic wrap. Then, wrap again in foil.

TO BAKE YOUR FROZEN PIE: Unwrap pie, place on a baking sheet, and bake at 400 degrees for 20 minutes. Reduce heat to 375 degrees and bake another 50 to 60 minutes. Cover pie with foil if it browns too quickly.

Brown Sugar Apple Pie Pin

Monday, October 2, 2017

Easy, No Sew, No Glue Spooky Eyeball Halloween Garland

Boo! Scared ya, didn't I? Just play'n.

We've been super busy over here at Loverbee central. The boys and I didn't get the great start to the new school year that I was hoping for. On top of that, Nora's sleep schedule continues to derail me. I've had to cut down on baking to once a week. (deep sigh)

So, that said, here is this busy family's easy Halloween craft - easy peasy and super spookely cute.

This craft involves a little cutting, tying, and the hanging of a few simple decorations. It'll take you longer to say "Easy, No Sew, No Glue Spooky Eyeball Halloween Garland" than it will be to put this cutie together. If your kids can tie a knot, they can probably do this whole project by themselves.

Easy, No Sew, No Glue Halloween Spooky Eyeball Garland
Make this Easy, No Sew, No Glue Spooky Eyeball Halloween Garland for cuteness sakes!


Here's what you'll need:
4 yards burlap
3 yards orange ribbon
3 yards purple ribbon
2 dozen Christmas ornament hangers
2 dozen spooky eyeball ornaments

I found my eyeball ornaments at a 99 Cents Only store. I've also seen felt ones. If you can't find any, you can cut circles out of white card stock, have kids draw spooky eyeballs on them, and use a hole punch to make a hole at the top of each.

burlap for Easy, No Sew, No Glue Halloween Spooky Eyeball Garland


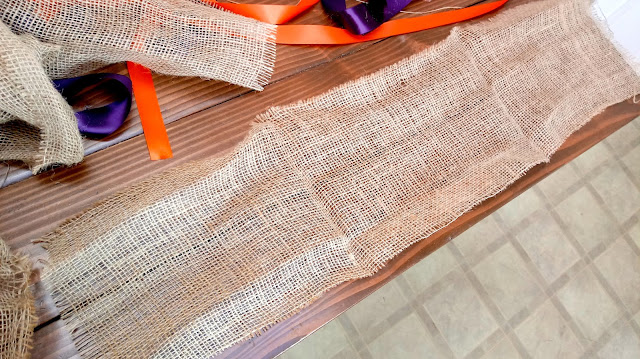
Start by prepping your burlap. My sections came in 36 x 18 inch pieces. I kept the length and cut each piece in half longways to get a width of 9 inches. By the way, to keep your burlap from unraveling, pull out a string from the center, where you plan to cut. Then, cut along the center, right where you pulled out the string. Here's a tutorial from Decor by the Seashore if you'd like a visual.

burlap knots for Easy, No Sew, No Glue Halloween Spooky Eyeball Garland


Now, tie each piece of burlap together with a simple knot.

ribbon for Easy, No Sew, No Glue Halloween Spooky Eyeball Garland


Next, cut your orange ribbon in half. Then, cut each piece in half again. You should end up with four, more or less, equal pieces. Do the same for the purple ribbon.

ribbon bows for Easy, No Sew, No Glue Halloween Spooky Eyeball Garland


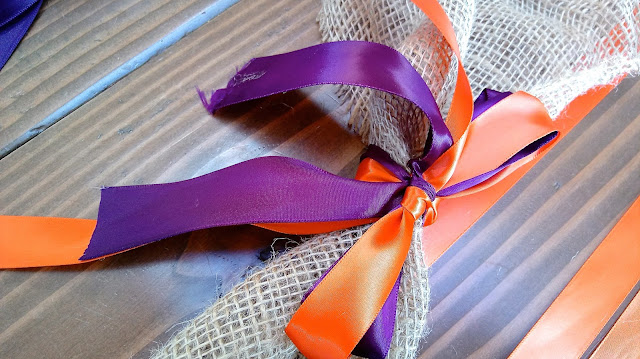
I tied my orange and purple ribbons together in between each burlap knot. I just tied a simple bow.

eyeball ornaments for Easy, No Sew, No Glue Halloween Spooky Eyeball Garland


Have kids loop a Christmas ornament hook through each eyeball and let them go crazy adding them to the garland. I found it easiest to hang the garland first.

Easy, No Sew, No Glue Halloween Spooky Eyeball Garland looped on chandelier


I draped my garland along our dining room chandelier since we don't have a proper mantel.

Easy, No Sew, No Glue Halloween Spooky Eyeball Garland
"Eye see you," says the Easy, No Sew, No Glue Spooky Eyeball Halloween Garland.


You can also hang it on a wall, mantel, arch, or doorway.

Eye'll be seeing ya! 😉

Easy, No Sew, No Glue, Spooky Eyeball Halloween Garland