Thursday, July 27, 2017

Strawberry Lemonade Popsicles

Nothin' says summer like a glass of strawberry lemonade. Even better than that, try these Strawberry Lemonade Popsicles.

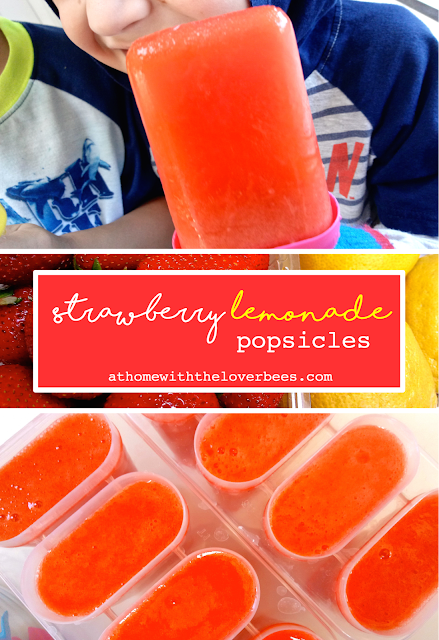
strawberry lemonade popsicles
Nothin' better than a strawberry lemonade popsicle!

These pops are the perfect summertime treat. They kinda taste like a pink Starburst candy - only better and fresher. These pops are sweet and tart and fruity and the prettiest strawberry pink color.

strawberry lemonade made into popsicles

You'll need the zest of one lemon and the juice of three. Also, hull and halve a cup and a half of strawberries.

strawberry lemonade popsicles ready to blend up

Throw your fruit, juice, and zest in a high speed blender with some sugar and water. After blending, give it a taste and add in more water or berries until you like the flavor.

strawberry lemonade popsicles poured into popsicle molds
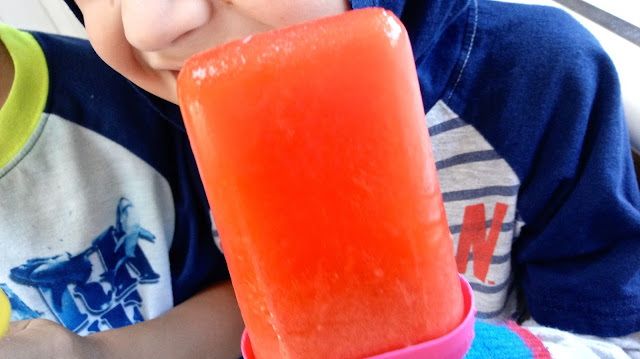
These strawberry lemonade popsicles boast a pretty strawberry pink hue.

Freeze your pops for about 4 hours or until completely frozen. Just a head's up, it will be hard to wait. 😉
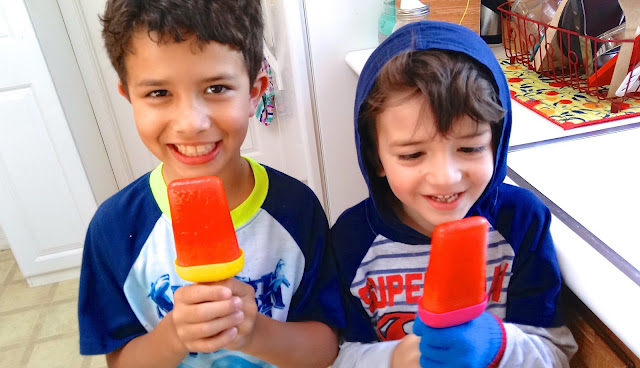
our favorite summertime treat - strawberry lemonade popsicles
The boys enjoying their favorite summertime treat.

Make a batch for your next pool day and watch the kids go nuts. Happy popsicle making!

Strawberry Lemonade Popsicles
Makes 8 to 10 medium popsicles

INGREDIENTS
3 large lemons
1 1/2 to 2 cups halved strawberries
1/2 cup sugar
About 2 cups water

DIRECTIONS
1. Zest one lemon and juice them all.
2. Pour strained lemon juice, lemon zest, strawberries, sugar, and 1 cup of water into a high speed blender and blend on low until the strawberries are broken down.
3. Increase blender speed to high and blend until you can no longer see flecks of lemon zest and mixture is smooth. Taste and add in more water to taste. I ended up using about 2 cups total. You can also add in more berries.
4. Pour into popsicle molds. Mixture may separate. That's okay.
5. Freeze for 4 hours or until completely solid.
strawberry lemonade popsicles on Pinterest

Monday, July 24, 2017

Unicorn Funfetti Cupcakes

Unicorns are taking over the world! No, not really - but they may as well be. That's my political statement for the year, folks.
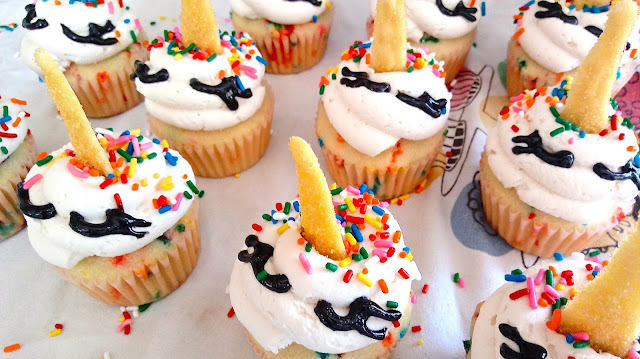
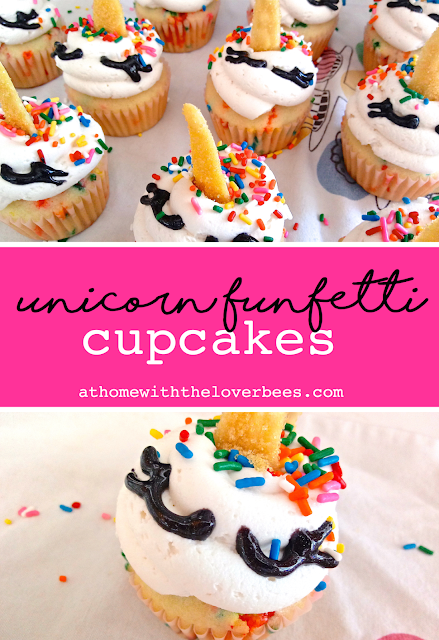
gluten free unicorn funfetti cupcakes
Gluten Free Unicorn Funfetti Cupcakes


Yes, I have jumped on the unicorn band wagon. What can I say? They're totally cute and they make my kids squeal with delight.


These adorable cupcakes are fairly easy to make. I made a gluten free cake mix according to the package directions and stirred in a quarter cup of sprinkles before baking. A regular vanilla or white cake mix will also work great.


I started this mystical culinary adventure by melting some white chocolate to make the horns. I piped the chocolate into horn shapes and sprinkled them with gold sanding sugar. I piped mine a little longer than they needed to be. An inch and a half should do just fine. You can also download or draw a template if eyeballing the horns is stressing you out. I'm not a complete perfectionist in the kitchen, so I eyeballed mine.

After your cupcakes are completely cool, whip up my favorite vanilla frosting. This recipe is creamy and dreamy and perfectly sweet. It's my "go to" vanilla frosting.


To put the unicorns together, use a wide round tip to pipe the lusciously perfect vanilla frosting onto your cupcakes. Sprinkle the tops and backs with more sprinkles, stick in the horns, and use a store-bought black icing tube to make the lashed unicorn eyes. I practiced on a plate to steady my hand and get my technique down.

A quick note about the horns: you really need to temper your chocolate so that the horns stay firm. Follow the directions below to do that. I didn't really bother when I made this batch of cupcakes and ended up with delicious, but flopped over, horns.

gluten free unicorn funfetti cupcakes
Also, these cupcakes are as delicious as they are adorable. Have lots a fun making and eating these magical treats.

Unicorn Funfetti Cupcakes

INGREDIENTS

For the horns:
4 oz baking white chocolate, chopped
1/4 cup gold or yellow sanding sugar

For the cupcakes:
1 box vanilla or white cake mix and ingredients to making according to package directions (I used Betty Crocker's Gluten Free Vanilla Cake Mix)
1/4 cup rainbow jimmies for cake mixes that make 12 cupcakes and 1/2 cup jimmies for cake mixes that make 24 cupcakes

For the frosting:
1/2 cup unsalted butter, softened
1/2 cup shortening
4 cups powdered sugar
2 tsp vanilla extract
1 to 4 Tbsp milk

1/2 cup rainbow jimmies for decorating
1 3.5 oz tube black piping gel

DIRECTIONS
1. Make your horns first as they'll need plenty of time to fully set. Line a baking sheet with wax or parchment paper and set aside.
2. Melt half of your white chocolate (2 oz) in a microwave safe bowl in the microwave in 15 second increments, stirring after each time. Add in the rest of the white chocolate and stir until all melted.
3. Snip off one corner of a Ziplock freezer bag about 1/8 of an inch. You can also insert a super tiny round piping tip into your bag, if you like. Fill your bag with melted chocolate and pipe 1 1/2 inch long horn shapes onto your parchment-lined baking sheet. Immediately sprinkle with gold sanding sugar. Place tray in the fridge to set.
4. Make your cupcakes according to the package directions stirring in the rainbow jimmies right before you scoop the batter.
5. Let cupcakes cool completely.
6. Make your frosting. Beat butter and shortening in a stand mixer for 30 seconds.
7. Beat in 2 cups powdered sugar until creamy.
8. Scrape down bowl and beat in 2 tsp vanilla.
9. Beat in 2 more cups powdered sugar.
10. Beat in milk 1 tablespoon at a time until the consistency is pipe-able (not too runny, not too stiff). Then, scrape down the bowl again and beat for 3 minutes on high until light and fluffy.
11. Put your unicorns together. Use a large round tip to pipe frosting onto your cupcakes.
12. Sprinkle tops and backs with more rainbow jimmies.
13. Push a horn into the top of each cupcake.
14. Use the black piping gel to pipe half circles and lashes on each cupcake for the eyes.

* If your cake mix makes 24 cupcakes, you 'll need to double the frosting recipe and the number of horns you make.

gluten free unicorn funfetti cupcakes

Friday, July 21, 2017

Summer Fun: Art Camp

This was SO MUCH FUN!!! I was texting a friend of mine about arts & crafts when all of a sudden I had a brilliant idea - an arts & crafts weekend. She has a little girl around Mateo's age who also loves creating, so we set a date and got to planning.

arts and crafts

Some of the projects we ended up doing were simple and straightforward and only required the purchase of supplies. Others took a bit more prep and organization.


We decorated pillowcases and hand towels with fabric paint, made our very own comic books, and hammered nails into wooden boards for string art. We also did a directed multi-media project, photograph reproductions, and a segmented watercolor poster. These projects may sound overwhelmingly artsy, but they aren't as complicated as all that - especially in the hands of 7 year olds.

I also had a box of simple art supplies, and a sketch pad, for each child to use if they finished projects early and needed something to do.


You'll need an assortment of fabric paints for the fabric painting project. I found some at the dollar store that were easy to use. I also picked up some solid colored pillowcases and hand towels. You'll need to insert a piece of cardboard inside of the pillowcases as the fabric paint can sometimes bleed through. You could do aprons, cloth napkins, or t-shirts too. White is nice, but as long as it's a solid color, you're good to go.


For the comic books, I simply printed out some comic book pages from Kids Activities Blog and gave each child a stack. They used supplies from their art boxes to write and draw their stories. They also made covers out of folded 11 x 17 inch sheets of paper and then stapled everything together.

string art


string art

I had my hubby cut up a half inch board into 8 x 8 and 8 x 6 inch pieces for our string art project. Each child sanded their own board with a small piece of sand paper. Then, they traced or drew a simple shape onto their boards. After a brief demonstration, the kids hammered 1 inch nails every quarter inch or so along their shapes. I helped them tie the string of their choice at their starting point and they looped the string around the nails in the style they preferred, tying them up at the end.


I prepped for the directed multi-media project by scattering different art supplies down the center of the table like a runner. I used stickers, ribbons, different kinds of tape, tissue paper, glue and glitter glue, scissors, a stapler, a hole punch, plus the supplies in their art boxes. I gave each child an 11 x 17 inch sheet of paper and gave them simple directions that they could interpret any way they wanted. "Draw a square on your page. Make your square into something. Add something shiny to your picture... ." It was a blast to see what each child came up with.


Our photograph reproduction project started with each child taking my camera phone outside and taking pictures of whatever they liked. We loaded the pics onto the computer and they chose which photograph they wanted to reproduce. They started drawing their reproductions with pencils and then chose which supplies to use to add in the color.


Our last project was a segmented watercolor poster. I showed the kids how they could make different patterns on their poster boards using lines. They could keep the lines from touching to make stripes or intersect them to make squares, diamonds, or triangles. Then they painted one segment at a time with water colors.

For those of you interested in planning your own art camp, here are a few tips. 

1. Gather all of your supplies before hand and have materials prepped - copied, cut, organized, packages opened, etc. 
2. You'll also want to make samples of some projects and print out photos or guides of others. 
3. Make sure each child has plenty of room to create. You can make stations for each child or a station for each craft or just make sure you have large spaces cleared for them to spread out.
4. Leave plenty of time for each craft. Different kids work at different paces and some will be more detailed than others. Have something available for children to do if they finish early. I had an art supply box and drawing pad for each child to use whenever they wished.
5. A dollar store is a great place to get all kinds of supplies.
6. If you notice any of the kids getting antsy or bored, take a break for a snack, a stretch, a game of chase outside, a splash in the pool, etc.
7. Get a plastic table cloth to cover your table for activities involving fabric paint, tempera paint, or glitter glue. This will save you many a headache.
8. Ask others to join in on the planning if coming up with all of the activities seems too daunting. Or, have someone else take care of the snacks. My lovely friend actually did all of the cooking for our meals and snacks. It was so nice not to have to think about that aspect of our time together. Also, her food is spectacular. Thanks Sweet Friend.

If you do decide to throw such an affair, send me a pic or post a comment. I'd love to hear about your experience, what projects you chose, and how the kids enjoyed it.

Monday, July 17, 2017

Movie Candy Chocolate Bark

I'm a magician. I turned candy into candy. How amazing is that? Just kidding. I did have a total blast making this Movie Candy Chocolate Bark for a very special outdoor family movie night.

movie candy chocolate bark

We really wanted to take the kids to one of the only drive-in theaters left in our state this summer. Our baby girl's sleep schedule made that option a "no go", so we made our own drive-in.


Matthew backed his truck up to the house and he and the boys loaded it up with a mattress and couch cushion. He also moved the tv onto the porch and we were ready to roll. We watched E.T. What a great movie for an outdoor viewing. The boys had never seen it. We started the movie as the sun was setting and finished it up in the dark. Even Matthew thought he heard something in the bushes (hee, hee).

I used our favorite movie candy to make some extra fun chocolate bark for this special viewing. Chocolate bark is super easy to make. I melt the chocolate in the microwave, sprinkle with toppings, and refrigerate until firm. Done and done!

movie candy chocolate bark

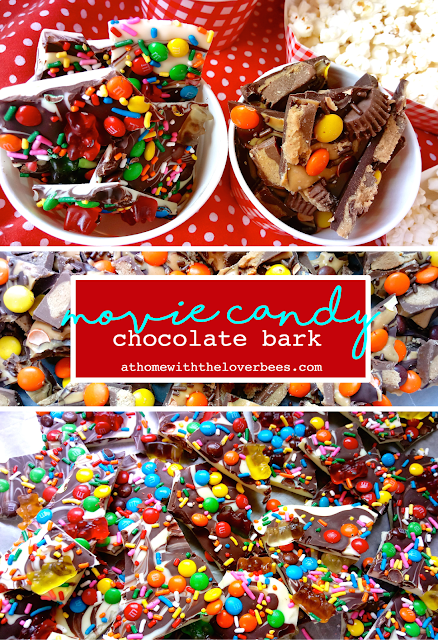
I made one just for the kiddos with a white chocolate base swirled with dark chocolate (to cut the sweetness) and topped it with mini M & M's, gummy bears, and rainbow sprinkles.

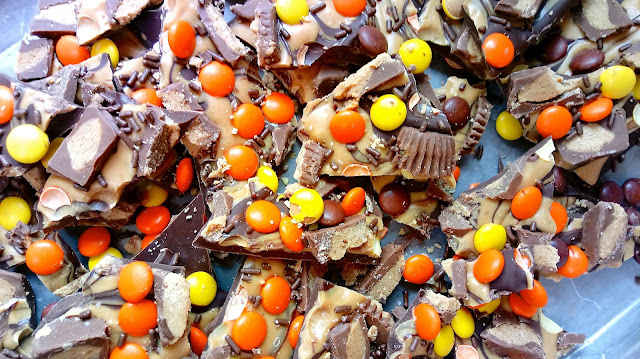
chocolate peanut butter chocolate bark

Mommy and Daddy's bark is a semisweet chocolate base swirled with melted peanut butter chips and topped with chopped Reese's peanut butter cups, Reese's pieces, chocolate sprinkles, and a little sprinkling of Kosher salt. Oh my.


I served up this bark in cute little cups with a side of popcorn and root beer floats to wash it all down. Hello sugar night - I mean, movie night.

Feel free to play around with this recipe subbing your favorite chocolate and toppings. Share what kind of movie candy combo you would use in the comment section.

Movie Candy Chocolate Bark

INGREDIENTS FOR GUMMY BEAR BARK
12 oz white chocolate chips or chopped white chocolate baking bars for the base
3/4 cup dark chocolate chips or chopped chocolate for swirling
1/2 cup gummy bears, maybe more
1/3 cup mini M & M's, maybe more
2 Tbsp rainbow sprinkles

INGREDIENTS FOR REESE'S BARK
12 oz semisweet chocolate chips or chopped chocolate bars for the base
1 cup peanut butter chips for swirling
1 1/2 cups chopped Reese's peanut butter cups
1/2 cup Reese's pieces, maybe more
2 Tbsp chocolate sprinkles
a couple of pinches of Kosher salt

DIRECTIONS
1. Melt half of your base chocolate in the microwave in a microwave safe bowl for 15 seconds at a time, stirring after each heating.
2. Stir in the rest of the base chocolate until it's all melted.
3. Pour onto a baking sheet lined with parchment paper and spread out until it's about 1/8 inch thick.
4. Melt your swirl-in chocolate/peanut butter chips the same way you did the first batch. Then, pour it in lines over your base chocolate and swirl it with a butter knife.


5. Sprinkle on your toppings. I like to start with the biggest topping first and end with the smallest. Gently press the toppings into the chocolate. Feel free to adjust the ratios of toppings according to your taste and eye.
6. Refrigerate for a couple of hours or until completely firm. Then, break the bark apart with your hands.
7. I store my bark in a Ziplock freezer bag in the fridge and pull it out an hour before I want to serve it so it's not too hard.

movie candy chocolate bark

Friday, July 14, 2017

Summer Fun: Flower Power Wreath

Looking for something to keep the kiddos busy? This wreath is totally kid friendly, but feel free to hog this one if you need some mommy creative space. 😉

My door was without adornment since the wind had turned my Usnea wreath into a wonky mess. Plus, the boys were jonesin for a project, so I had them try their hand at the paper flowers I used for my Easter garland this past spring. I pulled the scraggly Usnea off of my wreath base and the boys and I re-did the wreath with our handmade flowers.


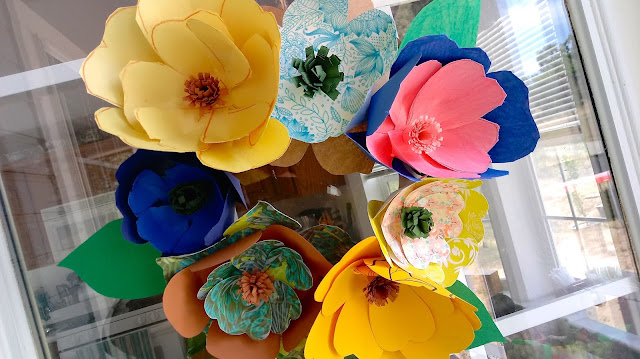
paper flower wreath

The boys did a great job with this craft and the wreath turned out super cute.


We started the project by tracing our petal templates. We used a combo of colored construction paper and printed scrapbook paper.


I taught the boys how to glue their flowers together and they went to town. See my Easter garland post for directions and templates for these flowers.


I used a glue gun to affix the flowers to our paper plate base. See my nature wreath post on instructions for making your own wreath base.


paper flower wreath

I promptly hung up our masterpiece on my naked front door. Ezra was so proud when he showed his daddy our handiwork.


Hope you're inspired to get those kiddos to work with all of that vacation time on their hands. 😉


paper flower wreath

Tuesday, July 11, 2017

What's for Dinner? Oven Roasted BBQ Chicken

This is my favorite BBQ chicken recipe.


I prefer this roasting method over grilling. When I want to grill my chicken, I usually use my BBQ rosemary lemon chicken recipe. But when I have a hankerin' for BBQ sauce, I pull out this tried and true treasure.

The chicken gets brushed with BBQ sauce every 15 minutes and ends up sporting a thick BBQ sauce glaze. The oven heats up the house a bit, but it is well worth a few beads of sweat.


First, score your chicken pieces a couple of times.


Next, mix up your marinade: BBQ sauce, apple cider vinegar, brown sugar, salt, pepper, and hot sauce.


Marinate your chicken for at least 4 hours. You really want to get that flavor in those babies.


When it's time to cook, spray a foil-lined baking sheet with oil spray, lay down your chicken, and brush both sides with more BBQ sauce.

Every 15 minutes, take out the chicken, and brush both sides again with more BBQ sauce. You'll do this about 4 times.

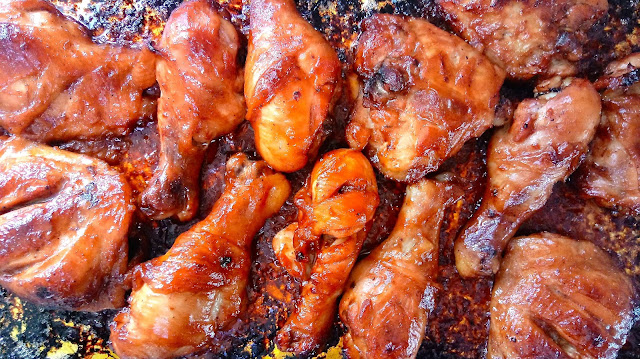
oven roasted BBQ chicken

When the chicken is done, it will be quite tender and glazed to perfection.

I usually serve this chicken with mashed potatoes, roasted potatoes, or potato salad. When I'm making this dish for guests I throw in some cole slaw and cornbread too. A little sweet tea wouldn't hurt either. 😉


Oven Roasted BBQ Chicken

INGREDIENTS
12 chicken legs and/or thighs. (I like the picnic pack that gives you 6 of each)
2 bottles BBQ sauce
2 Tbsp brown sugar
1 Tbsp raw apple cider vinegar
1 tsp salt
1/2 tsp fresh ground pepper
1/2 tsp hot sauce

DIRECTIONS
1. Score each chicken piece twice in the fattest part of the meat going down to the bone.
2. Mix 1/4 cup BBQ sauce with the rest of the ingredients in a small bowl.
3. Place chicken in a large Ziplock freezer bag and pour in the marinade. Zip closed with as little air as possible and massage marinade into chicken. Refrigerate for at least 4 hours.
4. Preheat oven to 400 degrees and line a large baking sheet with foil. Spray the foil lightly with oil spray.
5. Place chicken on pan, discarding the marinade. Brush each piece with additional BBQ sauce on both sides.
6. Roast 15 minutes and brush each piece again on both sides. Repeat this process 3 more times.

oven roasted BBQ chicken

Friday, July 7, 2017

Lessons in Kindness

We're working on kindness in our household. It's a long haul kinda process. I've got a lot of hopes for my kids in this arena. I really want them to know the difference between being nice/polite/respectful and being kind, which carries with it a connotation of love. I want them to understand that kindness involves loving others, feeling empathy, being compassionate, sharing out of the goodness of their hearts versus sharing because they're supposed to. They can be nice with their minds and their wills (like following a rule), but kindness comes from their hearts. It's something that you are, more than something that you do. We're trying to model and explain that difference and how we should always be nice (a rule) while aspiring to, and working towards, being kind (formation of true internal character). Boy, am I lacking in this department. Talk about teaching out of a deficit.

We totally want to raise little gentlemen that say, "please" and "thank you," share their toys with others, and include new kids in their play. But we are also trying to teach and model what these things look like when they come from the heart, i.e., kindness - actually caring, forgiving someone even when they don't deserve it, self sacrifice, not judging others because they're different. You can't do those things with niceness. Niceness is just surface control, but kindness comes from, and exercises, love.

So, how do you teach your kid how to love other people? It's quite the challenge. I'll let ya know if I ever get it all figured out. Until they reach a certain age, kids aren't even capable of understanding that other people have thoughts and feelings of their own. Not until they reach that milestone will they be able to consider another person and their well-being.

Our current focus is to flood our kids with love in the context of structure, boundaries, and discipline. We think they'll have a better chance of learning how to give that kind of love to others and will, probably (hopefully), naturally want to give it. An overflowing cup, if you will.

Pointing our kids to Jesus is another way we're trying to teach our little ones to be kind. The way Jesus was with people when He was here on earth is a great example of kindness versus niceness - the things He did, the things He said, the way He treated people, His ultimate sacrifice. When you read the accounts of His life in the gospels you can almost see the kindness in His eyes. He wasn't always nice (remember the money changers?), but He was, most certainly, always kind. Of course, we're talking about Love, Himself, here.


Big job, right? You're telling me. Time will tell if we've gotten the point across to our little cherubs, and if we see the fruit of our labor - both in their hearts and in our own.

Along with teaching, talking, and modeling, we pray. We pray for their hearts and minds in a world that has seemingly given up on both kindness and niceness. Amidst the ugliness, I pray that my children can see people the way that God sees them - as creatures that He perfectly formed, deeply loves with the greatest of all loves, and intensely desires to be close to and to call his very own sons and daughters. I want to see people that way too.

Wednesday, July 5, 2017

Chocolate Mint Vegan Fudgesicles

Things are heat'n up, but we're keep'n it cool with batch after batch of homemade popsicles. Even Nora holds and eats her own popsicle now. We just can't stop with the popsicles over here. I think I may have recently made the same statement regarding nachos. Life is all popsicles and nachos up in here. Ha!


These fudgy lovelies are soooooooooooooooo chocolatey with a hint of mint that make them super refreshing. Yum, Yum!


They're also very easy to make. 

Coconut cream and milk get whisked together with cocoa powder, sugar, vanilla, and mint extract. Easy peasy lemon squeezy - or chocolate squeezy, in this case.


You need to put a little muscle power into whisking the mixture together so that all of the cocoa powder gets incorporated. You can also use a blender if you don't mind washing it out.


I like to pour my mixture into a pitcher or container with a spout for easy pouring and filling.


Also, be prepared for the smell of chocolate and mint to fill the air sending family members poking their heads into the kitchen to see what's up. 😉


Freeze these pops for 4 hours or until completely frozen.


We were all happy campers with this batch of pops. 

Until the next batch,
Mama Loverbee

Chocolate Mint Vegan Fudgesicles

INGREDIENTS
1 can coconut cream
1 can coconut milk
3/4 cup cocoa powder
1 tsp vanilla extract
1/2 tsp peppermint extract
a dash of salt
3/4 to 1 cup granulated sugar

DIRECTIONS
1. Whisk together all of the ingredients starting with 3/4 cup of sugar in a large bowl until cocoa powder is completely incorporated. You can also use a blender.
2. Taste and add in more sugar if you like.
3. Pour into popsicle molds and freeze 4 hours or until completely firm.