Thursday, August 31, 2017

Fresh Peach, Walnut, and Poppy Seed Green Salad

Move over peach pie. This Fresh Peach, Walnut, and Poppy Seed Green Salad showcases summer fresh peaches like no other dish.

If you're heading to a barbecue over the Labor Day weekend, bring along this fresh green salad loaded with ripe fragrant peaches. I love it alongside anything grilled - chicken, steak, even burgers.

Fresh Peach, Walnut, and Poppy Seed Green Salad  for Labor Day BBQ
Bright and fragrant peaches totally make this Fresh Peach, Walnut, and Poppy Seed Green Salad.
I didn't want to let peach season pass me by before I got to enjoy this lovely salad - and I'm not much into green salads, let me tell you. I'm more of a slaw or marinated veggies kinda gal, but this is one of my favs. It is so fresh and fabulous. And it's pretty too.

Fresh Peach, Walnut, and Poppy Seed Green Salad


Gorgeous green romaine, spinach, and sliced green onions form the perfect bed for bright and beautiful sliced peaches and toasted walnuts. All is tossed with perfectly sweet and tangy poppy seed dressing. So yum!

Fresh Peach, Walnut, and Poppy Seed Green Salad
A drizzle of sweet and tangy poppy seed dressing is just lovely over this Fresh Peach, Walnut, and Poppy Seed Green Salad.


Fresh Peach, Walnut, and Poppy Seed Green Salad

INGREDIENTS
1/2 cup walnuts
1/2 a head of romaine lettuce, washed, dried, and torn
2 large handfuls of spinach, torn
3 to 4 peaches (ripe, but firm), sliced
3 green onions, sliced
about 1/3 cup of poppy seed dressing, maybe more (I love Brianna's)

DIRECTIONS
1. Preheat oven to 350 degrees.
2. Add walnuts to a baking sheet and bake for about 7 minutes until you can smell the walnuts toasting. Watch them carefully so they don't burn. Cool walnuts and then roughly chop.
3. In a large bowl, lay down the romaine and spinach. Sprinkle on peaches and then the green onions and walnuts.
4. Drizzle on the the dressing and toss gently just before serving.


Sunday, August 27, 2017

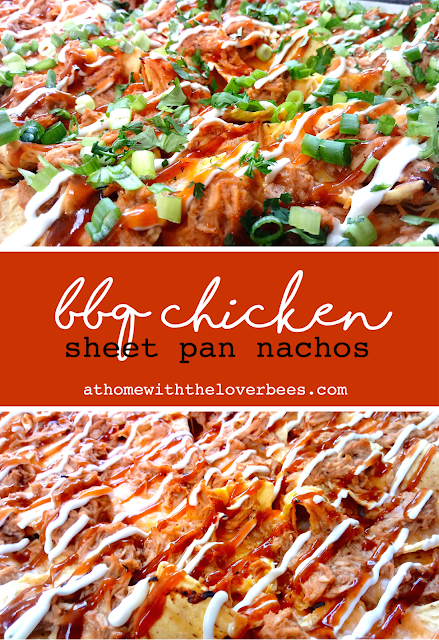
What's for Dinner? BBQ Chicken Sheet Pan Nachos

Homeschool is in session over here at the Loverbee's and quick dinners are a total must. Nachos are a quick and easy dinner that graces our table on a weekly basis. Surprise, surprise.

BBQ Chicken Sheet Pan Nachos
These BBQ Chicken Sheet Pan Nachos are deliciously sweet and tangy.


These BBQ Chicken Nachos are one of our favorites. They're sweet and tangy and oh so satisfying.
BBQ Chicken Sheet Pan Nachos

I start by smothering my corn chips with cheddar cheese and BBQ pulled chicken. The tray gets popped into a hot oven until the cheese is melty and the chips are toasty. Pulled pork or grilled chicken will also work great in this recipe. Or, you can use leftover Oven Roasted BBQ Chicken.

BBQ Chicken Sheet Pan Nachos

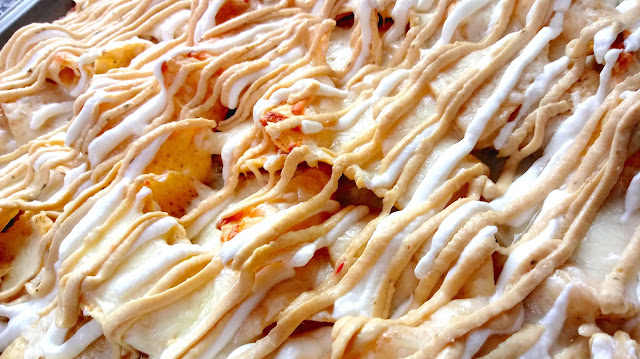
Sour cream and BBQ sauce get drizzled on top of the hot and toasty pan. With most nachos, it's all about the sauce. The BBQ sauce in these nachos adds sweet and smokey flavor, the right amount of moisture (you don't want a dry nacho), and the messiness that a tray of nachos is really all about.

Sheet Pan BBQ Chicken Nachos

A fresh and fabulous sprinkling of green onions and cilantro finishes off the dish. I left the greens off a third of the tray for my boys. They aren't totally opposed to green food - only when it's on top of, or mixed into, other foods. Because you can't mix green food with other food!?!? There is some madness not worth fighting.

BBQ Chicken Sheet Pan Nachos

INGREDIENTS
1 10 oz bag corn chips (you don't have to use the whole bag)
1 8 oz bag shredded sharp cheddar cheese
1 1/2 cups BBQ pulled chicken
1/2 cup BBQ sauce
1/3 cup sour cream
1/4 cup sliced green onions
1/4 cup chopped cilantro

DIRECTIONS
1. Preheat oven to 400 degrees and line a large sheet pan with parchment paper.
2. Lay down a plentiful layer of tortilla chips on your sheet pan. Sprinkle with all of the cheese and pulled chicken.
3. Bake for 7 to 10 minutes until cheese is melted and chips are toasty.
4. Drizzle on sour cream and BBQ sauce. I like to put each sauce in a ziplock bag, snip off the corner, and squeeze it out in diagonal lines across the whole sheet pan.
5. Sprinkle with green onions and cilantro.
6. Serve with a smile.

BBQ Chicken Sheet Pan Nachos Pin

Tuesday, August 22, 2017

The Best Grilled Potato Salad Ever

Okay, guys. This is it. This is the one. If any recipe was ever gonna make me famous, it is this recipe. And I'm gonna share it with you. Why? Because I can't hold it in anymore. I just have to share the magic.

The Best Grilled Potato Salad Ever
This grilled potato salad truly is the best potato salad ever.


If you're not a potato salad person, get ready to fall in love with potato salad. This recipe is beyond amazing. If you are a potato salad lover, get ready to meet the dish of your life. Extreme words, I know. But an extremely delicious dish deserves such high praise.
It was like discovering penicillin the day I made this potato salad. Okay, slight exaggeration, but you have to try it. I had seen someone throw grilled potatoes into a potato salad and decided to give it a try. I just happened to have balsamic mayo in my fridge that day (along with celery, green onions, and eggs) so that's what went into the salad. It also occurred to me, in a moment of utter inspiration, to amp up the smokey flavor with some smoked paprika. What a grand idea that was. Okay, here it goes.

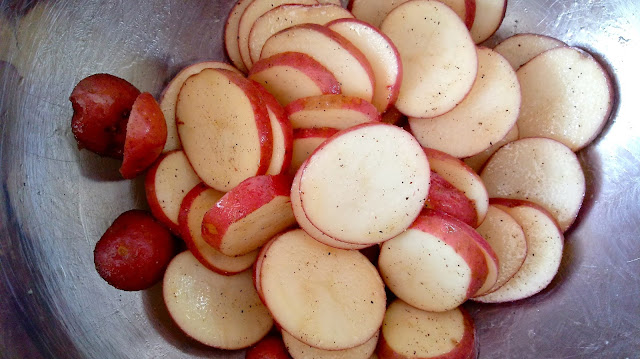
sliced red potatoes for The Best Grilled Potato Salad


Slice about a pound of red potatoes into rounds. Toss them with plenty of salt and pepper and a drizzle of olive oil. Grill 'em on a grill pan for about 20 minutes or so, turning them over a few times for even cooking and browning.

Fresh Ingredients for The Best Grilled Potato Salad


Slice up a couple of hard boiled eggs, some celery, and a few green onions.

Ingredients for The Best Grilled Potato Salad

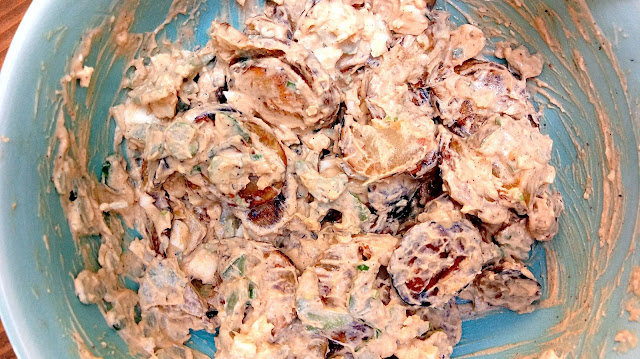
Dump in the grilled potatoes and the rest of the ingredients and gently toss together.

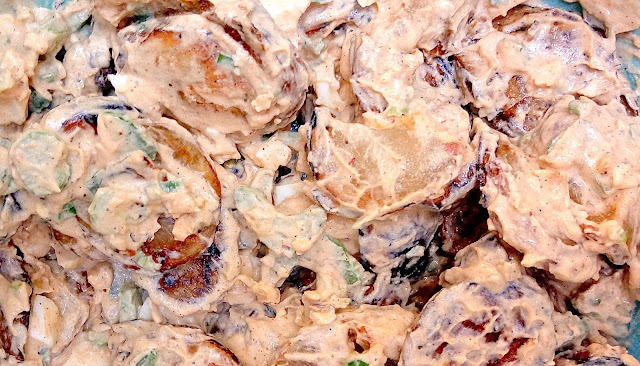
The Best Grilled Potato Salad
There is no better potato salad than this Best Ever Grilled Potato Salad!


Taste your salad and add in more mustard, vinegar, smoked paprika, and/or salt.

Friends, keep this recipe close to your hearts. Print it out and put it in a safe deposit box. Put it in a trust for the generations that will come after you. Okay, I'm stopping now. Just promise me you'll try this recipe and cherish it forever.

You're welcome.

The Best Grilled Potato Salad Ever

INGREDIENTS
1 to 1 1/2 pounds red potatoes, sliced into 1/4 inch rounds
olive oil to coat potatoes
salt and pepper to coat potatoes and more for salad
1/2 cup mayo, maybe more
2 celery ribs, sliced
4 or 5 green onions, sliced
2 or 3 hard boiled eggs, sliced into rounds
1/4 tsp smoked paprika to start
1/2 Tbsp dijon mustard to start
2 tsp balsamic vinegar to start

DIRECTIONS
1. Toss potato rounds with plenty of salt and pepper and a drizzle of olive oil.
2. Grill potatoes on a grill pan over medium high flame for about 20 minutes or so, turning a few times for even cooking and browning.
3. Toss grilled potatoes into a large bowl with celery, green onions, and eggs.
4. Dump in the rest of the ingredients and toss gently to coat.
5. Taste your salad and add in more salt, pepper, smoked paprika, mustard, and/or vinegar.
6. Add a comment to this post thanking me profusely for this life changing recipe. Ha!

Grilled Potato Salad Pin

Thursday, August 17, 2017

Back to School: Chocolate Peanut Butter Funfetti Granola Bars

My kiddos eat a LOT of snacks. I often announce lunch as just another snack time so they'll be more inclined to eat what I put in front of them. Whatever works, right?

Chocolate Peanut Butter Funfetti Granola Bars
The Loverbees are back to school with these Chocolate Peanut Butter Funfetti Granola Bars.

As the start of a new school year is upon us, fun and tasty snacks are a must - for all of us. These Chocolate Peanut Butter Funfetti Granola Bars will provide great energy and incentive to my boys and me as we begin the hard work of learning and teaching. These bars also make a fantastic after school snack or lunch box surprise.

toasted oats for Chocolate Peanut Butter Funfetti Granola Bars
Toasted oats make a big difference in these deliciously fun granola bars.

Start off by toasting your oats. Toasting them brings out a lovely nutty flavor. Let them cool a few minutes and then mix them up with the rest of your dry ingredients. In this funfetti version, I also added a couple tablespoons of sprinkles.

peanut butter & honey for Chocolate Peanut Butter Funfetti Granola Bars

The gooey ingredients get microwaved for 30 seconds until they come together into a thick syrup.

Peanut Butter Funfetti Granola Bar Mix
This funfetti peanut butter granola mix has fun written all over it.


Pour the gooey stuff over your dry mixture and mix until well incorporated.

Chocolate Peanut Butter Funfetti Granola Bars

Pour out your luscious peanut butter scented mixture into a parchment lined pan and push the funfetti out of it with a rubber spatula. The better you pack it down, the better the bars will stay together when cut.

Chocolate Peanut Butter Funfetti Granola Bars

Melt your chocolate with a little bit of coconut oil in the microwave and spread evenly over the bars. Sprinkle with another tablespoon of sprinkles.

Chocolate Peanut Butter Funfetti Granola Bars

Set your pan in the fridge until cold and then cut into bars. They cut better when cold. Store them in an air-tight container. They'll last longer in the fridge, but make sure you take them out at least an hour before you want to eat them so that the chocolate is the right temp and texture.

Chocolate Peanut Butter Funfetti Granola Bars
Kids go nuts over these Chocolate Peanut Butter Funfetti Granola Bars!


Chocolate Peanut Butter Funfetti Granola Bars

INGREDIENTS
2 1/3 cups whole oats
1/3 + 2 Tbsp almond flour
1/3 cup desiccated coconut
a pinch of salt
a dash of cinnamon
2 Tbsp sprinkles (I used rainbow jimmies)
2/3 cup natural peanut butter
1/2 cup honey
1 tsp vanilla
1 cup semisweet or milk chocolate chips
1 tsp coconut oil
1 Tbsp sprinkles for the top

DIRECTIONS
1. Preheat oven to 350 degrees and line a large baking sheet with parchment paper.
2. Spread your oats out evenly on your baking sheet and bake 7 to 9 minutes.
3. After the oats have cooled for a few minutes, combine them with the rest of the dry ingredients in a large bowl.
4. In a medium microwave safe bowl, combine the peanut butter and honey. Microwave for 30 seconds and then stir in the vanilla until mixture is smooth.
5. Pour peanut butter mixture over dry ingredients and mix until well incorporated.
6. Smash into a parchment lined 9 x 9 inch square pan with a rubber spatula. Really pack it down.
7. In a small microwave safe bowl, combine chocolate chips and coconut oil and microwave in 15 second intervals until almost melted. Then, stir until all the chocolate chips are melted and the mixture is smooth. Spread over bars. Sprinkle with a tablespoon of sprinkles.
8. Refrigerate your pan until cold and then cut into bars.

Chocolate Peanut Butter Funfetti Granola Bars

Tuesday, August 15, 2017

Back to School: Prepping Our New Homeschool Space

This homeschooling mama is gearing up for the new school year. It starts NEXT WEEK! Ahhhhhhhhhhhhhhhhhhh! I'm only slightly panicking and lamenting and wondering where my summer has gone.

Most moms are rejoicing right now as their kids are starting school. I love those pics of mom's jumping for joy or lounging in a pool while their children, all dressed and ready for school, watch on. Ha! So great. Homeschool mamas enjoy that experience at the end of the school year when summer starts. We all get to take turns celebrating.

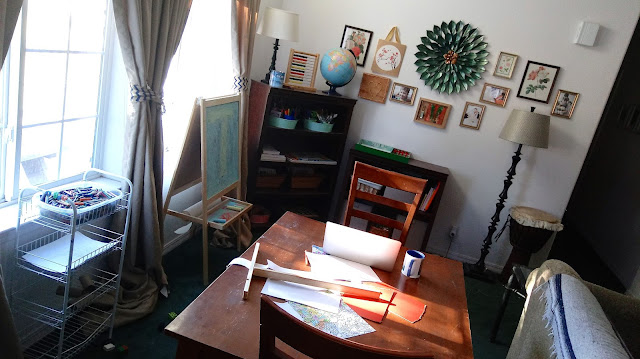
Okay, back to gearing up. I've been working on revamping and reorganizing our school area. Nora got her own room this past year and we moved the boys into the nice big room we were using for school. We spent the end of the last school year utilizing half of the dining room for school work and storage. Not a pretty sight.

homeschool back to school
We've got the benefit of sweet morning sunlight flooding our new homeschool space.

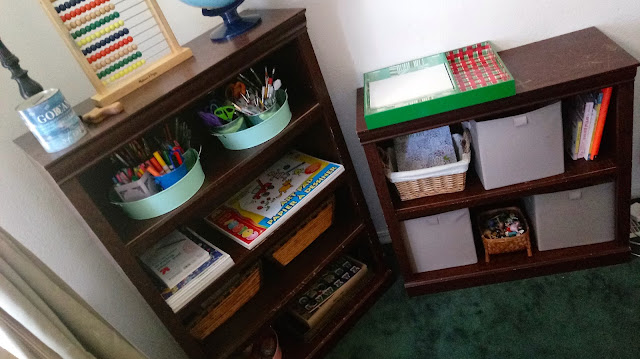
Fortunately, we just got rid of an old couch that was on its last leg. That cleared up a whole bunch of space in our spacious living room. I divided the room in two and moved in a work table and a couple of bookcases to house our school supplies. Now my dining room is free to be pretty again. That is very happy for me. 😂

back to school homeschool space

A new space is exciting and encouraging for me and the boys as we jump into a new school year. When I was little new clothes, new school supplies, and a brand new backpack and lunch box helped launch me into a new school year with excitement and a better attitude than I would have had otherwise. Since we homeschool we don't really need a lot of that same equipment that worked so well to motivate me, so I'm getting creative.

homeschool back to school supplies

Along with our new work space, some new supplies gorgeously displayed and a slew of exciting school snacks on my docket are just the right touches to boost our morale as we get back to formal learning.

back to school snack mix
An easy back to school snack mix made up of our favorite snacks.


To kick things off I put together a quick snack mix full of the boys' favorite store-bought snackies. I filled a big jar with cheese crackers, BBQ kettle chips, pretzels, and cheese puffs. Having something like this on hand makes my life so much easier. We can grab a handful without losing too much traction when we're right in the middle of something.

I've also been trying to anticipate the Nora factor. I'm using the bottom shelves of our new school storage area for wood puzzles and baskets of toys that will, hopefully, distract our little princess from distracting us during school time. I'll let y'all know how that goes. I'm not super hopeful, but I gotta try. Wish us luck.

Stay tuned for one of my favorite new school-time snack recipes.

Friday, August 11, 2017

Matcha Green Tea Raspberry Popsicles

Anybody else bothered by the fact that the world around us is trying to snuff out summer before its time? Every year I feel more and more cheated as school starts earlier, fall merchandise takes over stores, and pumpkin recipes start to come out of the woodwork (sigh).

I'm not done with summer, folks, and I'm not ready to give in to candy corn quite yet. On top of that, it's still stink'n hot here where I live. With that in mind, let's fight fire with fire and yet another popsicle recipe. Take a hike pumpkins. It's not your turn yet.


These Matcha Raspberry Popsicles are the perfect snack to take a stand against fall madness and continue to enjoy the end of a fabulous summer. They are just the right amount of sweet, creamy, and fruity. The addition of matcha powder adds a beautiful earthy green tea flavor that you've gotta try. Think, green tea latte with a luscious fresh raspberry swirl.


I simply added matcha green tea powder to the coconut cream mixture I like to use for popsicles.


Then I swirled in some homemade raspberry jam in the middle.


The popsicles get topped off with more matcha coconut cream and swirled again.


The green tea flavor really comes through in these pretty popsicles and melds perfectly with the gorgeous raspberry swirl - a match made in heaven. Or should I say, a matcha made in heaven. 😉


Matcha & Raspberry Popsicles
Makes about 8 medium popsicles

INGREDIENTS
2 cans coconut cream
1/2 Tbsp matcha green tea powder
1/4 cup sugar
2 tsp vanilla extract
1 half pint jar raspberry jam (I used homemade using this recipe)

DIRECTIONS
1. In a high speed blender combine the coconut cream, matcha powder, sugar, and vanilla. Blend until smooth and all flecks of matcha are incorporated.
2. Pour matcha mixture into popsicle molds about 1/3 of the way up. Freeze for about an hour.
3. Add 1 Tbsp raspberry jam to each popsicle mold and gently swirl into matcha layer with a butter knife.
4. Top off each pop with your matcha mixture and gently swirl again through all three layers.
5. Freeze 4 hours or until completely frozen.

Tuesday, August 8, 2017

What's for Dinner? Mediterranean Sheet Pan Nachos

Did someone say nachos? Oh, wait. That was me. I'm always saying nachos - or screaming it from roof tops. Ha! Ha! Seriously though, this mediterranean version is full of fresh flavors and textures - the perfect summertime dinner.

Mediterranean Nachos
These Mediterranean Nachos are the perfect summer meal!


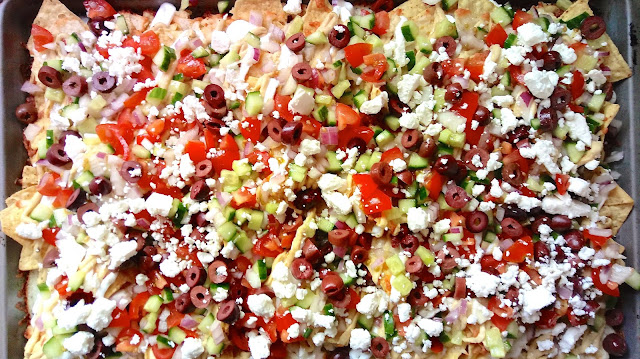
Topped with fresh English cucumber, bright red cherry tomatoes, fragrant red onions, sliced kalamatas, and crumbled feta, these nachos are practically a salad - only better - so much better!

Mediterranean Nachos

These nachos start off in a sheet pan with shredded Monterey Jack smothering a layer of crispy corn chips. Pita chips would also be awesome.

Mediterranean Nachos topped with hummus and yogurt

After a brief spell in the oven, hummus and plain yogurt get drizzled all over. I like to pop my sauces into Ziplock bags, snip off the corner, and squeeze them out in a pretty pattern.

Fresh Mediterranean Salsa for Mediterranean Nachos
Mediterranean "salsa" made with cherry tomatoes, English cucumber, and red onion.


Next come the goodies. I made a "salsa" out of summer fresh tomatoes, English cucumber, and red onions. I sprinkled my salsa evenly over the nachos along with some crumbled feta and sliced kalamata olives.

Mediterranean Nachos topped with cucumber, tomato, red onion, feta, kalmatas
Don't you just want to dive into this tray of fresh and fabulous Mediterranean Nachos?


Look at those beauties. So fresh and full of flavor. Cool cucumbers, fresh tomatoes, salty feta, and briny olives elevating those toasty and cheesy corn chips to new heights of nacho awesomeness! Treat this tray of nachos like the coolest of summer pools and just dive right in.


Mediterranean Sheet Pan Nachos

INGREDIENTS
1 7 to 10 oz bag corn tortilla chips or pita chips
3 cups shredded monterey jack
1/2 cup spicy hummus
1/2 cup plain yogurt
1 10.5 oz package cherry tomatoes, diced
1 English cucumber, diced
1 medium red onion, diced
1/2 cup kalamata olives, sliced
1/2 cup crumbled feta

DIRECTIONS
1. Preheat oven to 400 degrees and line a large baking sheet with parchment paper for easy clean up.
2. Lay down a layer of chips on your pan and top with Monterey Jack.
3. Bake for 7 to 10 minutes until cheese is melted and chips are a little toasty.
4. Fill a ziplock bag with hummus, snip off 1/4 inch off the corner and squirt all over your nachos. Do the same with the yogurt.
5. I like to combine my tomatoes, onion, and cucumber into a "salsa" and sprinkle an even layer over the nachos. You'll have left over salsa.
6. Top with olives and feta.

Mediterranean Nachos

Friday, August 4, 2017

My Favorite Fresh Strawberry Pie

I'm already starting to think about what kinds of goodies I wanna make this Fall. Don't worry, I won't jump into all the pumpkin stuff until an appropriate period of grieving over the end of summer has passed. Or, will I? Just kidding. I totally won't. I don't want to be one of those people. You know who I'm talkin' about.

Fresh Strawberry Pie with Sourdough Crust
This fresh strawberry pie with sourdough crust doesn't last long in my house.

Let's just continue to enjoy summer together with my favorite fresh strawberry pie. There are a bunch of different ways to make this perfect summertime treat. Here's how I like to do it.

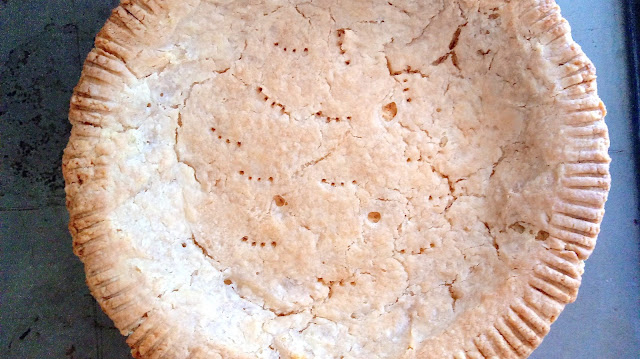
Homemade Sourdough Pie Crust
This sourdough pie crust is rich and flaky with a hint of sourdough flavor.

I start with a sourdough crust. One batch of my sourdough pastry will make two or three 9" pie crusts. I like to make up a batch and freeze the extra crusts for later use. Just make sure you start the process the night before you want pie as the sourdough crust needs time to ferment. When I'm pressed for time (and energy) I like to use a store-bought graham cracker crust. I buy a gluten free one, but a regular graham cracker crust is perfectly fine too. The sweet graham cookie flavor goes perfect with this pie. In fact, I sometimes prefer it.

On a side note, in case you're wondering why I either choose gluten free or sourdough products, it's because wheat can be hard for some people to digest. When I stopped eating wheat products my battle with indigestion all but disappeared. I still eat wheat, occasionally, but I try to ferment it using my sourdough starter whenever I can. The probiotics (friendly yeast and bacteria in my starter) break down the structure of the wheat making it easier to digest. I know, a bit scientific. Bottom line, my tummy feels better when I avoid straight up wheat.

Fresh Strawberry Pie with Sourdough Crust

While my sourdough crust cools, I cook up my gelatin mixture using Taste of Home's recipe. A cornstarch and sugar slurry gets heated until thick. Then, I add in a small box of strawberry Jello.

Fresh Strawberry Pie with Sourdough Crust
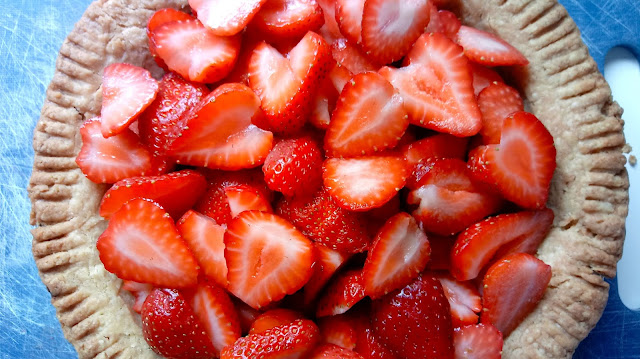
Is there anything better than fresh strawberries piled into a homemade crust?

While my gelatin mixture cools in the fridge, I slice up the strawberries and pile them into my crust.

Fresh Strawberry Pie with Sourdough Crust

The cooled gelatin mixture gets poured on top of the fresh berries and the pie goes into the fridge for a few hours 'til set.

Cool Whip topped fresh strawberry pie
I like to top my fresh strawberry pie with good ol' Cool Whip to keep things easy.

Lastly, I top my pie with a whole honk'n container of Cool Whip. Fresh whipped cream is also good if you don't mind the extra step. I like the flavor, stability, and easiness of Cool Whip, so that's what I usually go with for this pie.

A slice of this pie on a warm summer night is just the right way to enjoy summer. My advice? Strawberry on until the pumpkins take over. 🍓

Fresh Strawberry Pie

INGREDIENTS
1 9" sourdough pie crust using my sourdough pastry recipe (use my recipe to roll out 2 or 3 crusts and freeze the extra crusts for later use) OR use a store-bought graham cracker crust
3/4 cup granulated sugar
2 Tbsp cornstarch
1 cup water
1 3 oz package strawberry Jello
4 cups sliced strawberries
1 8 oz tub Cool Whip, thawed in the fridge

DIRECTIONS
1. Blind bake your sourdough pie crust. (If using a store-bought graham cracker crust, skip down to step 2.) After you've rolled out your crust, lined your pie plate, and rested the crust in the freezer for 5 minutes, gently line your crust with foil and fill with pie weights or dried beans. Bake at 375 degrees for 20 minutes. Remove the foil and pie weights, pierce the bottom of your crust with a fork, and bake another 15 to 20 minutes until golden brown. If the edges are getting too brown, cover them with foil.
2. In a medium saucepan, combine sugar, cornstarch, and water and bring to a boil. Cook and stir for about 2 minutes until thick.
3. Remove from heat and stir in the strawberry Jello. Refrigerate mixture for 15 minutes.
4. Slice your berries, if you haven't already, and arrange them into your cooled pie crust.
5. When the timer is up for your gelatin mixture, pour it over the berries as evenly as possible. Refrigerate pie for a few hours until set.
6. Spread the whole tub of Cool Whip over the top of your pie.
7. Continue to say "yes" to strawberries and "no" to pumpkin.

Fresh Strawberry Pie with Sourdough Crust